- traces of oil on any surface of the belt;
- traces of wear on the toothed surface, cracks, cuts, folds and separation of the fabric from the rubber;
- cracks, folds, depressions or bulges on the outer surface of the belt;
- fraying or delamination on the end surfaces of the belt.
Attention! A belt with traces of motor oil on any of its surfaces must be replaced, as oil quickly destroys rubber. The reason for oil getting on the belt (usually a breach in the sealing of the crankshaft and camshaft seals) must be eliminated immediately.
Note: Carry out the work on an inspection pit, overpass or, if possible, on a lift.
You will need: special devices for locking the camshafts and crankshaft and the timing belt tension roller, a 10 mm socket wrench, 8 mm and 13 mm open-end wrenches or socket heads, 18 mm wrenches and TORX E8.
1. Raise the front of the vehicle and support it securely. Remove the right front wheel (see "Wheel replacement").
2. Remove the right front fender liner (see "Removal and installation wheel mudguards and fender liners").
3. Remove the engine splash guard (see "Removal and installation the engine mudguard").
4. Remove the power steering pump drive belt by cutting it with a knife.
5. Remove the accessory drive belt by cutting it with a knife.
Note. According to the manufacturer's recommendations, the accessory drive belts and the power steering pump should be cut with a knife for removal, after which they become unusable. This is because both belts cannot be reused even after removal without damage, since they are designed only for one-time stretching when put on the pulleys (belt tension adjustment is not provided). In addition, belt replacement is regulated after a certain mileage or service life, therefore, when replacing the accessory drive belt, the power steering pump drive belt should be replaced at the same time.
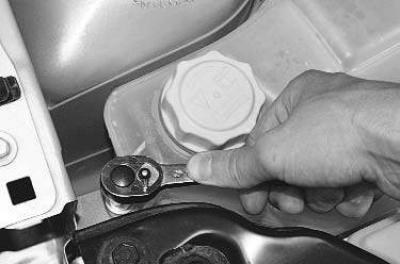
6. Unscrew the expansion tank mounting bolt…
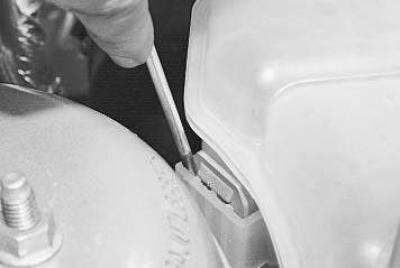
7. ... using a screwdriver to pry the retainer, remove the expansion tank from the bracket and move it to the side.
8. Remove the cylinder head cover (see "Replacing the cylinder head cover gasket").
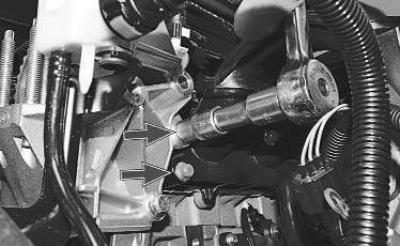
9. Unscrew the plug located in the front part of the cylinder block on the right and screw the locking rod into the opened hole until it stops against the crankshaft. Carefully turn the crankshaft by the bolt securing its pulley until the shaft stops with the locking rod.
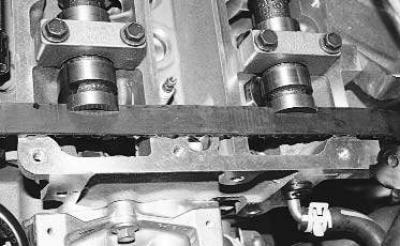
10. Secure the camshafts from turning by installing the locking plate into the special grooves at the rear of the camshafts.
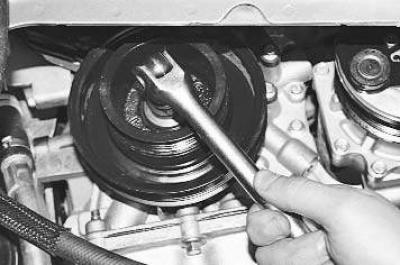
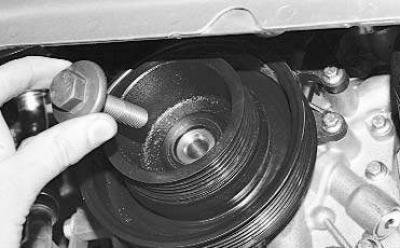
11. Remove the crankshaft pulley bolt.
Note: The crankshaft pulley mounting bolt is tightened to a high torque. To prevent the crankshaft from turning, engage V gear, press and hold the brake pedal (an assistant should do this).
12. Remove the bolt…
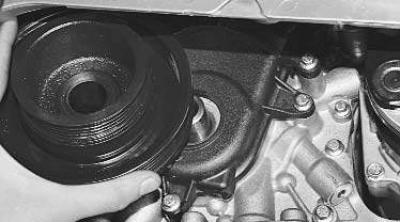
13. …and remove the crankshaft pulley.
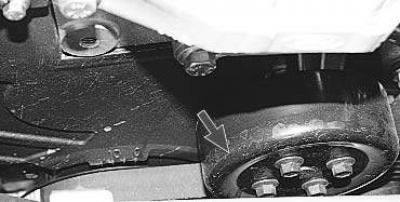
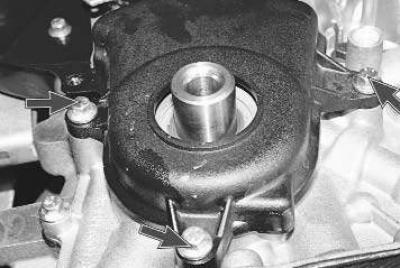
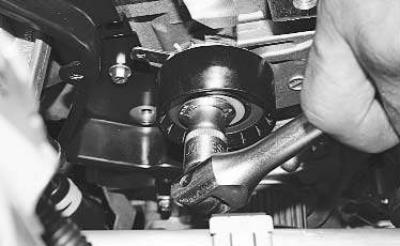
14. Hold the water pump pulley with a screwdriver to prevent it from turning and loosen the four bolts by moving the screwdriver one at a time. Then remove the bolts completely…
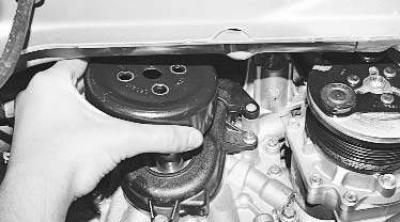
15. …and remove the water pump pulley.
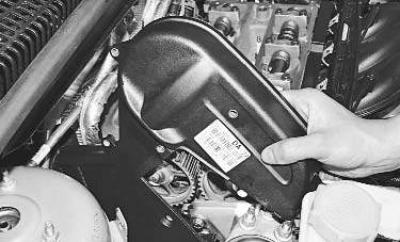
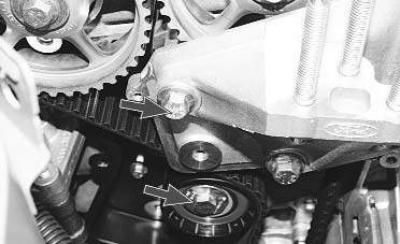
16. Unscrew the nine bolts securing the upper timing cover and remove the cover.
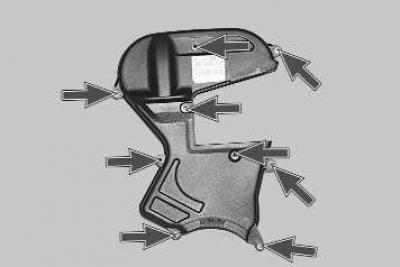
Note: This is how the holes for attaching the top cover are located.
17. Remove the three bolts of the lower timing cover…
18. …and remove the lid.
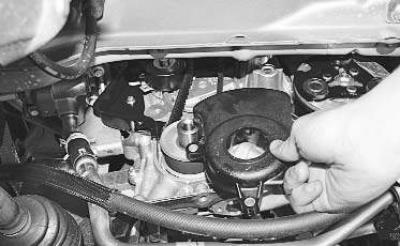
19. Remove the right powertrain support (see "Replacing the powertrain suspension mounts").
20. Unscrew the two side bolts securing the bracket of the right support of the power unit suspension…
21. …in a similar manner, unscrew the two front bolts and remove the bracket.
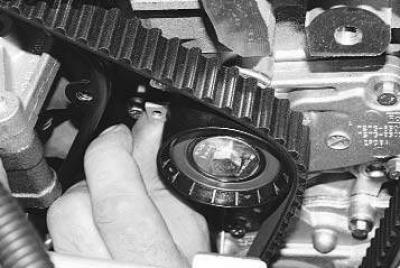
22. Loosen the tension of the timing belt by using your finger or a screwdriver, overcoming the spring force, and turning the movable roller plate clockwise until the holes in it and the roller bracket align. Insert a pin of a suitable diameter into the hole, fix the roller…
23. …and remove the timing belt.
Caution! Do not turn the crankshaft with the timing belt removed, as the pistons will damage the valves.
24. Unscrew the tension roller mounting bolt and remove it.
Note: If you are disassembling the timing drive only to replace the tension roller, you do not need to remove the drive belt.
25. Install the roller in the reverse order of removal, having first secured it with a punch.
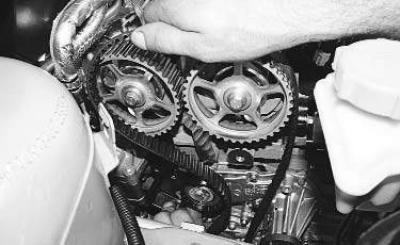
Place the new belt on the toothed pulley of the exhaust camshaft. Pull the leading branch of the belt and put it on the toothed pulley of the intake camshaft. Then pull the leading branch of the belt and put it on the toothed pulley of the crankshaft. Put the driven branch of the belt behind the tension roller.
26. Install the lower and upper timing belt covers and crankshaft pulley. Tighten the crankshaft pulley mounting bolt in two stages:
- 1st - tighten the bolt to 45 Nm (4.5 kgf·m);
- 2nd - tighten the bolt 90°.
27. Remove the camshaft retaining plate.
28. Remove the crankshaft locking bolt from the hole in the cylinder block.
29. Engage neutral gear in the gearbox, turn the crankshaft two revolutions and stop it, approximately 20° before reaching TDC.
30. Screw the locking bolt into the cylinder block hole and carefully turn the crankshaft until it is secured with the bolt.
31. Install the locking plate on the camshafts. If the tool can be installed without difficulty, the timing belt is installed correctly. If the tool cannot be installed (the valve timing is misaligned), remove the belt, install the locking tool and reinstall the belt as described above.
32. If the timing belt is installed correctly, remove the retaining plate from the camshafts, unscrew the retaining bolt from the hole in the cylinder block, reinstall the plug of this hole, tightening it to a torque of 20 N·m (2.0 kgf·m), and install all previously removed parts in the reverse order of removal.