Electrical equipment and appliances Ford Scorpio 1

Technical characteristics of on-board electrical equipment
Battery A 12 V battery with a capacity of 50 or 60 Ah is used. The negative pole of the battery is connected to the vehicle ground. The current output in the starter...
Battery A 12 V battery with a capacity of 50 or 60 Ah is used. The negative pole of the battery is connected to the vehicle ground. The current output in the starter...

Fuses and relays
Relay The location and purpose of the relays and fuses may differ depending on the vehicle modification. The designation of the controlled and protected electrical...
Relay The location and purpose of the relays and fuses may differ depending on the vehicle modification. The designation of the controlled and protected electrical...
Electronic control units
Electronic control units perform the same functions as relays, but can accept more commands and perform more tasks. They are electronic, not electromechanical. The main...
Electronic control units perform the same functions as relays, but can accept more commands and perform more tasks. They are electronic, not electromechanical. The main...
Central locking system
The system ensures that all doors are closed and opened from the driver's door or front passenger door lock. To prevent accidental locking of keys inside the vehicle,...
The system ensures that all doors are closed and opened from the driver's door or front passenger door lock. To prevent accidental locking of keys inside the vehicle,...
Direction indicator system
The direction indicator system consists of an electronic switch unit, a switch for external and control lights and wires. The hazard warning light system operates from...
The direction indicator system consists of an electronic switch unit, a switch for external and control lights and wires. The hazard warning light system operates from...
Fuel computer
The computer receives input from a fuel tank sender, a speedometer sender, and an EEC IV module (on fuel injected models) or a fuel flow meter (on carbureted models)....
The computer receives input from a fuel tank sender, a speedometer sender, and an EEC IV module (on fuel injected models) or a fuel flow meter (on carbureted models)....
Additional control system — general information
The additional monitoring system (AWS) monitors the levels of the cooling and washer fluid, brake pad wear, outside air temperature and lamp operation. The system also...
The additional monitoring system (AWS) monitors the levels of the cooling and washer fluid, brake pad wear, outside air temperature and lamp operation. The system also...
Main faults of the starter
When the starter is turned on, the starter motor does not work The reasons for this may be a failure of the starter or traction relay, as well as a defect in the wires....
When the starter is turned on, the starter motor does not work The reasons for this may be a failure of the starter or traction relay, as well as a defect in the wires....

Rear window wiper
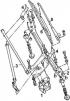
Rear window wiper 1 – nut, 2 – washer, 3 – lever, 4 – brush, 5 – bushing, 6 – guide bushing, 7 – gear motor, 8 – bushing, 9 – nut, 10 – bolt 1. Remove the rear wiper...
Rear window wiper 1 – nut, 2 – washer, 3 – lever, 4 – brush, 5 – bushing, 6 – guide bushing, 7 – gear motor, 8 – bushing, 9 – nut, 10 – bolt 1. Remove the rear wiper...

Replacement and adjustment of windshield washer nozzles
Windshield 1. Open the hood. 2. Remove the supply tube from the injector. 3. Use a small screwdriver to press the injector retainer located at the bottom rear of the...
Windshield 1. Open the hood. 2. Remove the supply tube from the injector. 3. Use a small screwdriver to press the injector retainer located at the bottom rear of the...

Removal and installation the instrument cluster
All control and measuring devices are located on the instrument cluster. To replace control lamps and measuring devices, it is necessary to remove the instrument...
All control and measuring devices are located on the instrument cluster. To replace control lamps and measuring devices, it is necessary to remove the instrument...

External and internal lighting
Main headlight Replacing the high and low beam bulbs 1. Open the hood. 2. Turn the rear headlight cover counterclockwise and remove it. 3. Disconnect the electrical...
Main headlight Replacing the high and low beam bulbs 1. Open the hood. 2. Turn the rear headlight cover counterclockwise and remove it. 3. Disconnect the electrical...

Replacement of other electrical equipment
Replacing the headlight corrector motor The headlight corrector motor is installed on the rear side of the headlight and is secured using a bayonet clamp. 1. Remove the...
Replacing the headlight corrector motor The headlight corrector motor is installed on the rear side of the headlight and is secured using a bayonet clamp. 1. Remove the...

Removal and installation of switches, motors and sensors
Light switch, heater fan switch 1. Remove the ground wire from the battery. 2. Remove the switch handle by pulling it towards you. 3. Press the two latches and remove...
Light switch, heater fan switch 1. Remove the ground wire from the battery. 2. Remove the switch handle by pulling it towards you. 3. Press the two latches and remove...

Additional control system — removal and installation
Graphic display lamps 1. Remove the instrument cluster. 2. Remove the graphic display from the instrument cluster. 3. The lamps and LEDs can be removed from the graphic...
Graphic display lamps 1. Remove the instrument cluster. 2. Remove the graphic display from the instrument cluster. 3. The lamps and LEDs can be removed from the graphic...

Removal and installation the radio
Using a DIN tool to remove a radio Removing the radio requires two DIN tools (arrow) to remove it. 1. Pull off the control knobs, unscrew the axle nuts with gaskets and...
Using a DIN tool to remove a radio Removing the radio requires two DIN tools (arrow) to remove it. 1. Pull off the control knobs, unscrew the axle nuts with gaskets and...

Removal and installation speakers
Depending on the vehicle's trim level, speakers can be installed in the front door, on the rear shelf and on the dashboard. Front door speakers 1. Remove the interior...
Depending on the vehicle's trim level, speakers can be installed in the front door, on the rear shelf and on the dashboard. Front door speakers 1. Remove the interior...

Anti-theft alarm system
Anti-theft alarm system unit for vehicles manufactured before April 1992. The block is indicated by an arrow. Anti-theft alarm system unit for vehicles manufactured...
Anti-theft alarm system unit for vehicles manufactured before April 1992. The block is indicated by an arrow. Anti-theft alarm system unit for vehicles manufactured...
This section is available on russian, bulgarian, belarusian, ukrainian, serbian, croatian, romanian, polish, slovak, hungarian
See other similar sections for Ford cars:
• General information: Vehicle device Ford Focus 2 (2004-2010)
• Electrical equipment: Equipment and devices Ford Mondeo 1 (1993-1996)
• Electrical equipment: Equipment and devices Ford Escort 4 (1986-1990)
• Electrical equipment: Equipment and devices Ford Transit 2 (1986-2000, diesel)
• General information: Vehicle device Ford Focus 2 (2004-2010)
• Electrical equipment: Equipment and devices Ford Mondeo 1 (1993-1996)
• Electrical equipment: Equipment and devices Ford Escort 4 (1986-1990)
• Electrical equipment: Equipment and devices Ford Transit 2 (1986-2000, diesel)
Fusion
Scorpio 1
Scorpio 2
Sierra
- General information
- Vehicle device
- User manual
- Faults on the way
- Maintenance
- Tips for the car owner
- Power unit
- Engine repair
- Lubrication and cooling system
- Supply system
- Exhaust and vapor recovery
- Transmission
- Clutch
- Car gearbox
- Front wheel drives
- Chassis
- Front suspension
- Rear suspension
- Steering
- Brake system
- Wheels and tires
- Body
- Exterior
- Interior
- Doors, locks and windows
- Body сare
- Electrical equipment
- Equipment and devices
- Engine electrics
- Lighting and signaling
- Switches and sensors
- Electrical circuits
Scorpio 1
- General information
- User manual
- Maintenance
- Power unit
- Petrol engines OHC
- Petrol engines DOHC
- Petrol engines V6
- Ignition and control
- Diesel engines
- Cooling system
- Supply system
- Carburetors
- Fuel injection
- Transmission
- Clutch
- Manual gearbox «N»
- Manual gearbox «MT 75»
- Automatic gearbox «A4LD»
- Rear axle and drive shafts
- Chassis
- Steering
- Power steering
- Front suspension
- Rear suspension
- Brake system
- Body
- Exterior
- Interior
- Doors, locks and windows
- Heating and ventilation
- Electrical equipment
- Equipment and devices
- Power devices
- Electrical circuits
Scorpio 2
- General information
- Car care
- Maintenance
- Power unit
- Engine repair
- Lubrication system
- Cooling system
- Ignition system
- Supply system
- Carburetors
- Injection system (gasoline)
- Injection system (diesel)
- Exhaust system
- Transmission
- Clutch
- Car gearbox
- Chassis
- Front suspension
- Rear suspension
- Steering
- Brake system
- Wheels and tires
- Body
- Exterior
- Interior
- Doors, locks and windows
- Heating system
- Electrical equipment
- Equipment and devices
- Headlights and lighting
- Windshield wipers and washers
- Power devices
- Electrical circuits
Sierra
- General information
- User manual
- Maintenance
- Gasoline engines
- Engine repair
- Ignition system
- Fuel system
- Cooling and lubrication system
- Changes 1984-1986
- Changes 1987-1989
- Changes 1990-1993
- Diesel engines
- Engine repair
- Fuel system
- Cooling and lubrication system
- Changes 1988-1993
- Transmission
- Clutch
- Mechanical gearbox
- Automatic gearbox
- Cardan and rear axle
- Chassis
- Steering
- Steering with power steering
- Front suspension
- Rear suspension
- Brake system
- Body and electrical
- Body elements and doors
- Electrical equipment
- Electrical circuits