Removal
1. Disconnect the ground cable from the battery.
Attention! This will erase the information in the electronic storage devices.
Cars manufactured before 04.1992

2. Unscrew the four screws (indicated by arrows) securing the decorative instrument cluster trim and remove it.
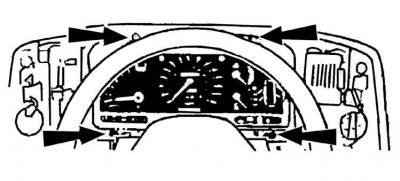
3. Unscrew the four screws (indicated by arrows) securing the instrument cluster and move the instrument cluster forward slightly from the front panel.
Cars manufactured since 04.1992
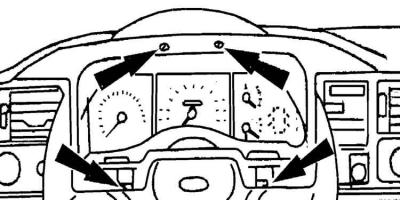
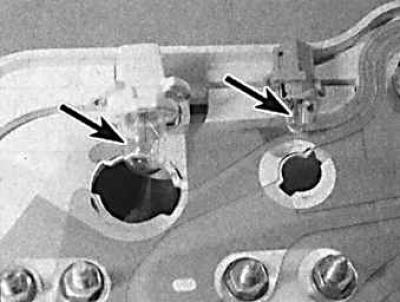
4. Unscrew the screws (indicated by arrows) and disconnect the clamps (indicated by arrows) securing the decorative trim of the instrument cluster and remove it.
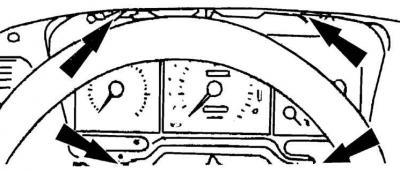
5. Unscrew the four screws (indicated by arrows) securing the instrument cluster and remove it.
6. It is also necessary to disconnect the instrument lighting controller.
All models
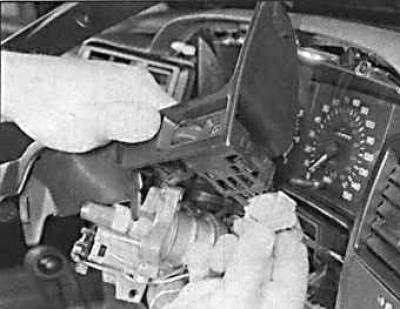
7. Remove the multi-pin connector from the rear side.
Attention! The red connector of the graphic display has a stopper that must be pressed down first.
8. Disconnect the speedometer drive cable by moving the large locking ring securing the speedometer cable to the instrument cluster to the right.
9. Remove the instrument cluster from the instrument panel.
Installation
To install the instrument cluster, perform the steps in reverse order to the removal process.
Removal and installation of measuring instruments
1. Disconnect the ground cable from the battery.
Attention! This will erase the information in the electronic storage devices.
2. Remove the instrument cluster from the instrument panel. The instrument cluster can be placed on a table covered with a soft, lint-free cloth with the instruments facing down.
3. Remove the two clamps from the instrument cluster by prying them up with a screwdriver.
4. Remove all indicator lights (indicated by arrows) by turning their mounting socket counterclockwise.
5. On vehicles manufactured before 05/1989, unscrew all nuts on the terminals of the mounting plate and release the plate from the clips and remove it.
6. On vehicles manufactured from 06/1989 onwards, carefully remove the mounting plate from the instrument cluster.
7. If there are adjustment knobs on the glass side of the instrument cluster, remove them.
8. Remove the two retaining clips from the bottom of the glass, rotate the glass upward and remove it.
9. To remove the speedometer, unscrew the three (in cars manufactured before 01.1992) or two (from 02.1992) speedometer mounting screws located on the rear side of the instrument cluster and remove the speedometer by sliding it forward.
10. To remove the clock or tachometer, unscrew the three mounting screws located on the rear side of the instrument cluster and remove the instrument by pulling it forward.
Caution! The tachometer can only be positioned with the front part facing downwards for a short time, as silicone fluid may leak out of the tachometer.
11. To remove the fuel level and coolant temperature gauges, unscrew the three mounting screws located on the rear side of the instrument cluster and remove the gauges by pulling them forward.
Installation
To install the devices, you must perform the steps in reverse order to the removal process.
[For more information, please visit the website: fordbook]