


It is very important to determine in time that a tire has been punctured. While driving, pay attention to the behavior of the car: if it has become difficult to accelerate, the effort on the steering wheel has increased when maneuvering, or the directional stability has worsened, be sure to check the tire pressure.
The easiest way to repair a wheel is to go to the nearest tire shop, where the repair will be done quickly, professionally and, as a rule, at a very affordable price.
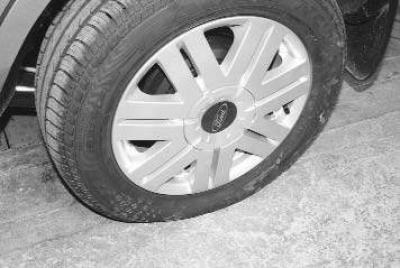
Warning! Do not try to get to a tire shop on a completely flat tire: just drive a few dozen meters and the tire will have to be thrown away.
The damaged wheel needs to be replaced with a spare one. However, this fairly simple operation requires some skills.
If you have a flat tire, turn on the hazard warning lights, brake smoothly to 2-3 km/h, try to carefully move to the edge of the roadway in 1st gear and stop as far to the right as possible at the shoulder, and if possible, outside the roadway. If road conditions allow and it does not contradict the requirements of the Traffic Regulations, if you have a flat tire on the right side of the car, pull over to the right shoulder, if you have a flat tire on the left, pull over to the left. Try not to stop the car in places where the road is poorly visible: on sharp turns, on descents and ascents, bridges, in tunnels. If the car remains on the roadway, first of all ensure your own safety and the safety of other road users! Turn on the hazard warning lights and install an emergency stop sign.
Wheel replacement
Warning! Be careful when changing a flat tire. It may have been punctured by criminals in order to steal valuables from the car while you are busy changing it.
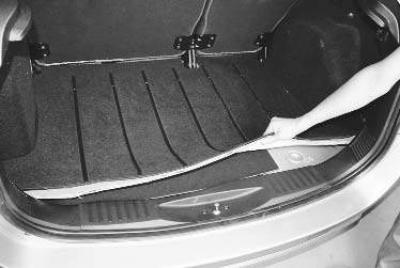
1. Open the trunk (it contains everything you need to change the wheel) and remove the trunk floor mat (or lift its rear part).
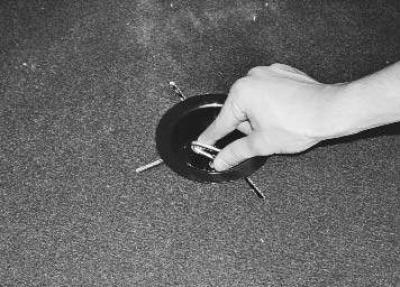
2. Unscrew the spare wheel retainer…
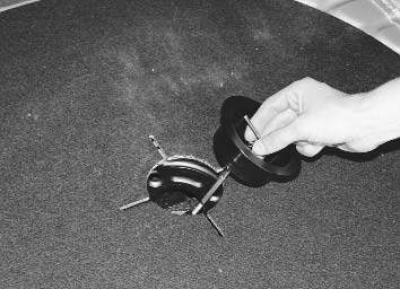
3. …remove the retainer…
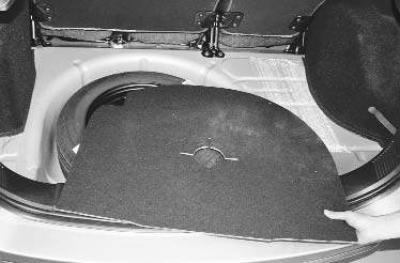
4. …and remove the spare wheel compartment cover from the trunk.
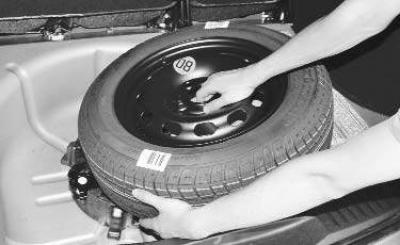
5. Remove the spare tire from the trunk and place it next to the tire being replaced.
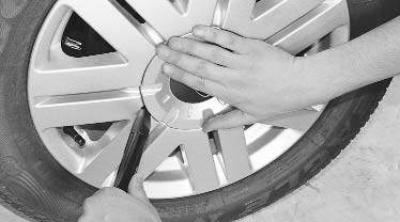
6. Use the pointed end of the wheel lug wrench (wheel brace) to pry up the decorative cap trim…
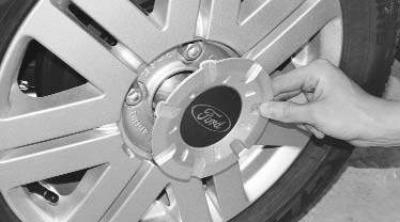
7. …and remove the cover, overcoming the force of its retaining spring.
8. Engage 1st gear and the parking brake and secure the vehicle on the opposite side by placing wheel chocks under the front and rear wheels so that the raised vehicle cannot move forward or backward.
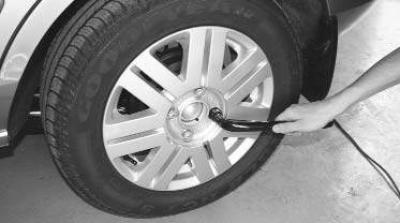
9. Using a wheel brace, loosen the four wheel nuts and place a jack under the vehicle next to the wheel being replaced (see "Using a jack").
Note: To avoid getting dirty when changing a wheel, wear gloves and protective clothing if your vehicle has them.
Note: To make it easier to unscrew the nuts, we recommend purchasing a special wheel wrench with a telescopic handle. It is also convenient to work with a cross-shaped wheel wrench.
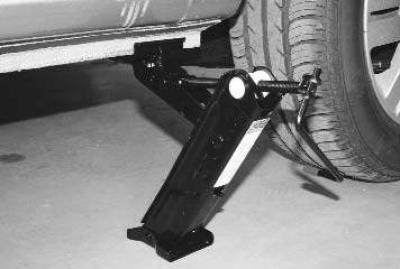
10. Raise the car with a jack so that the wheel is off the road, then completely unscrew the nuts, remove the wheel, and then its decorative cap.
Attention! Try to keep the car suspended with the wheel removed for as little time as possible.
Caution! Raise the vehicle with a jack only to the height required to remove and install the wheel.
Warning! If you are working on soft ground, place a thick board under the base of the jack. Do not use bricks for this purpose: they easily split and the car may fall off the jack, seriously injuring you.
11. Install the spare wheel in place of the removed one, install the decorative cap and screw on the fastening nuts until they stop, but do not tighten them.
Attention! When screwing on the nuts, make sure that their conical parts are aligned with the conical surfaces of the holes in the wheel disk, otherwise the nuts will loosen during movement and the wheel may be lost.
12. Lower the vehicle and tighten the nuts completely. Tighten the wheel nuts one by one around the circumference. To avoid damaging the wheel rim, do not try to "tighten" the wheel nuts by pressing the wrench handle with your foot.
Note: To feel the required tightening force for the wheel nuts (tightening torque 130 Nm), use a torque wrench at first.
13. Install the decorative cap cover.
14. Before continuing driving, be sure to check the air pressure in the tire of the installed wheel.
Note: The car has tubeless tires. If you do not have enough skills to install tires, we advise you not to try this job yourself. One sidewall damage and you will have to buy a new tire or install a tube.
Note: In a desperate situation, you can use a special first aid kit for repairing tubeless tires without dismounting or tire sealant. They must be used in accordance with the attached instructions.
Note. Why is a tubeless tire better than a tubed tire? Firstly, a tubeless tire deflates very slowly when punctured: you can drive for weeks with a nail in the wheel, pumping it up, until you have an opportunity to repair it. Secondly, when wires of the metal cord start sticking out of a tubeless tire after a very significant mileage, it can still be used as a spare tire. There is no point in inserting a tube into such a tire: it will puncture the first time you inflate it.