Warning: in these models of vehicles, the electric fan may operate with the ignition off. When working in the fan area, turn off its motor or disconnect the battery negative cable.
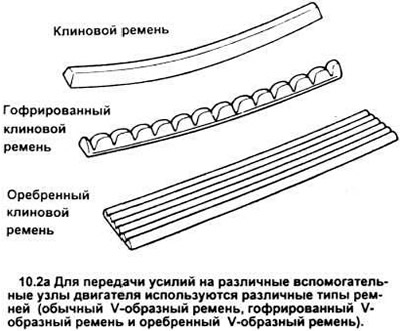
1. Auxiliary drive belts, otherwise known as fan belts or V-belts, are located to the right of the engine. The condition and tension of drive belts can determine the operation of the engine and a number of accessories. Too much tension leads to intensive wear, and insufficient causes slippage, noise. vibration of parts and destruction of the belt. Over time, drive belts deform and stretch. Therefore, they should be checked and replaced periodically.
Examination
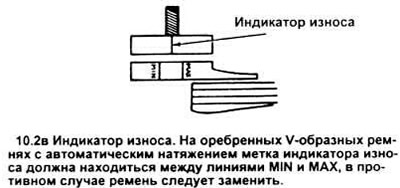
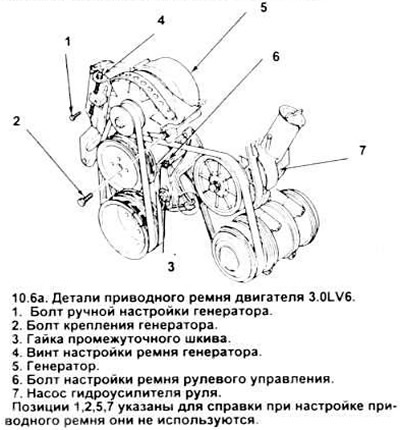
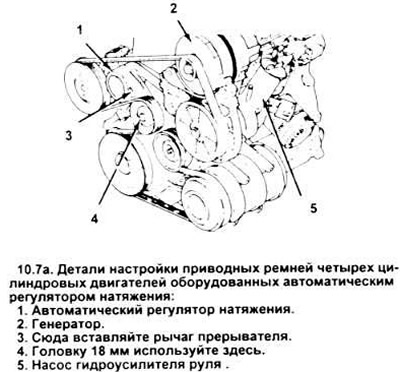
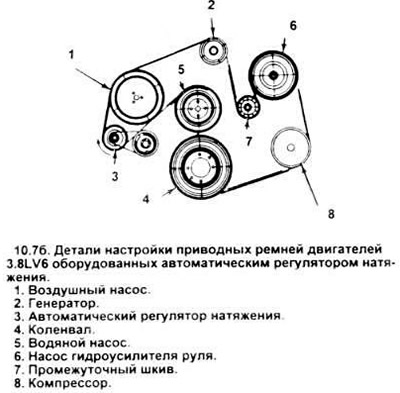
2. The number and type of belts installed on a particular vehicle depends on the options available (see picture). Only the belts on the 3.0LV6 engine require adjustment, while all other engines are equipped with an automatic belt tensioner (see picture).
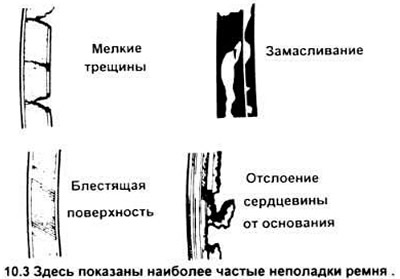
3. With the engine off, open the hood and inspect the belts on the right side of the engine. Light with a flashlight and check each belt for burrs around the edges, separation of the belt core, separation of the ribs from the rubber, torn or worn ribs, or cracks on the inside of the ribs. It should also be inspected for longitudinal splitting and glossing, which makes the surface of the belt shiny (see picture). Both sides of the belt should be inspected. If you find at least one of the listed damages, replace the belt as described below.
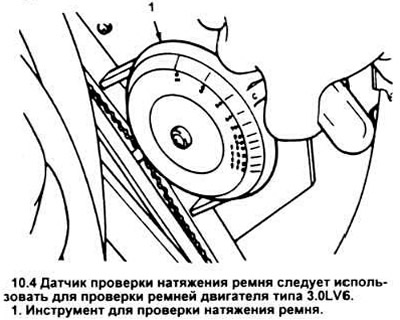
4. To check the tension of each belt in accordance with the manufacturer's recommendations, install a belt tension gauge (SIR N T63 L - 8620 - A). Measure the tension with the sensor, guided by the instructions for it, and compare the obtained data with the values \u200b\u200ballowed for respectively used and new belts.
Note: we will call a new belt that has not been in use, used, one that has worked for at least 10 minutes.
Adjustment
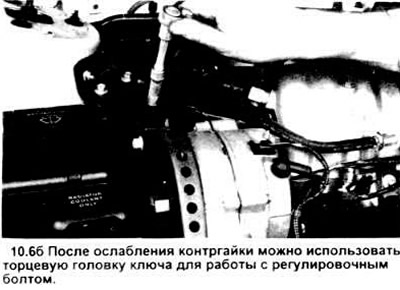
5. If you need to adjust the alternator drive belt, first unscrew the alternator mounting bolt, then the manual adjustment bolt that secures the alternator in the bracket grooves (see picture). Turn the adjusting screw to adjust the belt to the desired degree of tension, then tighten the manual adjustment bolts and mounting. Check belt tension again.
6. If it is necessary to adjust the power steering/air conditioning drive belts, locate the intermediate pulley in the right front corner of the block. Slightly loosen idler pulley holder bolts (see figure 10.6a) and turn the adjusting bolt clockwise to tighten the belt and counterclockwise to loosen it. Be sure to fasten the holder bolts after adjusting the belt, check the belt tension.
7. If the vehicle is equipped with an air pump, loosen the adjustment and swivel bolts, then move the pump up or down as required to change the belt tension.
Replacement
8. When replacing a belt, the same operations are carried out as when adjusting, but at the same time it is removed from the pulleys. Where an automatic tensioner is used, lift it with a lever or bar to remove the belt. Since all belts wear at about the same rate, it is best to replace them at the same time. Mark each belt and the corresponding pulley groove to properly install the replacement belt.
9. When replacing the ribbed V-belt (This type of wide belt is used to drive the power steering pump and the A/C compressor), make sure it fits exactly into the grooves of the pulley, their surfaces must be exactly the same.
Visitor comments