Special tool
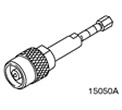 | Bearing puller (main instrument) 205-295 (15-050A) |
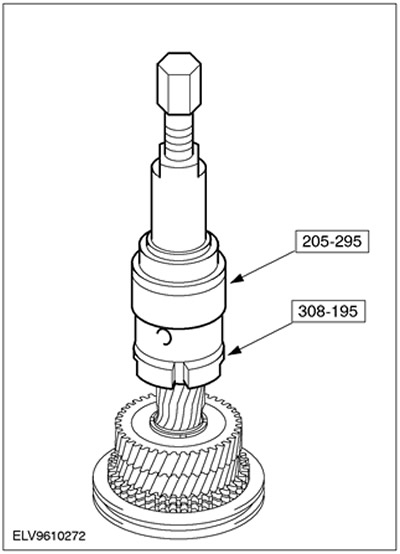
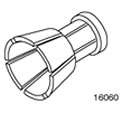 | Clamp for 205-295 308-195 (16-060) |
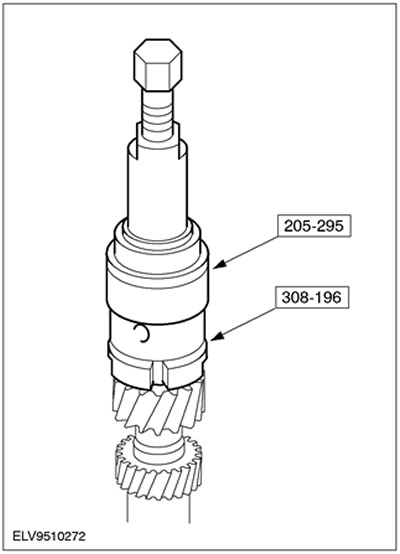
 | Clamp for 205-295 308-196 (16-061) |
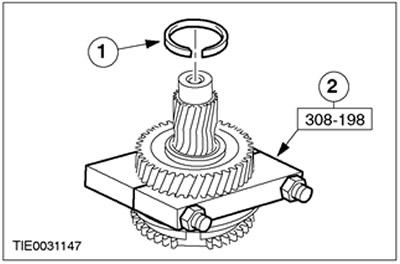
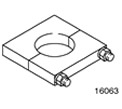 | Thrust element for removing gears 308-198 (16-063) |
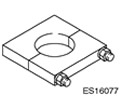 | Base plate for removing gears (diameter 85.1 mm) 308-230 (16-077) |
General Equipment: Press.
| Name | Specification |
| transmission fluid | WSD-M2C200-C |
Disassembly
All cars
1.
CAUTION: The inner ring and conical synchronizer ring must be handled with great care.
General notes
- The 1.8L Endura-DI diesel engine has been fitted to the Focus since the first quarter of 1999.
- General view of the input shaft: For more information, refer to the chapter Description and purpose available in this section.
2.
CAUTION: Use vise with jaw guards.
Clamp the axle shaft in a vise.
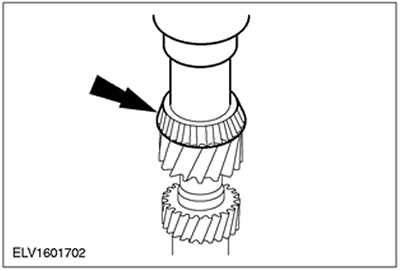
3. Remove the tapered roller bearing from the clutch side.
4. Remove the tapered roller bearing from the transaxle case side.
All except diesel vehicles
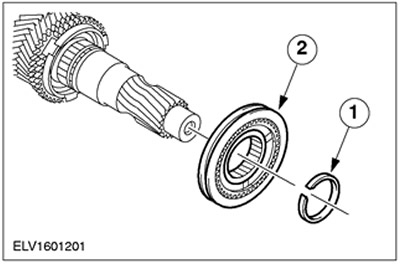
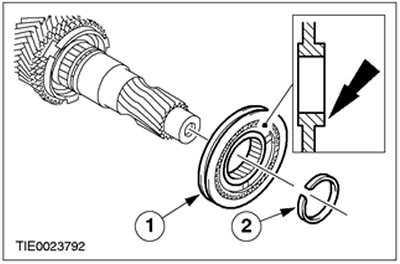
5.
NOTE: Remove the gears using an appropriate press.
NOTE: Discard spring ring as it is no longer needed.
Disconnect the 5th gear.
- 1. Disconnect the snap ring.
- 2. Disconnect the gear using the special tool.
Diesel vehicles
6.
NOTE: Remove the gears using an appropriate press.
NOTE: Discard spring ring as it is no longer needed.
Disconnect the 5th gear.
- 1. Remove the retaining ring.
- 2. Remove the gear using the special tool.

All cars
7. Disconnect the 4th gear.
- 1. Disconnect the gear.
- 2. Disconnect the needle bearing.
- 3. Disconnect the synchronizer ring.
8.
NOTE: Discard spring ring as it is no longer needed.
Disconnect the 3rd/4th gear synchronizer assembly.
- 1. Remove the retaining ring.
- 2. Disconnect the synchronizer assembly.
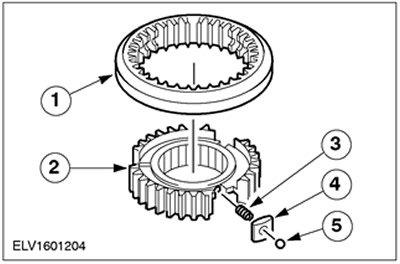
9.
NOTE: Mark the installation position of the synchronizer clutch relative to the synchronizer hub when ready for installation. The elements work in pairs.
NOTE: Carefully remove the synchronizer sleeve from the synchronizer hub. The locking balls are under spring force.
Synchronizer 3rd / 4th gears assy. Disassemble the gear.
- 1. Remove the synchronizer clutch.
- 2. Synchronizer hub
- 3. Compression spring
- 4. Rusk
- 5. Locking ball
Vehicles manufactured up to 08.2001
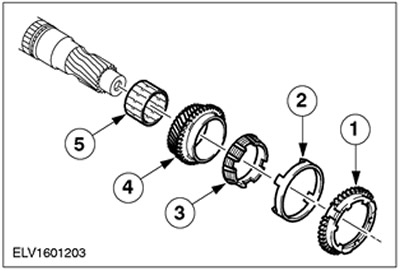
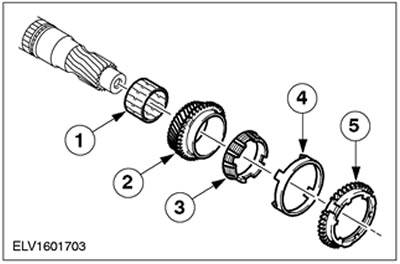
10. Remove the double synchronizer together with the 3rd gear.
- 1. Synchronizer outer ring
- 2. Tapered synchronizer ring
- 3. Synchronizer inner ring
- 4. 3rd gear
- 5. Needle roller bearing
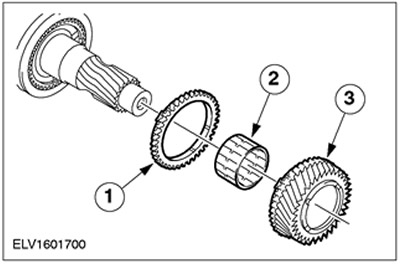
Vehicles manufactured since 08.2001
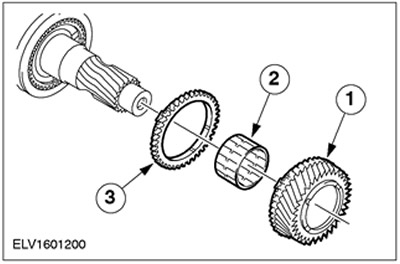
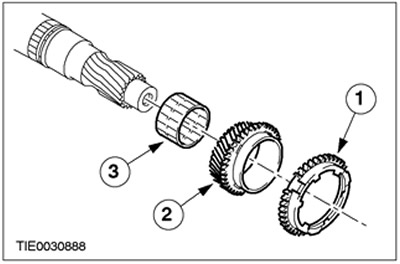
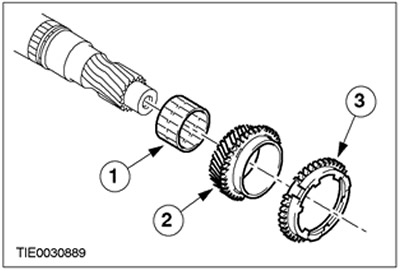
11. Disconnect the 3rd gear.
- 1. Disconnect the synchronizer ring.
- 2. Disconnect the gear.
- 3. Disconnect the needle bearing.
Assembly
All cars
1.
NOTE: Install new tapered roller bearings (raw).
Carefully clean and check all elements. Before assembly, transmission fluid is applied to them.
2. Press on the tapered roller bearing from the clutch side.
- Press on the tapered roller bearing using a suitable piece of pipe and a press.
Vehicles manufactured up to 08.2001
3. Install the 3rd gear with double synchroniser and needle bearing.
- 1. Needle roller bearing
- 2. 3rd gear
- 3. Synchronizer inner ring
- 4. Tapered synchronizer ring
- 5. Synchronizer outer ring
Vehicles manufactured since 08.2001
4. Install the 3rd gear.
- 1. Install the needle roller bearing.
- 2. Install the 3rd gear.
- 3. Install the synchronizer ring.
All cars
5.
NOTE: Pay attention to the markings.
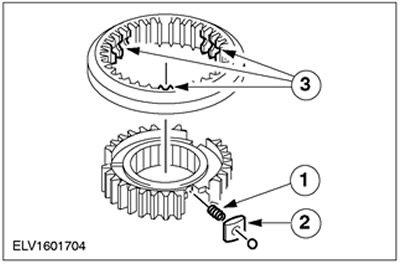
3rd/4th gear synchronizer. Assemble the gear.
- 1. Insert compression springs.
- 2. Insert the synchronizer cotters and locking balls by pushing in against the force of the spring.
- 3. Install the synchronizer clutch.
6.
NOTE: Replace circlip (use a snap ring with a 2.5 mm high shoulder).
NOTE: Install the synchronizer hub with the large lip facing out and the annular groove facing the small lip.
Connect the 3rd/4th gear synchronizer.
- 1. Install the synchronizer assembly.
- 2. Install a new circlip.
7. Install the gear.
- 1. Install the synchronizer ring.
- 2. Install the needle roller bearing.
- 3. Install the gear.
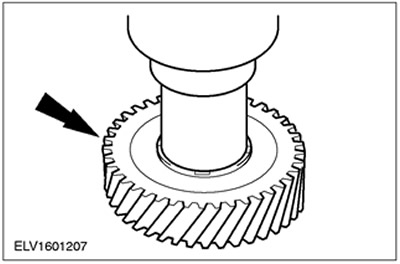
8.
NOTE: Install the 5th gear with the large tab facing out.
Press the 5th gear
- Press on the 5th gear. Use a suitable piece of pipe and a press.
- Install a new snap ring.
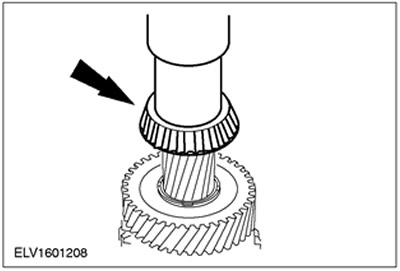
9. Press on the tapered roller bearing from the gearbox housing side.
- Press on the tapered roller bearing using a suitable piece of pipe and a press.
Visitor comments