Special tool
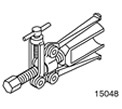 | Bearing outer ring puller 205-078 (15-048) |
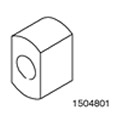 | Adapter 205-078-01 (15-048-01) |
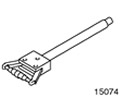 | Bearing outer ring puller 205-176 (15-074) |
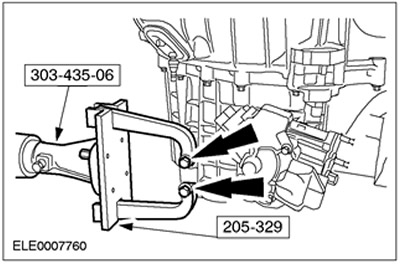
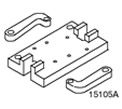 | Engine/Differential Assembly Stand 205-329 (15-105A) |
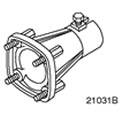 | support bracket (used with 303-435) 303-435-06 (21-031V) |
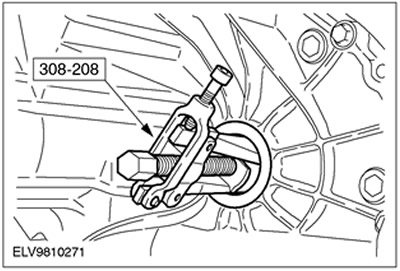
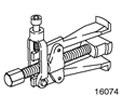 | Axle shaft oil seal remover 308-208 (16-074) |
Disassembly
All cars
1.
NOTE: 1.8L Endura-DI is available from MY 1999.
Install special tools.
Vehicles manufactured up to 01.2000
2.
NOTE: Shift the shift mechanism to neutral position.
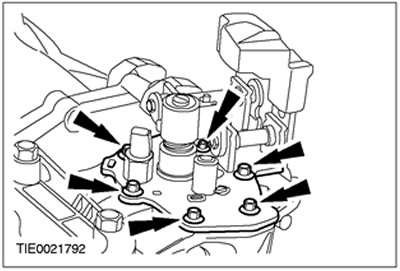
Remove the gearshift mechanism.
- Turn out bolts.
- Pry off with a screwdriver.
Vehicles manufactured since 02.2000
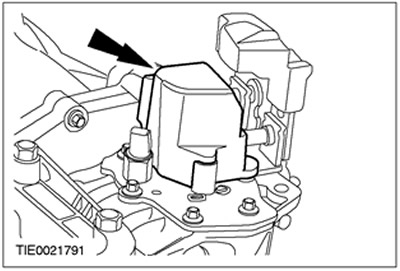
3. Detach the switch mechanism cover.
4.
NOTE: Shift the shift mechanism to neutral position.
Remove the gearshift mechanism.
All cars
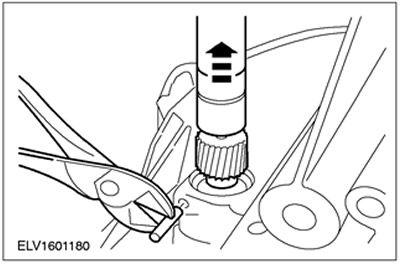
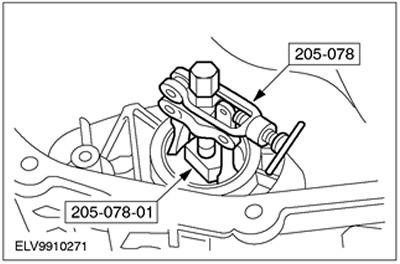
5. Using the special tool, remove the front drive axle oil seals.
Diesel vehicles
6.
NOTE: Only needed when repairing leaks
Remove the speedometer drive gear.
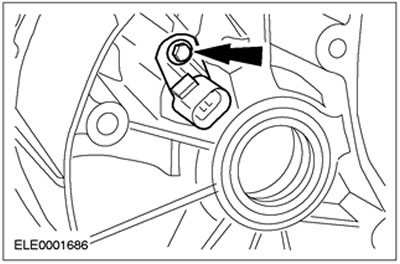
Vehicles with 2.0L engine
7.
NOTE: Only needed when repairing leaks
Remove the vehicle speed sensor (VSS).
All cars
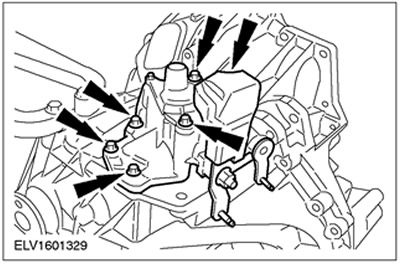
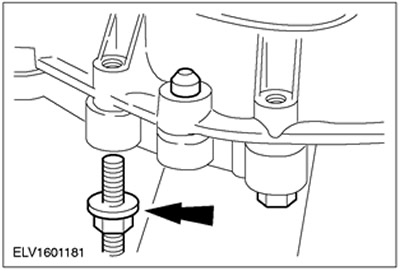
8.
NOTE: Do not remove drive pins.
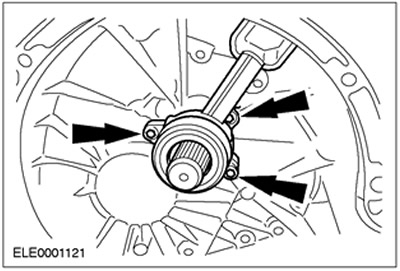
Turn out bolts of a case of a transmission.
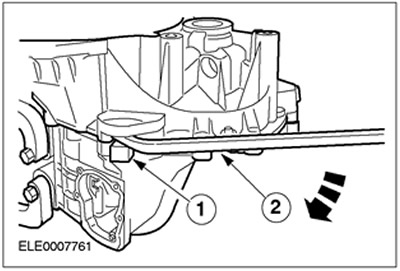
9.
CAUTION: Be careful not to damage the gearbox housing.
Disconnect the gearbox housing.
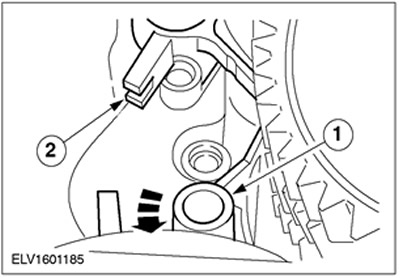
1. Use props.
2. Disconnect the gearbox housing using two mounting keys («mounts»).
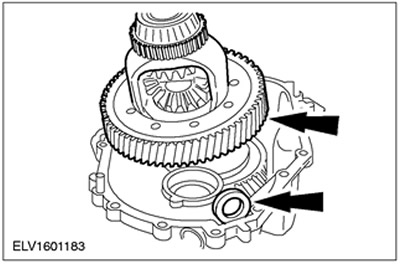
10.
NOTE: Tilt differential slightly.
Remove the differential assembly. Remove the magnetic disk.
11. Remove the 1/2 gear selection shafts and the gear selection fork.
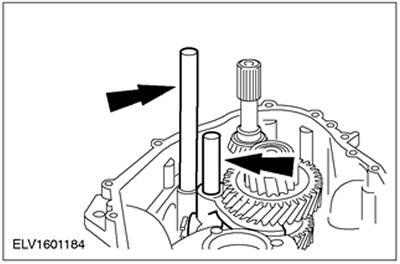
12. Remove the gear selection forks.
- 1. Move the 5th/Reverse selector fork to the side and remove it.
- 2. Turn the 3/4 shift fork and remove it.
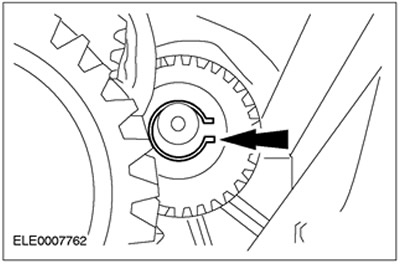
13. Remove the circlip from the reverse idle gear.
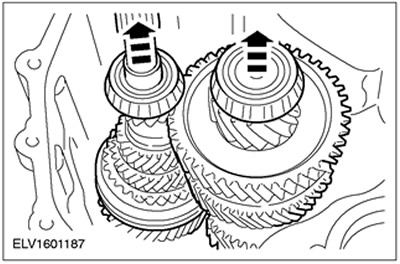
14. Remove primary and secondary shafts.
- Remove the input and output shafts together from the gearbox housing.
- Remove the reverse idle gear along with the needle roller bearing and thrust washers.
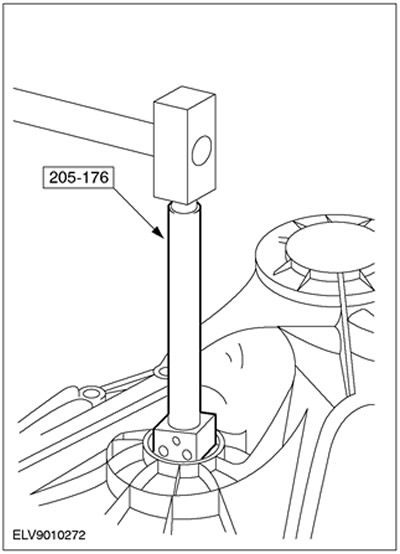
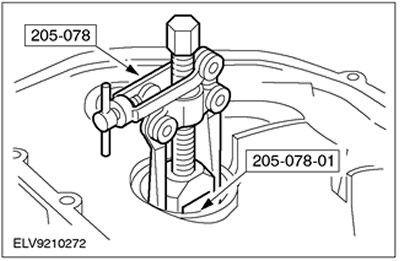
15. Remove the differential bearing outer race.
- Install the special tool in the crankcase recess.
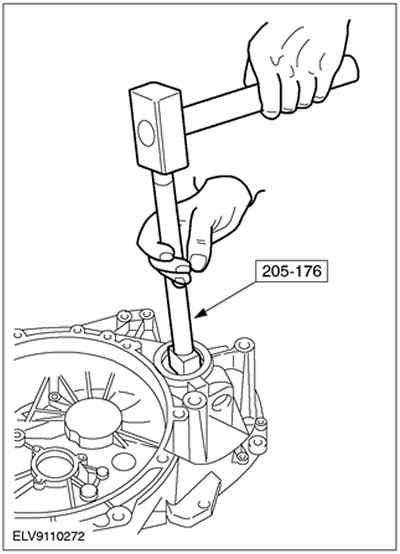
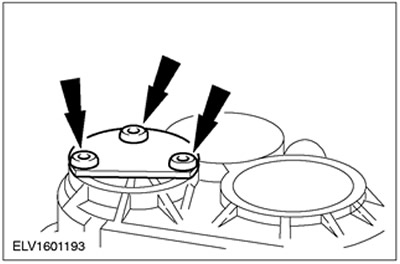
16. Remove the bearing outer races from the input and output shafts.
- Install the special tool in the crankcase recess.
17. Clean and degrease the input shaft splines.
18.
WARNING: Do not allow brake fluid to come into contact with skin or eyes. If brake fluid comes into contact with the skin or eyes, immediately flush the affected area with water. Failure to follow these instructions may result in injury.
CAUTION: Apply adhesive tape to the input shaft splines to prevent damage to the input shaft seal.
NOTE: Discard the clutch slave cylinder as it is no longer needed.
Remove clutch slave cylinder (with thrust bearing).
19. Remove adhesive tape from input shaft splines.
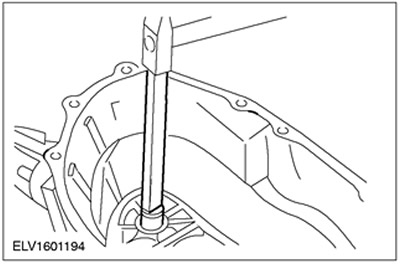
20. Remove the bearing outer races along with the shim from the differential and input shaft.
- Install the special tool in the crankcase recess.
21. Remove the outer race of the output shaft bearing along with the shim.
- Install the special tool in the crankcase recess.
22.
NOTE: Only if there is damage or leaks
Remove the reverse gear shaft.
23.
NOTE: Only if there is damage or leaks
Remove the reverse gear shaft.
- Remove the axle with a hard piece of wood.
Visitor comments