Contents: Disassembly ↳ Assembly ↳
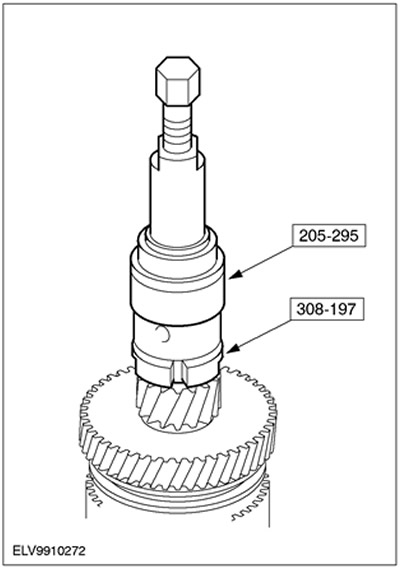
Special tool
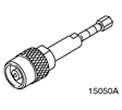 | Bearing Puller (Main Tool) 205-295 (15-050A) |
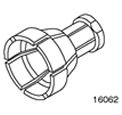 | Collet for 15-050 A/205-295 308-197 (16-062) |
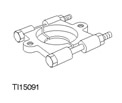 | Bearing/Gear Puller 205-310 (15-091) |
General equipment: Press.
| Name | Specification |
| Transmission fluid | WSD-M2C200-C |
Disassembly
1.
CAUTION: The inner ring and the synchronizer cone ring must be handled with extreme care.
General notes
- General view of the secondary shaft. For more information, refer to the Description and operating principle chapter in this section.
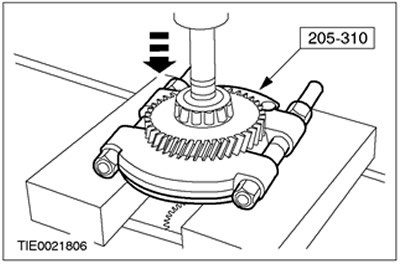
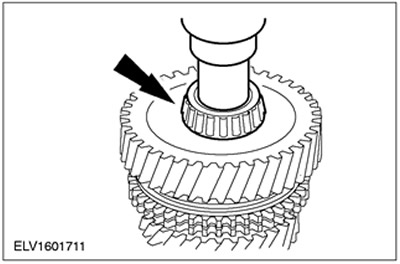
2. Remove the gearbox housing roller bearing together with the reverse gear pinion using the special tool.
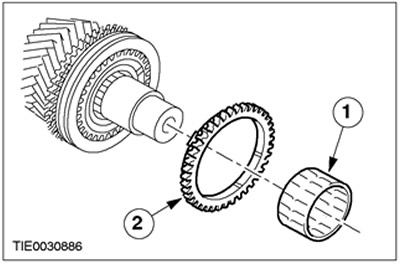
3. Remove the reverse gear synchronizer ring.
- 1. Remove the needle roller bearing.
- 2. Remove the synchronizer ring.
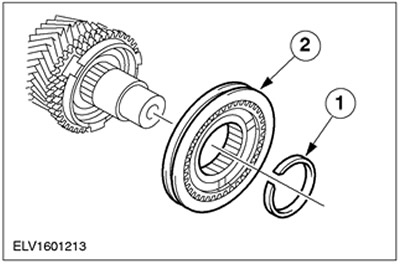
4.
NOTE: Discard the snap ring as it is no longer needed.
Remove the 5th/reverse synchronizer.
- 1. Remove the retaining ring.
- 2. Remove the synchronizer assembly.
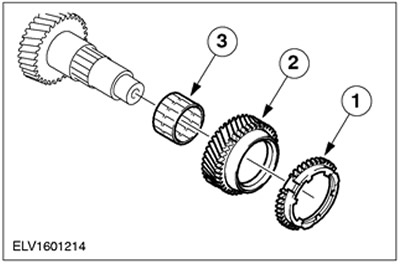
5. Remove the 5th gear gear together with the synchronizer ring and needle roller bearing.
- 1. Synchronizer ring
- 2. 5th gear pinion
- 3. Needle roller bearing
6. Remove the tapered roller bearing from the clutch side.
7.
CAUTION: The secondary shaft and output gear form a pair and can only be replaced in pairs.
NOTE: Discard the retaining ring as it is no longer needed.
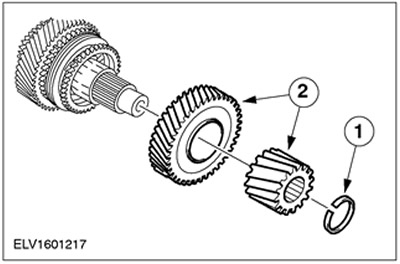
Remove the output gear and 1st gear.
- 1. Remove the retaining ring.
- 2. Remove the output gear together with the 1st gear gear.
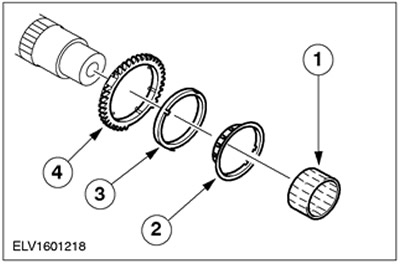
8. Disconnect the double synchronizer together with the needle roller bearing.
- 1. Needle roller bearing
- 2. Inner synchronizer ring
- 3. Conical synchronizer ring
- 4. Outer synchronizer ring
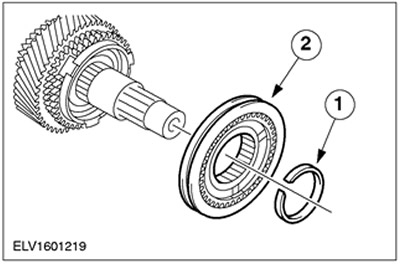
9.
NOTE: Discard the snap ring as it is no longer needed.
Connect the 1st/2nd gear synchronizer.
- 1. Retaining ring
- 2. Synchronizer assembly
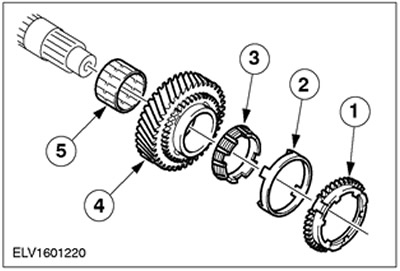
10. Remove the double synchronizer together with the 2nd gear.
- 1. Outer synchronizer ring
- 2. Conical synchronizer ring
- 3. Inner synchronizer ring
- 4. 2nd gear pinion
- 5. Needle roller bearing
11.
CAUTION: Carefully remove the synchronizer sleeve from the synchronizer hub. The detent balls are under spring force.
NOTE: Mark the position of the synchronizer sleeve.
Disassemble the synchronizer assembly.
- 1. Remove the synchronizer sleeve.
- 2. Synchronizer hub
- 3. Compression spring
- 4. Rusk
- 5. Stopper ball

Assembly
1.
NOTE: Do not apply oil to tapered roller bearings that are to be reused. Install new tapered roller bearings (untreated).
Carefully clean and inspect all components, apply transmission fluid to them before assembly.
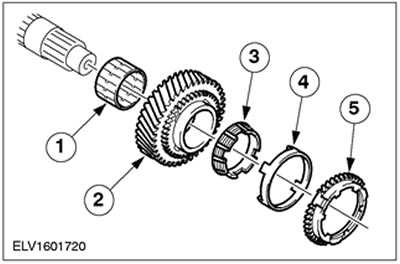
2. Install the 2nd gear with double synchronizer and needle roller bearing.
- 1. Needle roller bearing
- 2. 2nd gear pinion
- 3. Inner synchronizer ring
- 4. Conical synchronizer ring
- 5. Outer synchronizer ring
3.
NOTE: Pay attention to the markings.
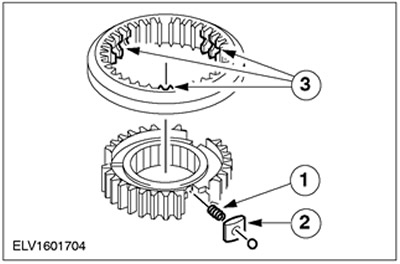
Assemble the 1st/2nd gear synchronizer.
- 1. Insert the compression springs.
- 2. Insert the crackers together with the locking balls, overcoming the force of the spring.
- 3. Set the gear selector ring to the correct position and move it forward.
4.
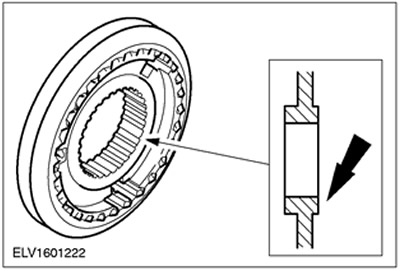
NOTE: Connect the synchronizer hub so that the small projection and the annular groove face outward (towards the 1st gear).
1st/2nd gear synchronizer installation position
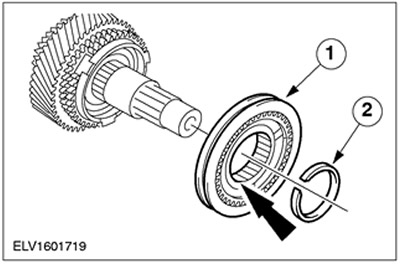
5. Install the 1st/2nd gear synchronizer.
- 1. Synchronizer assembly
- 2. Install a new snap ring.
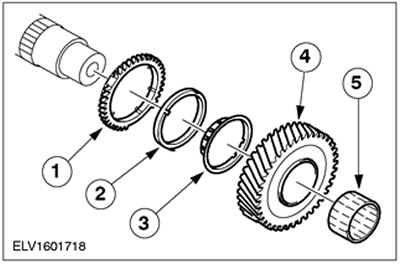
6. Install the 1st gear pinion together with the double synchronizer
- 1. Outer synchronizer ring
- 2. Conical synchronizer ring
- 3. Inner synchronizer ring
- 4. 1st gear pinion
- 5. Needle roller bearing
7.
CAUTION: The output gear can only be splined in one position.
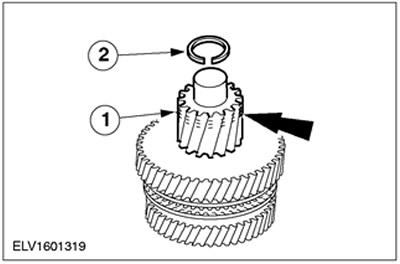
Press on the output gear.
- Install the output gear so that the marking faces up.
- 1. Press on the output gear using a suitable piece of pipe and a press.
- 2. Install a new retaining ring.
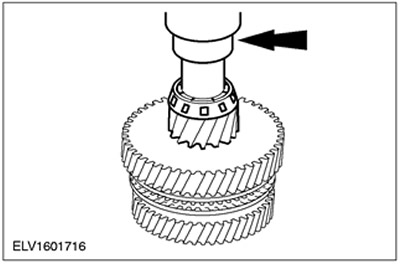
8. Press the tapered roller bearing on the clutch side.
- Press on the tapered roller bearing using a suitable piece of pipe and a press.
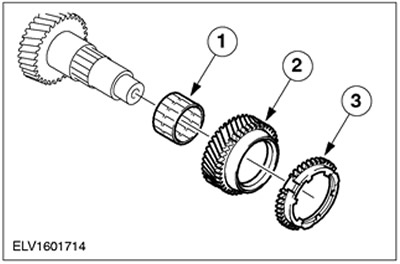
9. Install the 5th gear gear together with the synchronizer ring and needle roller bearing.
- 1. Needle roller bearing
- 2. 5th gear pinion
- 3. Synchronizer ring
10.
NOTE: Pay attention to the markings.
Assemble the 5th/reverse synchronizer.
- 1. Insert the compression springs.
- 2. Insert the crackers together with the locking balls, overcoming the force of the spring.
- 3. Set the gear selector ring to the correct position and move it forward.
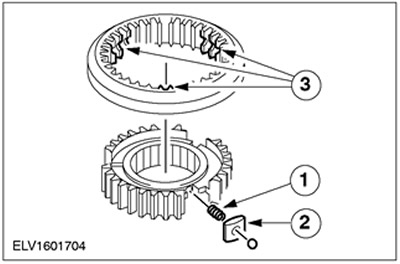
11.
NOTE: Connect the synchronizer hub so that the small projection and the annular groove face outward (towards the reverse gear).
Installation position of 5th gear/reverse gear synchronizer assembly
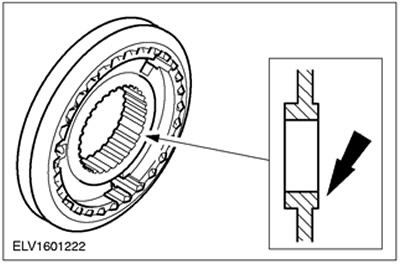
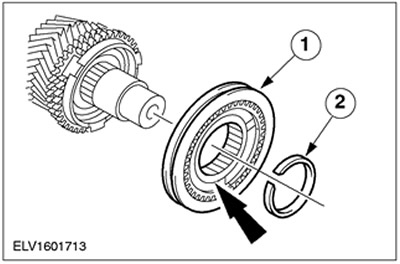
12. Install the 5th/reverse synchronizer assembly.
- 1. Synchronizer assembly
- 2. Install a new snap ring.
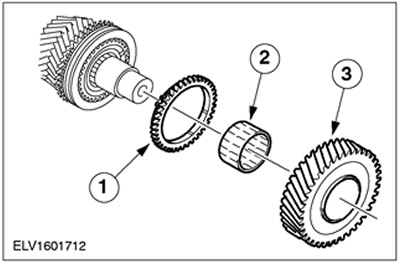
13. Install the reverse gear gear.
- 1. Synchronizer ring
- 2. Needle roller bearing
- 3. Reverse gear
14. Press the tapered roller bearing on the transmission side.
- Press on the tapered roller bearing using a suitable piece of pipe and a press.
Information for this article was taken from the website www.FordBook.ru