Drive joint
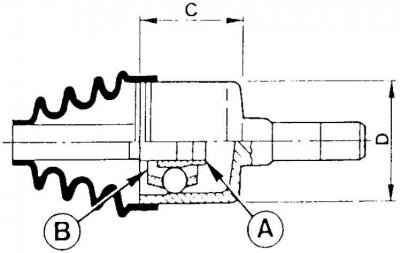
A and B - grease packing points, C - hinge length, D - hinge diameter
Surface for application of sealing paste
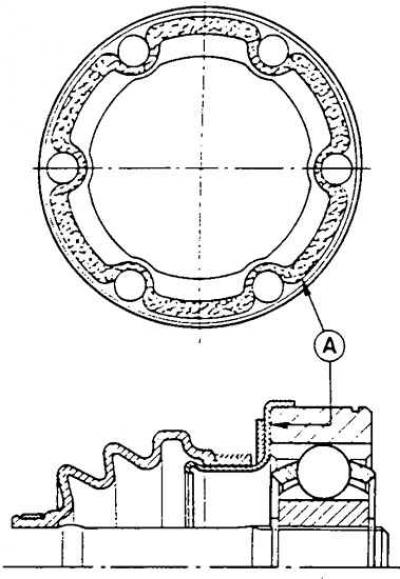
A - surface for applying sealing paste
Elastic hinge
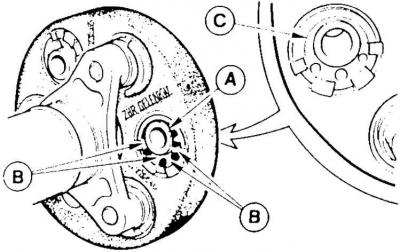
A - metal bushing, B - rubber dampers, C - bushing
Drive shafts
Replacing grease in joints
1. Remove the axle shaft with two hinges.
2. After marking the position of the semi-axis relative to the inner part of the hinge and the metal cover relative to the outer part of the hinge, remove the hinge from the protective casing and disconnect it from the semi-axis.
3. Clean the hinge and check the wear of the balls and guides. Apply grease to the inside of the joint (see fig. drive joint): into space (A) 10–15 g and into space (IN) 65-70 g for a two-layer protective cover and about 85 g for a three-layer protective cover.
4. Install the hinge on the axle shaft and secure the protective cover. If necessary, put on a new protective cover, paying attention to the fact that grease does not get inside it.
5. Install the metal casing in accordance with the previously made designations and ensure its tightness in the hinges.
6. Install half shaft.
Hinge seal
In the case of grease coming out on the surface of the hinge from under the metal casing, proceed as follows.
1. Remove the axle shaft together with two hinges, having previously marked its position relative to the elements with which it was connected.
2. Remove the hinge from the metal casing and disconnect it from the axle shaft.
3. After thoroughly cleaning the surface of the hinge and the metal casing, apply on surfaces A (see fig. Surface for application of sealing paste) sealing paste.
Attention! Only use non-hardening pastes and apply them in such a way that the bolts can be evenly tightened.
4. Connect the hinge to the axle shaft and install the protective cover.
Cardan shaft
The cardan shaft of the car is connected to the output shaft of the gearbox with an elastic joint. The flange on the gearbox output shaft is part of this joint.
Removal and installation of the elastic hinge
1. Removing the elastic joint requires locking the Torx bolts.
2. Before installing the elastic joint, check that the Torx head bolts are tightened to 80 Nm.
Attention! If these bolts turn, coat their threads with Loctite 270.
3. Apply grease to the washers located on both sides of the flange in such a way as to prevent them from turning while tightening new ones (at each hinge installation) nuts with a torque of 75 Nm.
4. Check the condition of the rubber dampers in the elastic joint (see fig. Elastic hinge).
5. If the rubber dampers are chipped or cracked, the cardan shaft together with the joint must be replaced. It is not possible to replace only the joint, as the joint and shaft are balanced together.
Attention! Small cracks on the front surface of the hinge do not mean that it must be replaced.
Further information regarding the technical characteristics, adjustment and repair of the cardan shaft and rear axle is given in section 7.
Visitor comments