2. If the liners are not replaced with new ones, make sure that they are installed in their original places to the corresponding connecting rods.
3. Pistons with connecting rods are installed in the corresponding cylinders on top of the cylinder block.
4. Position the piston ring locks as follows:
- top: 150°to one side of the junction of the helical oil ring expander;
- central: 150°to the other side of the junction of the helical expander of the oil scraper ring;
- lower: spiral oil ring expander against the marked front side of the piston;
- oil scraper ring, intermediate rings: 25 mm on each side of the spiral expander gap.
5. Lubricate the piston and piston rings with engine oil.
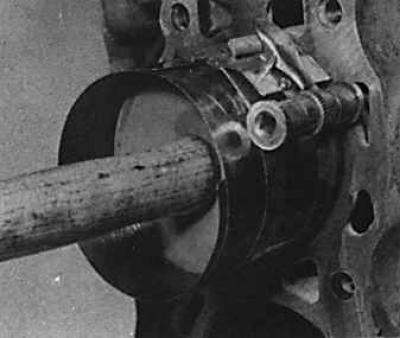
6. Install the universal piston ring compressor and prepare to install the first piston in the cylinder. Check: the connecting rod and piston groups must match the cylinder numbers, the connecting rod must be installed in the correct direction, the front of the piston must be located towards the front of the engine (there is a corresponding arrow or mark on the piston crown).

7. Lubricate the piston skirt and insert the connecting rod and piston group into the cylinder bore so that the lower part of the piston ring compressor is located at the cylinder block.
8. Tap the piston gently but firmly with the handle of the hammer to seat the piston in the cylinder.
9. Lubricate the connecting rod journals with engine oil and rotate the crankshaft so that the connecting rod journals are in the most convenient position for installing the connecting rods on them.
10. Wipe the connecting rod bearing cap and the outer side of the bushing, and install the bearing shells so that the mounting tab of the bushing fits into the mounting groove in the connecting rod cap.
11. Lubricate the bearing and install the cap on the connecting rod.
12. Install the connecting rod nuts.
13. Tighten the nuts with a torque wrench to the correct torque.
14. Once all the connecting rods are in place, rotate the crankshaft to make sure the crankshaft rotates freely without binding.
Visitor comments