Caution: On HCS and Endura-E engines, new bolts must be used to secure the lower connecting rod cap.
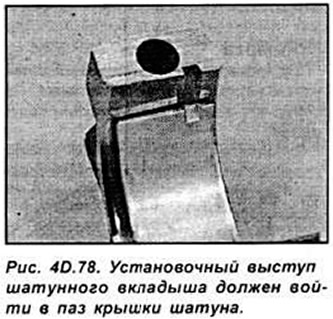
Wipe the half of the connecting rod at the cap and the lower part of the bearing shell and install the bearing shell in place so that the installation tongue fits into the corresponding slot 8 of the connecting rod. If the bearing shells are not replaced with new ones, make sure that they are installed in their original places on the corresponding connecting rods (see Fig. 4D.78).
Lubricate the piston and piston rings with engine oil. Compress the piston rings on the piston with a universal piston ring compressor. Lubricate the piston skirt and insert the piston with the connecting rod into the cylinder bore so that the lower part of the piston ring compressor is located at the cylinder block (see Fig. 40.79).
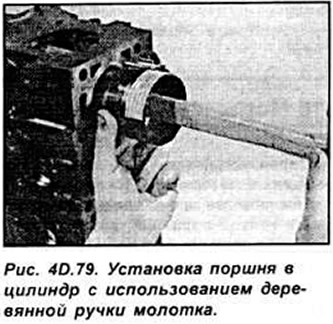
Tap the piston gently but firmly with the hammer handle to seat the piston into the cylinder.
Lubricate the connecting rod journals with engine oil and turn the crankshaft so that the connecting rod journals are in the most convenient position for installing the connecting rods on them.
Wipe the connecting rod bearing cap and the outside of the bearing shell and install the bearing shells in place so that the bearing locating tab fits into the locating groove of the connecting rod cap.
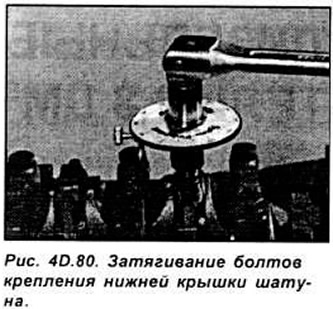
Lubricate the bearing and install the cap on the connecting rod. Tighten the connecting rod cap mounting bolts to the specified torque.
Once all connecting rods are installed, rotate the crankshaft to ensure that the shaft rotates freely and without binding. The same method used to check main bearing clearances using a Plastigage can be used to check connecting rod bearing clearances.
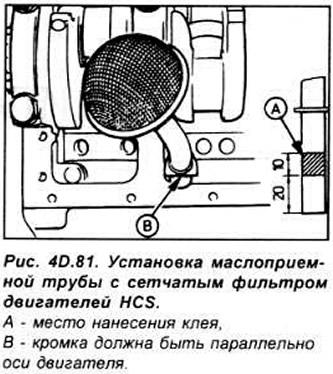
On HCS and Endura-E engines, install the oil pick-up pipe and mesh filter, for which clean the area of the oil pick-up pipe with an activator, wait 13 minutes, then lubricate this area with a special glue and insert the oil pick-up pipe into the cylinder block (see Fig. 4D.81).
For details, please visit the website FORDBOOK