Special tool
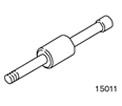 | Hammer with moving hammer 205-047 (15011) |
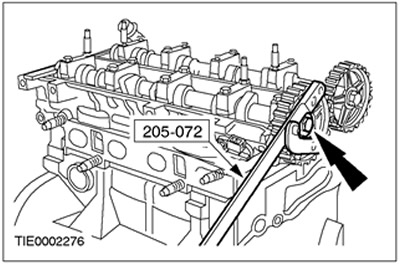
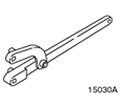 | Universal wrench for holding flanges 205-072 (15030A) |
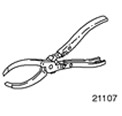 | Pliers for valve shims 303-196 (21107) |
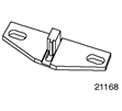 | Flywheel locking tool 303-204 (21168) |
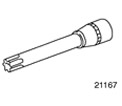 | Socket wrench for cylinder head bolts 303-392 (21167) |
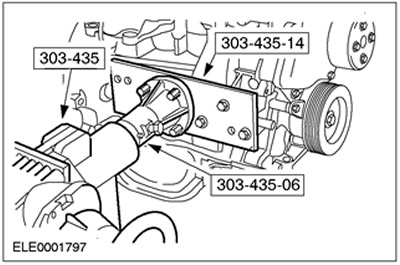
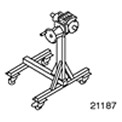 | Assembly stands 303-435 (21187) |
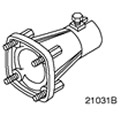 | Support bracket for 303-435 303-435-06 (21031B) |
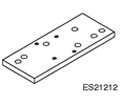 | Base plate for 303-435-06 303-435-14 (21212) |
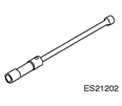 | Spark Plug Wrench 303-499 (21202) |
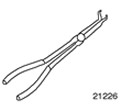 | Pliers for spark plug connectors 303-622 (21226) |
 | Adapter for 205-047 303-633 (21227) |
General equipment: Workshop crane.
Disassembly
All cars
1. Fix the engine on the assembly stand. Install the special tools on the engine.
2. Drain the engine oil and remove the oil filter.
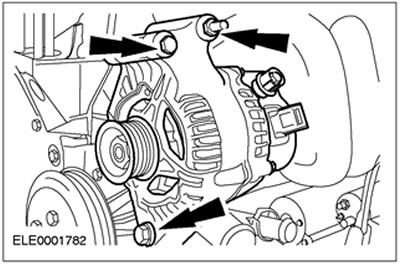
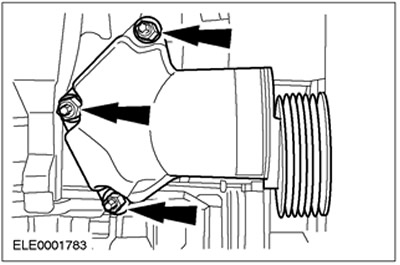
3. Remove the generator.
Vehicles without air conditioning
4. Disconnect the drive belt tensioner.
All cars
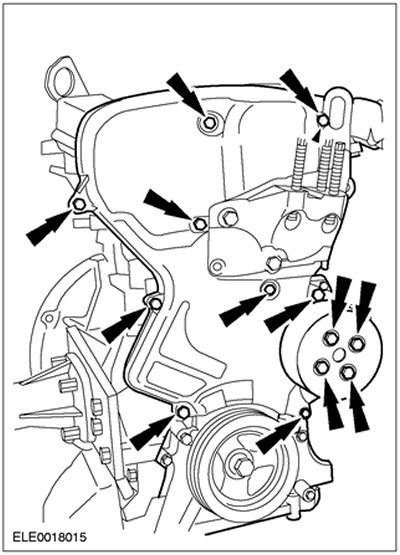
5. Remove the top timing belt cover.
- Coolant pump pulley
- intermediate pulley
- Timing belt cover
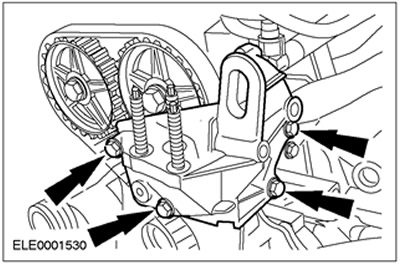
6. Disconnect the engine support bracket.
7. Disconnect the fuel lines. Hose bracket.
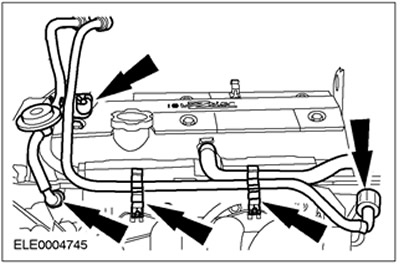
8. Disconnect the top plate of the cylinder head cover (in the presence of).
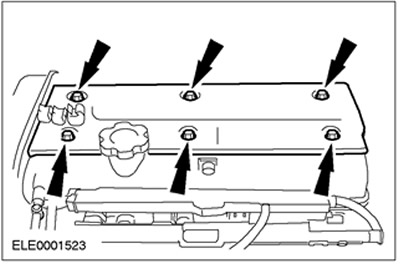
9.
CAUTION: The cylinder head cover gasket cannot be replaced individually. To avoid damage to the gasket, point it straight up when removing the cylinder head cover.
CAUTION: When disconnecting the spark plug connector, do not pull on the wire. If necessary, remove the ignition coil to avoid bending the wire. To release the gasket, turn the spark plug connector slightly before removing.
CAUTION: Disconnect the spark plug connector using straight line force only.
Remove the cylinder head cover.
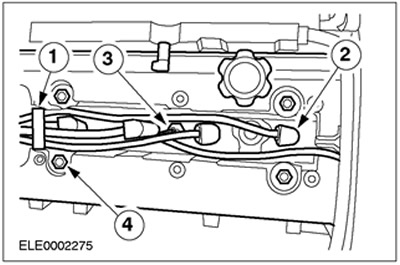
- 1.Remove the high voltage wire clamp.
- 2. Disconnect the high voltage wires from the spark plugs.
- For angled spark plug connectors, use special tool 303-622.
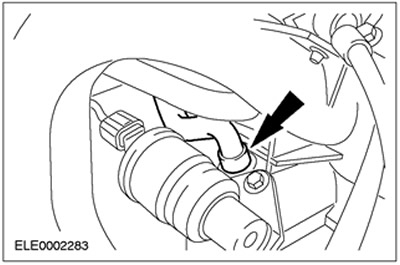
- 3. Disconnect the plug connector of the cylinder head temperature sensor (CHT).
- 4. Loosen and remove the nuts.
10. Remove spark plugs. Use special tool 303-499.
11. Disconnect the crankshaft pulley/damper.
- 1.Connect the special tool with two bolts (M10x40 and M10x45) and corresponding nuts.
- 2. Remove the bolt.
- Hold in place using the special tool.

12. Disconnect the lower timing belt cover.
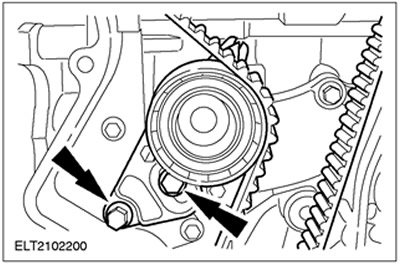
Timing belt tensioner with cam
13. Loosen the tension and remove the timing belt. Turn out a bolt.
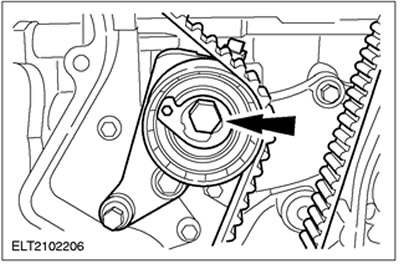
14. Disconnect the timing belt tensioner.
Groove Timing Belt Tensioner
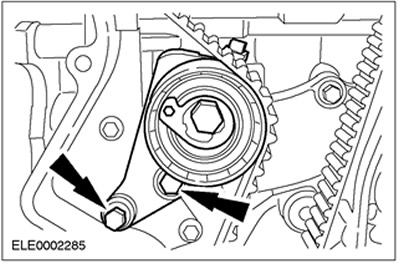
15. Loosen the tension and remove the timing belt. Turn out bolts.
16. Disconnect the timing belt tensioner. Turn out bolts.
All cars
17. Remove the pulleys from the camshafts. Hold in place using the special tool.
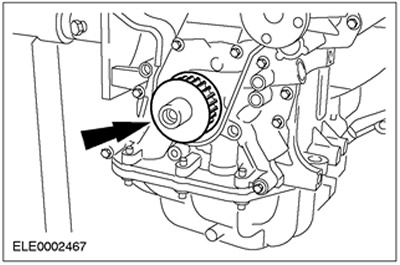
18. Remove the pulley from the crankshaft.
19. Disconnect the inner timing belt cover.

20.
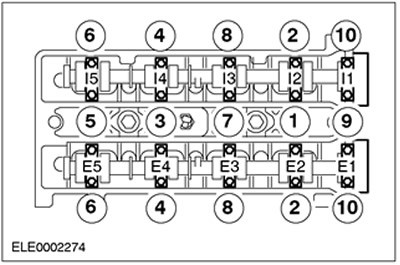
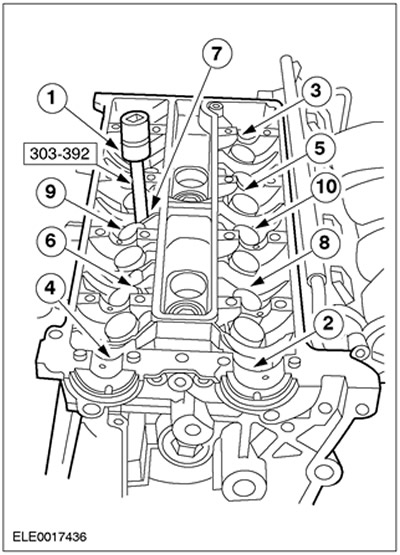
NOTE: Tightening sequence.
NOTE: Keep the bearing caps in order for later installation. Identification numbers are located on the outer surface of the camshaft bearing caps.
Remove camshafts.
- Loosen each camshaft bearing cap bolt one turn until the camshaft is free.
- Disconnect the camshaft bearing caps.
- Remove the camshaft oil seal.
21.
NOTE: Keep the valve lifters in order for later installation.
Remove the valve lifters and valve shims. Use a special tool.

22. Disconnect the crankcase ventilation hose.
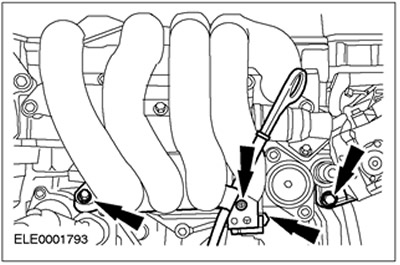
23. Remove the three lower intake manifold bolts from the cylinder block and disconnect the oil level indicator tube. Disconnect the knock sensor connector (KS) from the clamp on the oil dipstick tube.
24.
CAUTION: Before removing the cylinder head, it must be cooled to below 30°C.
CAUTION: Place the cylinder head on a soft support surface.
NOTE: Release sequence.
Disconnect the cylinder head. Turn out bolts of a head of cylinders. Use a special tool.
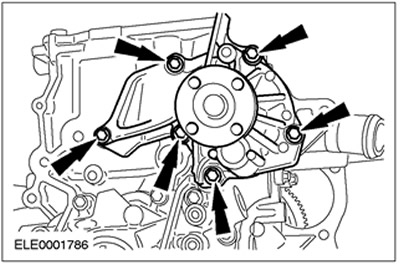
25.
CAUTION: Be careful not to damage the coolant pump impeller.
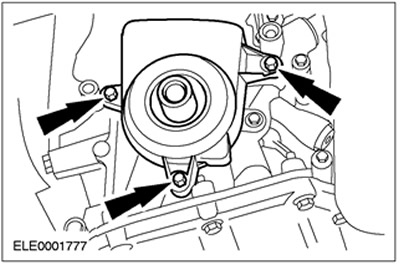
Remove the coolant pump.
26. Disconnect the thermostat housing and oil pressure switch.
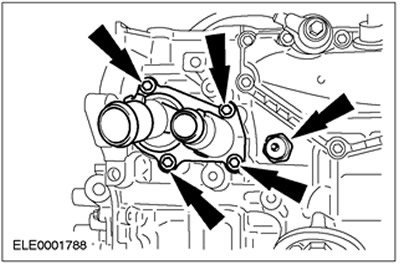
27. Disconnect the crankcase ventilation hose and KS.
Vehicles manufactured up to 11.1999
28.
CAUTION: Remove the oil sump by sliding it down to prevent oil sludge or abrasive particles from entering the engine.
Disconnect the oil pan.
Vehicles manufactured since 12.1999
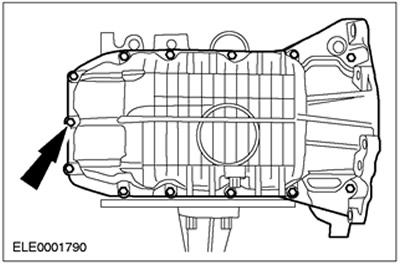
29. Drain the engine oil and remove the oil pan bolts (shown on the engine installed in the car).
- 1.Remove the drain plug.
- 2. Remove the oil sump bolts.
30.
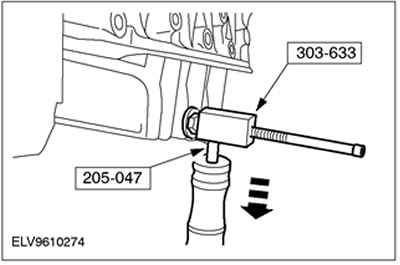
CAUTION: To avoid damage to the sealing surfaces, use only the prescribed special tool to remove the oil pan. Do not use a chisel or screwdriver to remove.
Disconnect the oil pan.
- 1.Install the special tools and fix them to the oil sump.
- 2. Having made several blows, separate the oil sump from the cylinder block.
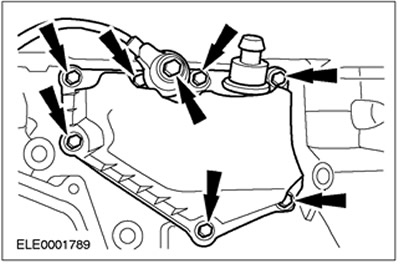
All cars
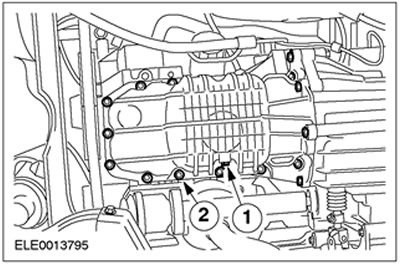
31. Disconnect the inlet oil line and oil pump along with the gasket. Remove the oil seal from the oil pump on a flat surface.
Vehicles with manual transmission.
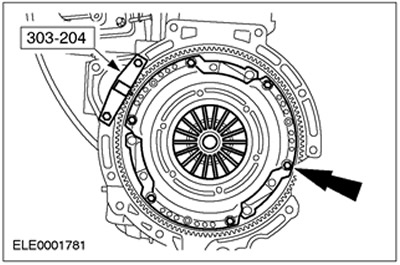
32.
CAUTION: Loosen the bolts two turns to release the clutch pressure plate.
Using the special tool, block the flywheel and remove the clutch.
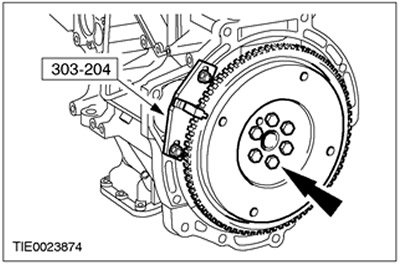
33. Disconnect the flywheel (locked with a special tool).
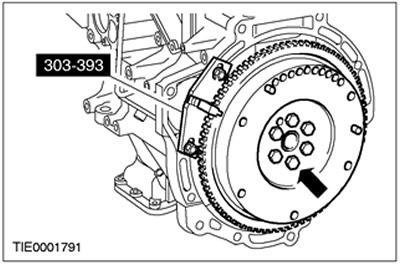
Turn out the central bolt of the engine roll limiter (right front axle).
34. Disconnect the drive disk (locked with a special tool).
All cars
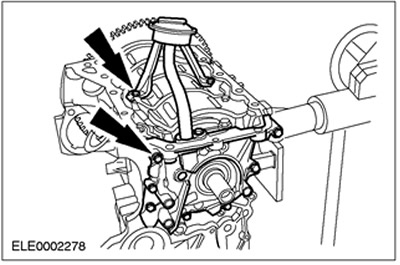
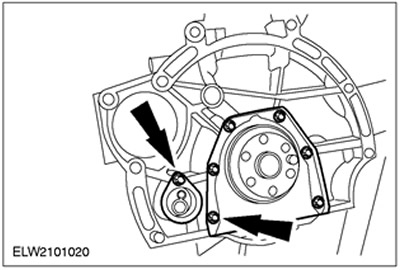
35. Remove the crankshaft position sensor (TFR).
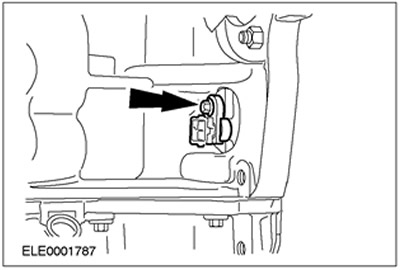
36. Disconnect the crankshaft rear oil seal housing and crankshaft position sensor support (TFR).
37. Disconnect the cylinder block together with the crank mechanism from the assembly stand (incomplete cylinder block). Disconnect the special tools from the cylinder block.
Visitor comments