Special tool
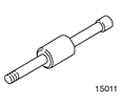 | Hammer with moving hammer 205-047 (15011) |
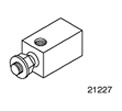 | Oil sump puller 303-633 (21227) |
| Name | Specification |
| Engine oil | WSS-M2C912-A1 |
| Sealant for the junction of the oil sump with the cylinder block | WSE-M4G323-A4 |
Withdrawal
All cars
1. Raise the car. See Section 100-02 for more information.
Vehicles manufactured up to 11.1999
2. Drain the engine oil and remove the oil pan.
- 1. After draining, replace the drain plug using a new seal.
- 2.Remove the bolts.
- Remove the gasket.

Vehicles manufactured since 12.1999
3. Drain the engine oil and remove the oil pan bolts.
- 1.Remove the drain plug.
- 2. Remove the oil sump bolts.

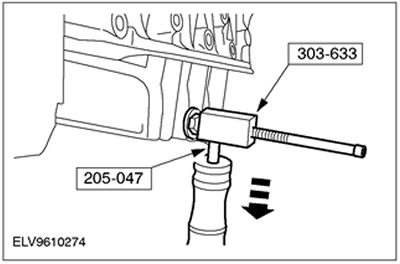
4.
CAUTION: To avoid damage to the sealing surfaces, use only the prescribed special tool to remove the oil pan. Do not use a chisel or screwdriver to remove.
Disconnect the oil pan.
- 1.Install the special tools and fix them to the oil sump.
- 2. Having made several blows, separate the oil sump from the cylinder block.
Installation
All cars
1.
CAUTION: The oil pump gasket protrudes from the cylinder block sealing surface; it must not be damaged.
CAUTION: Be careful not to damage the rubber sealing surface of the crankshaft rear oil seal holder.
NOTE: Do not damage mating surfaces.
NOTE: Mating surfaces must be free of oil and gasket residue.
preparatory activities.
- Clean mating surfaces.
- Remove all residual oil and oil sludge from the oil sump.
Vehicles manufactured up to 11.1999
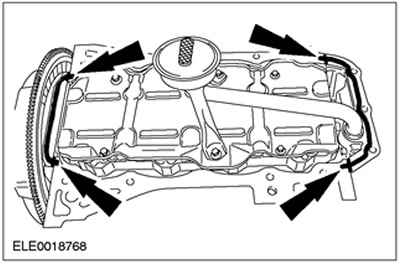
2.
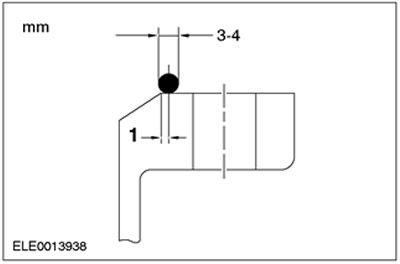
NOTE: Apply sealant 10 mm beyond the mating surface joints.
NOTE: Tighten bolts within ten minutes of applying sealant.
Apply sealant (the figure shows the removed engine).
- Joints of the mating surface of the cylinder block
- Mating surfaces of crankshaft rear oil seal holder
3.
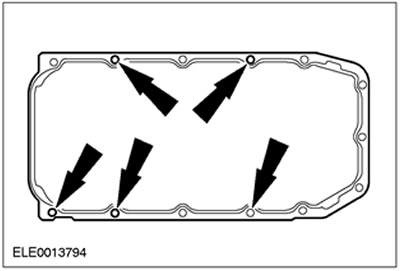
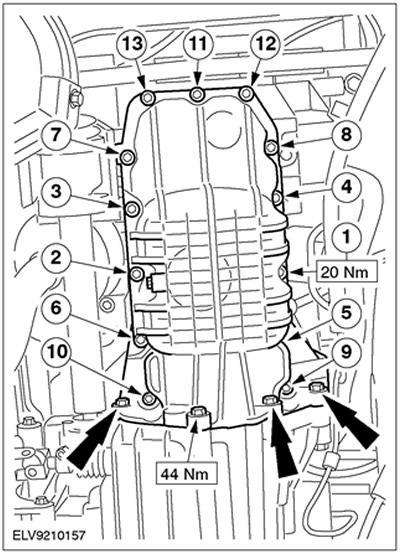
NOTE: Tightening sequence.
Install the oil pan. Use a new gasket. Install the oil sump flush with the cylinder block on the transmission side.

Vehicles manufactured since 12.1999
4.
CAUTION: Use hairpins. If the sealant gets into the blind holes of the engine crankcase, the latter may be damaged.
Install five studs (M8x20) into the specified blind holes.
5.
NOTE: Connect the oil sump within ten minutes of applying the sealant.
Apply a 3mm bead of sealant to the oil pan flange.
6.
NOTE: Tightening sequence.
Tighten the oil pan bolts in two steps.
- Stage 1: 10 Nm
- Stage 2: 20 Nm
- Unscrew the pins.
All cars
7. Standard finishing operations: Fill with engine oil. For more information, please refer to the General Specifications chapter available in this section.
Visitor comments