Contents: Removal ↳ Installation ↳
Removal
1. Disconnect the two electrical connectors and the vacuum hose (if equipped). Then remove the air cleaner cover assembly together with the air flow meter, the resonator and the pre-chamber (Chapter 4A).
2. Disconnect the accelerator cable from the throttle linkage (Chapter 4). Also disconnect the cruise control cable (if equipped) (Chapter 12).
3. Remove the upper timing belt cover (Chapter 9).
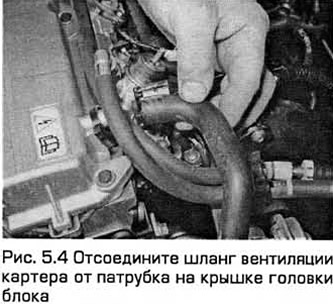
4. Disconnect the crankcase ventilation hose from the fitting on the cylinder head cover (see Fig. 5.4).
5. Disconnect the spark plug wires from the spark plugs and pull them out, unhooking the wires from the cover.
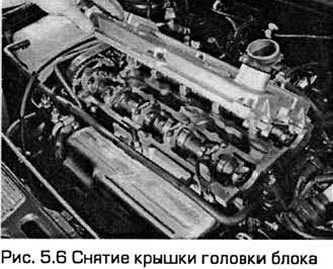
6. Unscrew the cylinder head cover mounting bolts one by one. Pay attention to the spacer sleeve and rubber seal on each bolt. Then remove the cover (see Fig. 5.6).
7. Discard the cover gasket. It should always be replaced after the cover is removed. Make sure the sealing surfaces are not damaged and that the rubber seals on each bolt are intact. Replace any worn or damaged seals.
Installation
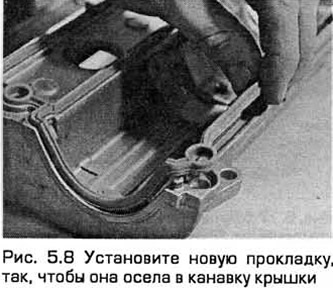
8. When installing, thoroughly clean the cover and cylinder head, and then install a new gasket so that it settles into the groove of the cover (see Fig. 5.8).
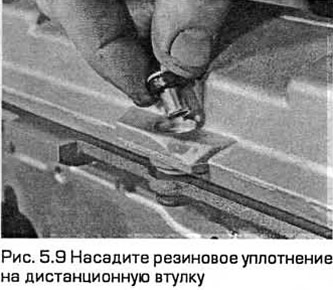
9. Install the cover onto the cylinder head. Then insert the rubber seal and spacer sleeve into the installation location of each bolt (see Fig. 5.9). Screw the bolts in by hand so that the gasket settles into its groove.
10. Tighten the cover bolts to the specified torque in a crisscross pattern from the center outwards in two stages (see Technical Requirements).
11. Install the high-tension wires and secure them properly by laying them out. Each wire is numbered. The wire can be identified by the numbering on the corresponding terminal of the ignition coil.
12. Install the crankcase ventilation hose and the upper timing belt cover. Attach and adjust the accelerator cable. Then install the air cleaner cover assembly with air flow meter, resonator and pre-chamber (Chapter 4).