Mark the position of both rear wheels on the hubs with paint. This will allow the balanced wheel to be installed again in the same position.
Loosen the wheel nuts on the vehicle while it is parked on the platform.
Raise the rear of the car onto jack stands.
Remove both rear wheels.
Release the handbrake.
Remove the locking pin from the automatic adjustment mechanism.
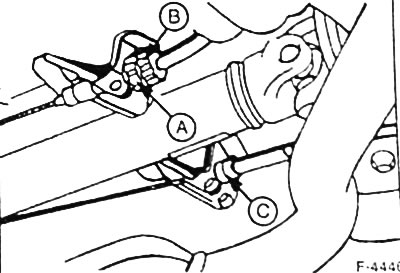
Loosen lock nut "A", turn adjusting bolt "B" and thereby loosen the cable tension until both levers at the brake calipers rest on the stop. C - retaining ring.
Using a felt-tip pen or lacquer pencil, draw an "arrow" mark through the brake lever and caliper on both calipers.
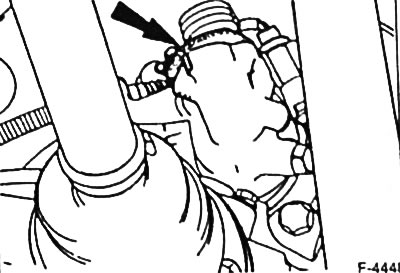
Using the adjusting bolt "B" (see Fig. F-4446), adjust the handbrake until the marks on both levers and calipers are slightly offset from each other.
Apply the handbrake to equalize the tension of the brake cable.
Tighten locknut "A" (see Figure F-4446) at adjusting bolt "B" with your fingers, then continue tightening with a suitable wrench until a click is heard at least three times (but not more than six).
Note: One full turn of the adjusting bolt corresponds to approximately 6 clicks.
Insert a new locking pin into the automatic adjustment mechanism.
Place the rear wheels so that the marks made before removal match. Tighten the wheels with nuts. Lower the car and tighten the wheel nuts crosswise to 100 Nm.
The text of the article was copied from the website: www.FordBook.ru