Contents: Removal ↳ Installation ↳
Removal
Mark the position of both rear wheels on the hubs with paint. This will allow the balanced wheel to be installed again in the same position.
Loosen the wheel nuts on the vehicle while it is parked on the platform.
Raise the rear of the car onto jack stands.
Remove both rear wheels.
Release the handbrake.
Remove the locking pin from the automatic adjustment mechanism.
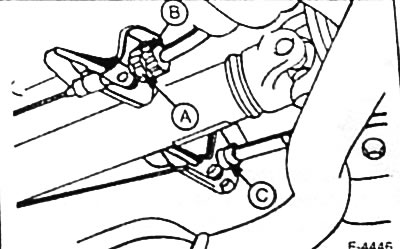
Loosen lock nut "A", turn adjusting bolt "B" and thereby loosen the tension of the cable rod until both levers on the brake calipers rest on the stop.
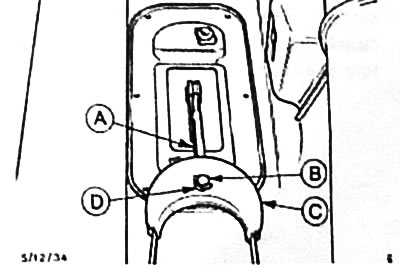
Using a screwdriver, press the lock washer "D" off the forked pin "B". Remove the equalizer "C" from the drive rod "A".
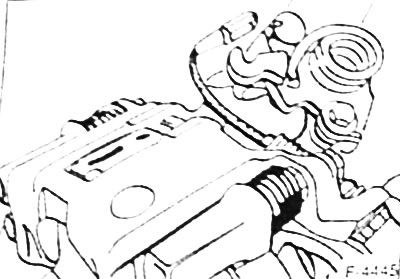
Disconnect the handbrake cable from the rocker arm and pull it out of the guide bushing at the brake caliper.
Bend back the brake cable retaining clip at the lower control arm.
Remove the retaining ring "C" (see figure F4446), which secures the cable sheath. Pull the cable sheath out of the guides on the body.
Disconnect the handbrake cable from the rear axle subframe and remove the cable from the vehicle.
Installation
Insert the handbrake cable at the rear axle subframe.
Route the handbrake cable over the rear wishbones and insert it into the guide bushings at the brake calipers.
Hang the ends of the cable on the swing arms.
Insert the cable sheath into the guides at the body and from the side opposite the automatic adjustment mechanism. Secure it with the locking ring "C" (see Figure F-4446).
Pass the drive cable through the equalizer. Fasten the equalizer with the cable to the drive rod and secure the forked pin with a lock washer.
Adjust the handbrake, see p. 119.
Insert a new locking pin into the automatic adjuster. Secure the brake cable with the retaining clip at the lower wishbone.
Place the rear wheels so that the marks applied before removal match. Tighten the wheels with nuts. Lower the car and tighten the wheel nuts crosswise to 100 Nm.