You will need: a 13 mm socket head and a flat-blade screwdriver.
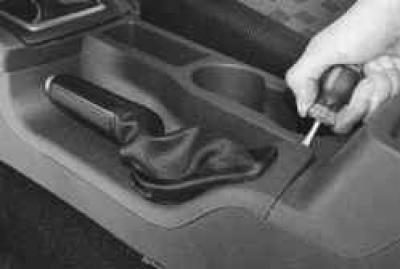
1. Use a screwdriver to pry up the edge of the parking brake lever boot frame…
2. …detach the frame from the floor tunnel lining, overcoming the elastic resistance of its clamps, and move the cover up the lever.
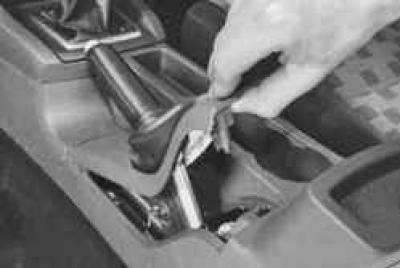
NOTE: Driver's seat has been removed for clarity. It is not necessary to remove the seat to gain access to the seat cover fasteners and the parking brake adjuster.
3. Check the correct adjustment of the clearances between the brake shoes and the drums of the rear brake mechanisms (if the car is equipped with drum brake mechanisms of the rear wheels). To do this, press the brake pedal hard several times with the parking brake lever lowered all the way down. If the clearances are larger than normal, clicks of the clearance adjustment mechanisms will be heard in the brake mechanisms each time the pedal is pressed. When the clicks stop, the adjustment is complete.
4. Raise the rear of the vehicle and support it securely.
5. Remove the brake drums (see "Removing and installing the brake drum"), if the vehicle is equipped with drum brakes on the rear wheels.
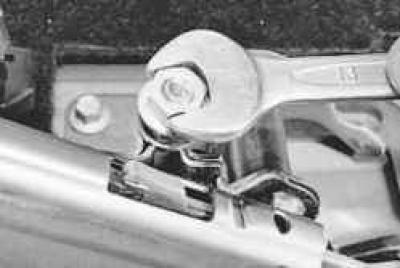
6. Loosen the lock nut of the front parking brake cable end…
7. …and completely unscrew the lock nut from the tip.
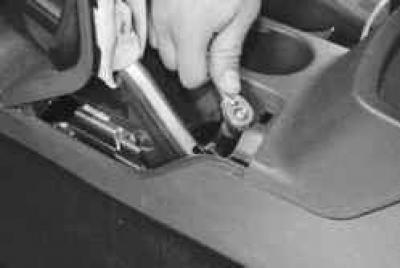
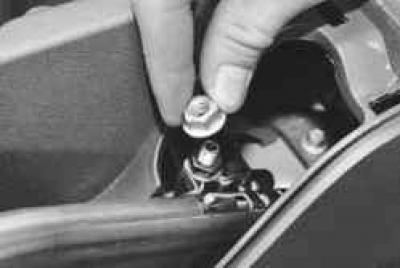
8. Lower the drive lever down to the stop and unscrew the adjusting nut to the very end of the threaded end of the front cable.
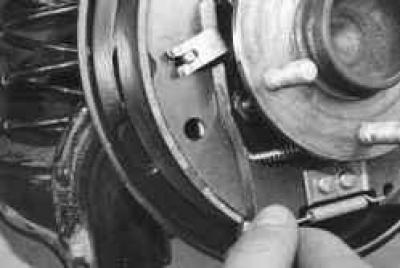
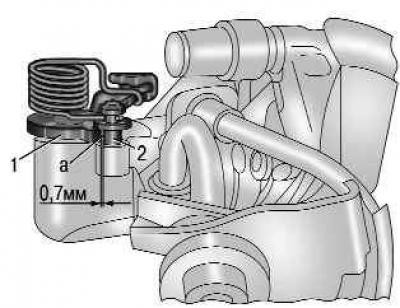
Fig. 9.6. Control gap of the parking brake drive of a vehicle equipped with rear wheel disc brakes: a – control gap between the release lever and the caliper support; 1 – release lever; 2 – rear brake caliper support
9. Insert 2.0 mm thick feeler gauges between the end stops of the expansion levers and the rear brake shoes of both drum brake mechanisms of the rear wheels or 0.7 mm thick feeler gauges into the gaps a (Fig. 9.6) between the expansion levers 1 and the supports 2 of the disc brake calipers.
10. Turn the adjusting nut clockwise, screwing it onto the threaded end of the front cable until one of the release levers begins to move.
NOTE: Use an assistant to observe the movement of the levers.
11. Remove the feeler gauges from the brake mechanisms.
12. Install the brake drums (if the vehicle is equipped with rear drum brakes) and wheels.
13. Check the ease of rotation of the wheels. If the wheels rotate with braking, repeat the adjustment of the parking brake. If repeated adjustment does not achieve the desired result, check the condition of the brake shoes of the rear wheel brake mechanisms, brake drums, discs and drive cables. Replace faulty parts (see the relevant subsections) and adjust the parking brake drive as described above.
14. Place the car on its wheels.
15. Install and tighten the front cable end lock nut.
16. Install the parking brake lever boot in the reverse order of removal.
USEFUL TIP: If there is no feeler gauge or technical possibility of removing the brake drums (if the car is equipped with rear wheel drum brakes), a simplified version of adjusting the parking brake system is acceptable.
1. Perform the operations described above in points 1–4.
2. Turn the adjusting nut clockwise, screwing it onto the threaded end of the front cable, periodically checking the ease of rotation of the rear wheels. Screw the adjusting nut onto the end of the cable until a clearly noticeable resistance to its rotation appears.
3. Loosen the adjusting nut until the rear wheels are completely free.
4. Place the car on its wheels, apply the parking brake, set the gearshift lever to neutral and try to roll the car manually. If this is successful, the drive is incorrectly adjusted or faulty. In this case, repeat the adjustment, performing it more carefully. If repeated adjustment does not produce the desired result, see point 10 above.
The text was obtained in its entirety from the specified website fordbook