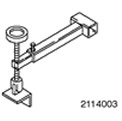
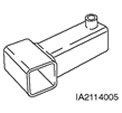
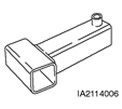
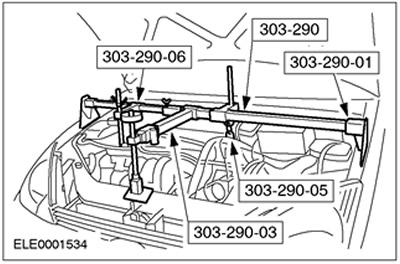
Special tool
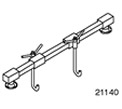 | Engine support beam 303-290 (21-140) |
 | Adapter for 303-290 303-290-01 (21-140-01) |
 | Adapter for 303-290 303-290-03 (21-140-03) |
 | Adapter for 303-290 303-290-05 (21-140-05) |
 | Adapter for 303-290 303-290-06 (21-140-06) |
General equipment:
- Jack for gearbox
- Fixing clamp
| Name | Specification |
| transmission fluid | WSD-M2C200-C |
Installation
1. General notes:
- Use only new self-locking nuts.
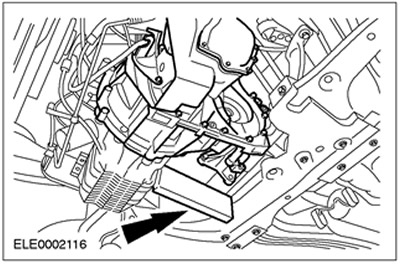
2. Secure the gearbox using the retaining strap and move it to the installation position using the gearbox jack.
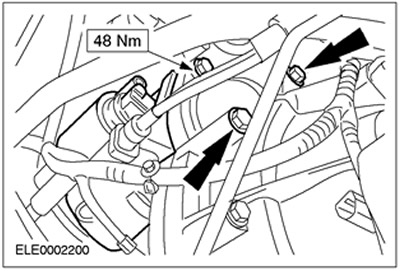
3. Tighten the flange bolts.
- Install the power steering high pressure line bracket.
4. Tighten the flange bolts.

5. Remove the wooden block.
6. Lower the car.
7. Tighten the top flange bolts.
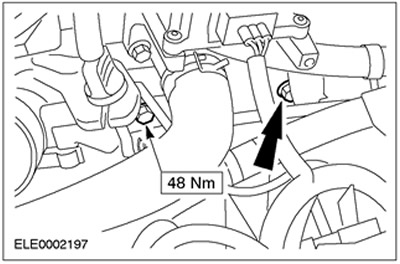
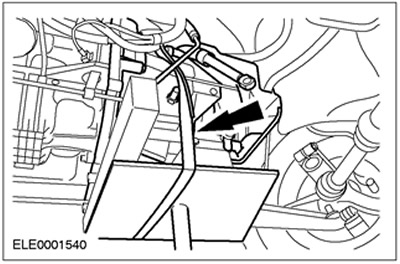
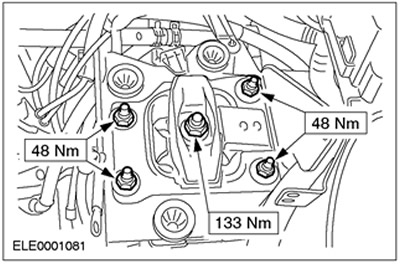
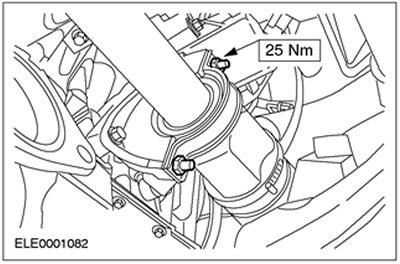
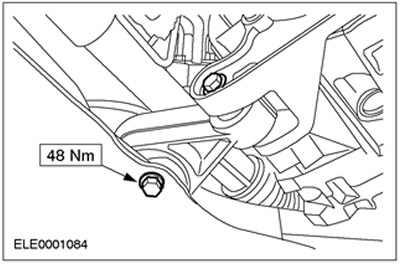
8. Install the rear engine mount bracket.
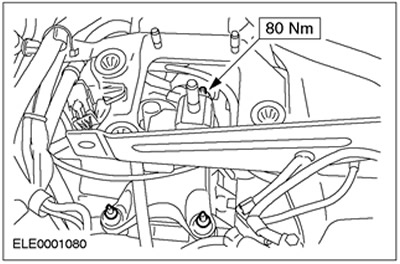
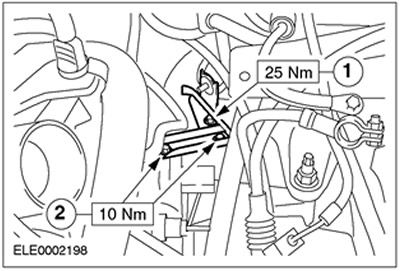
9. Install the rear engine mount linkage and slave cylinder high pressure line bracket.
- 1. Bracket for the high pressure line of the working cylinder
- 2. Communication
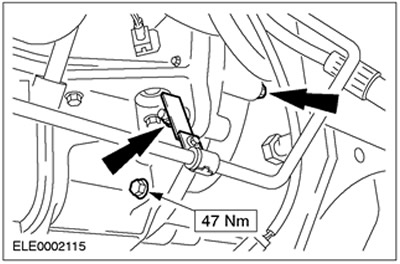
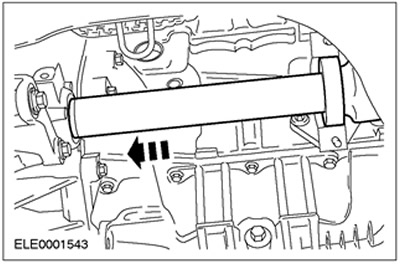
10. Using the special tool, raise the engine and transmission just enough to allow the rear engine mount to be installed.
11. Install the rear engine mount.
12. Disconnect special tools.
13. Raise the car. See Section 100-02 for more information.
14. Install the drive belt cover.
15.
CAUTION: Support axle shaft. The inner hinge should not be tilted more than 18 degrees. External hinge - at an angle exceeding 45 degrees.
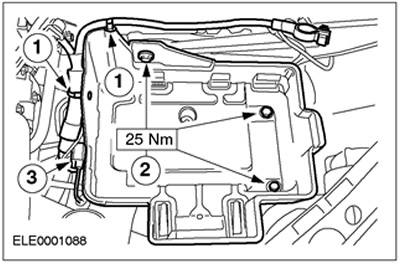
CAUTION: To protect the oil seal, use a dowel sleeve when installing the front axle shaft (comes with every new oil seal).
CAUTION: Do not damage the oil seal.
CAUTION: Make sure the snap ring is installed correctly.
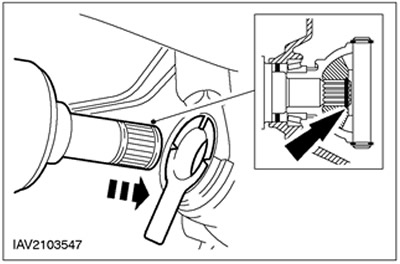
NOTE: Attach the tripod joint assembly (continuation).
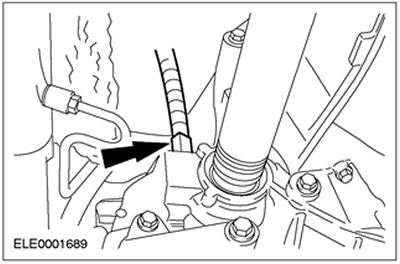
Establish the left semiaxle on a transmission.
16.
CAUTION: Support axle shaft. The inner hinge should not be tilted more than 18 degrees. External hinge - at an angle exceeding 45 degrees.
CAUTION: Do not damage the oil seal.
Establish the right semiaxle on a transmission.
17.
NOTE: Install new bracket and new intermediate bearing nuts.
Connect the bracket for fastening the intermediate bearing of the right axle shaft.
18. Install roll limiter.
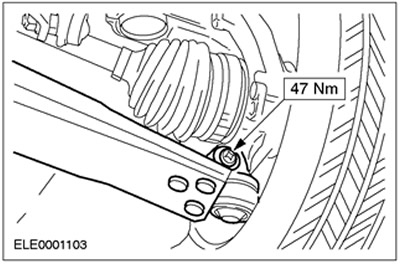
19. Install the ball joints of the lower suspension arms on both sides.
20. Tighten fastening elements of a reception exhaust pipe.
21. Install the starter. Connect the ground wire.
22. Install selector and shift cables.
- Install the shift and select cables to the bracket by turning the bushing clockwise.
23. Fill in the transmission fluid; transmission fluid should be filled to a level 5-10 mm below the lower edge of the inspection hole.
24. Close the cover of the shift cables and gear selection.
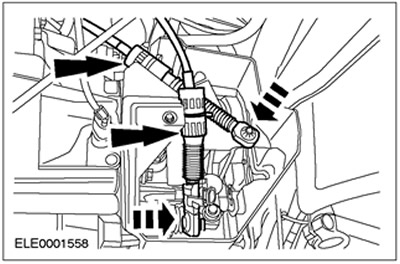
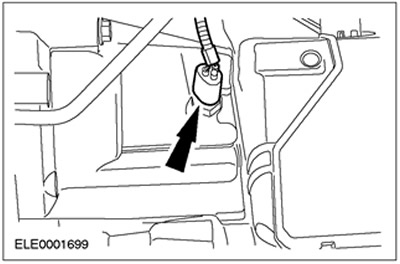
25. Mate the vehicle speed sensor connector (VSS).
26. Dock the reverse light switch connector.
27. Lower the car.
28.
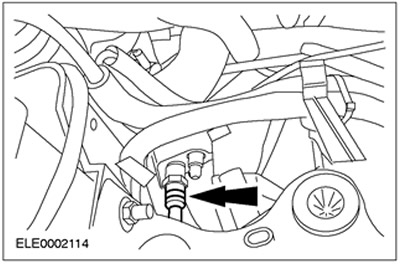
CAUTION: Brake fluid leakage. Observe precautions for handling brake fluid.
Connect the clutch slave cylinder high pressure line.
- Insert the clutch slave cylinder high pressure line into the bracket.
29. Remove air from the hydraulic clutch. See Section 308-00 for more information.
30. Install the inlet pipeline.
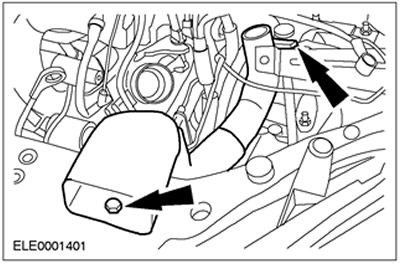
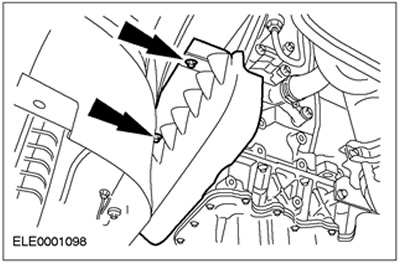
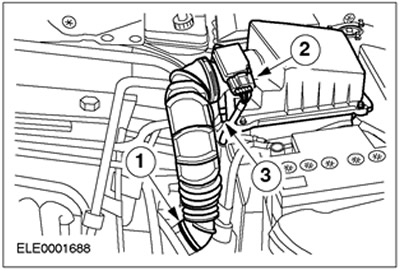
31. Install the air filter.
- 1. Install intake piping.
- 2. Dock the MAF sensor connector (MAF).
- 3. Install the crankcase ventilation hose.
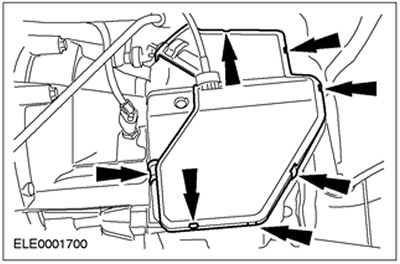
32. Install the battery tray.
- 1. Connect the wiring harness.
- 2. Screw in the bolts.
- 3. Mate and secure the connector.
33. Install the battery and connect the wires to it.
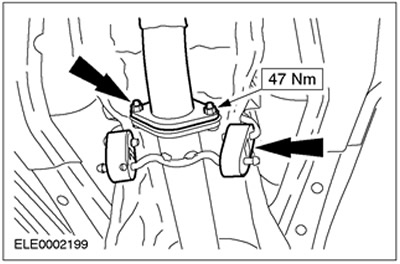
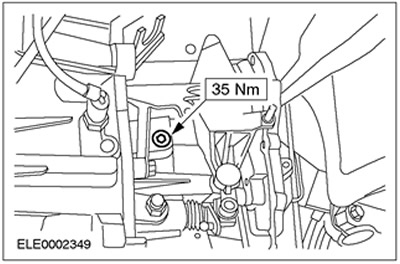
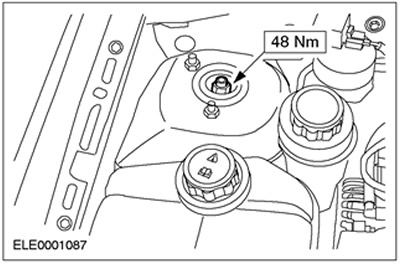
34. Tighten the nuts of the left and right suspension struts.
- Stop the piston rod from turning with an Allen wrench.
- Tighten by hand with a ring wrench.
- Tighten to the prescribed torque using a torque wrench.
35. Adjust the gearshift mechanism. See Section 308-06A / 308-06B / 308-06C for more information.
36. Standard final operations:
- Check the wiring of the vacuum hoses and electrical wiring and fix them with clamps.
- Enter the radio key code.
- Reprogram preset radios.
- Set your clock.
- Carry out a road test to give PCM a chance to collect data.
- Recheck fluid levels and correct if necessary.
Visitor comments