Contents: Disassembly ↳ Assembly ↳
Disassembly
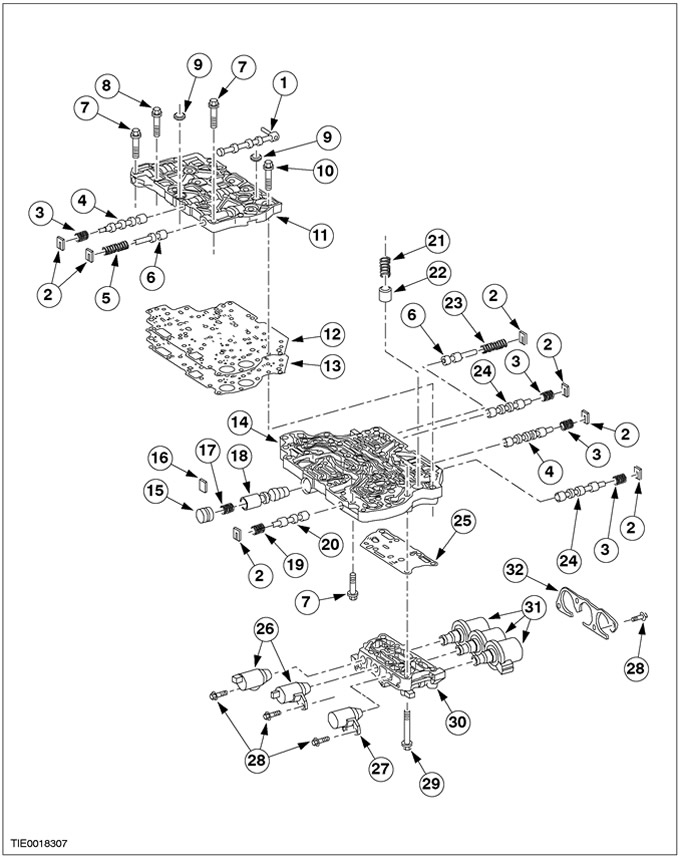
| Pos. | Spare Part No | Name |
| 1 | - | Manually operated valve assembly |
| 2 | - | Spring retainer plate (7 pcs.) |
| 3 | - | Control spring for bypass clutch control valve (4 pcs.) |
| 4 | - | Bypass valve for clutch control (2 pcs.) |
| 5 | - | Modulating valve spring) |
| 6 | - | Line pressure modulation valve (and torque converter release) (2 pcs.) |
| 7 | - | Bolt M6x40 (3 pcs.) |
| 8 | - | Bolt M6x30 (5 pcs.) |
| 9 | - | Valve block seal |
| 10 | - | Bolt M6x60 (5 pcs.) |
| 11 | - | Upper control valve block |
| 12 | - | Valve Body Gasket/Disc Assembly |
| 13 | - | Valve Block Separator Gasket |
| 14 | - | Lower control valve block |
| 15 | - | Main control valve stopper |
| 16 | - | Main control valve retaining plate |
| 17 | - | Main line pressure regulating valve spring |
| 18 | - | Main line pressure regulating valve |
| 19 | - | Solenoid control valve spring |
| 20 | - | Solenoid control valve |
| 21 | - | Intermediate gear servo unit accumulator spring |
| 22 | - | Intermediate gear servo unit storage piston |
| 23 | - | Torque converter control valve spring |
| 24 | - | 3-4 Lock and Switch Control Valve (2 pcs.) |
| 25 | - | Solenoid valve block gasket |
| 26 | - | Shift control solenoid valve (2 pcs.) |
| 27 | - | Pressure control solenoid valve assembly |
| 28 | - | Screw M6x15 (7 pcs.) |
| 29 | - | Screw M6x72 (2 pcs.) |
| 30 | - | Electromagnetic throttle valve block |
| 31 | - | Shift control solenoid valve assembly (3 pcs.) |
| 32 | - | Bracket for electromagnetic valves for switching control H/DWN |
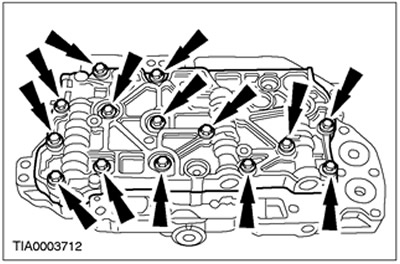
1. Remove the solenoid valve block bolts and the solenoid valve block.
2. Remove the solenoid valve block gaskets and discard them as no longer needed.

3. Remove the seals and discard them as no longer needed.
4. Disassemble the main control valve block.

Assembly
1.
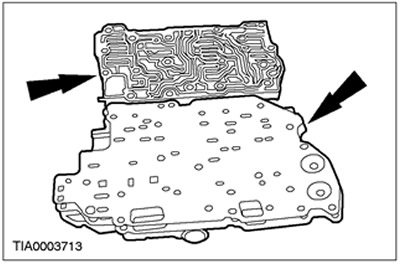
NOTE: There is a gasket glued to the top side of the spacer plate.
NOTE: The spacer pad is placed on the bottom side.
NOTE: Inspect the main control valve block.
Install a new control valve block plate and spacer gaskets.
2.
NOTE: Do not fully tighten the bolts at this stage.
Assemble the main control valve block.
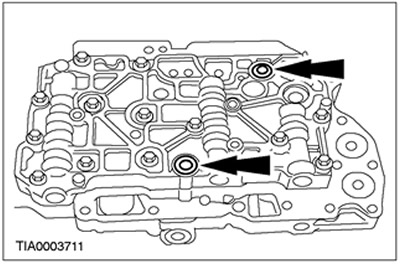
3. Install the seals.

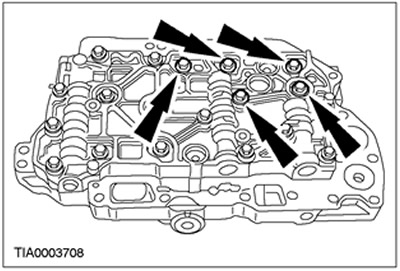
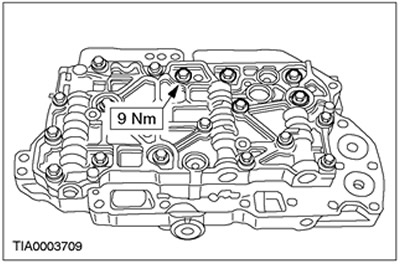
4. Tighten the solenoid valve block bolts.
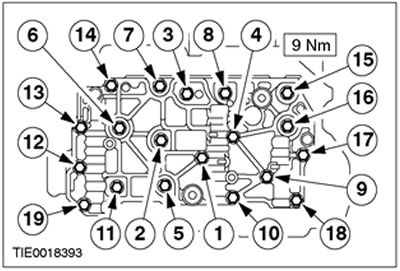
5. Tighten the remaining bolts, working in the sequence shown.
The material was copied from an information website: www.fordbook.ru