Contents: Disassembly ↳ Assembly ↳
Special tool
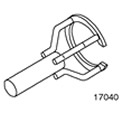 | Spring Ring Compressor 307-209 (17-040) |
| Name | Specification |
| Automatic transmission fluid | WSS-M2C202-B |
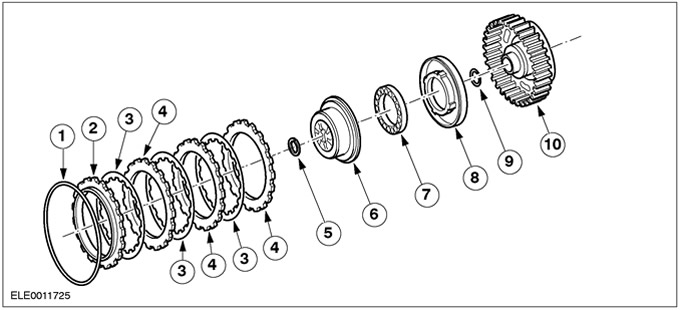
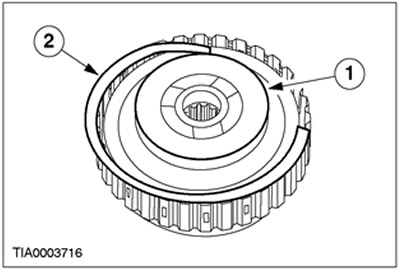
| Pos. | Spare Part No | Name |
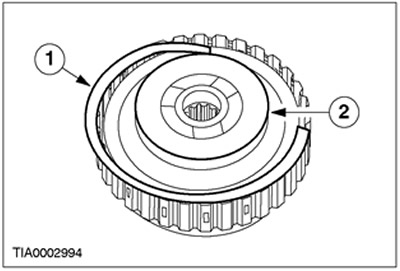
| 1 | – | Retaining ring |
| 2 | – | Direct Drive Clutch Pressure Plate |
| 3 | – | Damage or wear of friction elements |
| 4 | – | Forward clutch steel spacer discs |
| 5 | – | Spring ring (selective selection) |
| 6 | – | Balancing piston of direct drive clutch |
| 7 | – | Direct Drive Clutch Return Spring |
| 8 | – | Direct Drive Clutch Piston |
| 9 | – | Direct Drive Clutch Thrust Bearing |
| 10 | – | Direct Drive Clutch Cylinder Assembly |
Disassembly
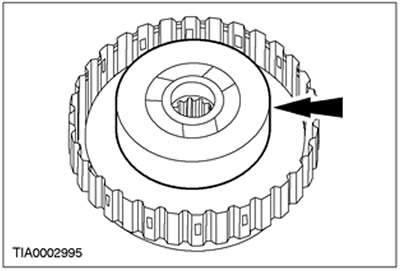
1. Remove the pressure plate and direct drive clutch discs.
- 1. Remove the direct drive clutch pressure plate retaining ring.
- 2. Remove the pressure plate and direct drive clutch discs.
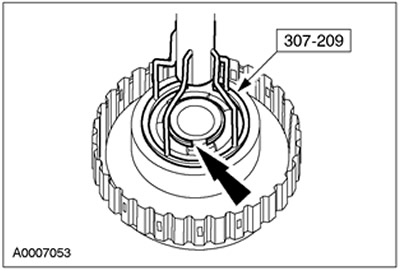
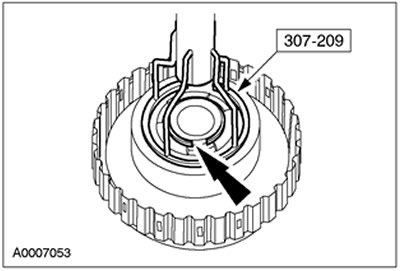
2. Using a special tool, remove the snap ring.
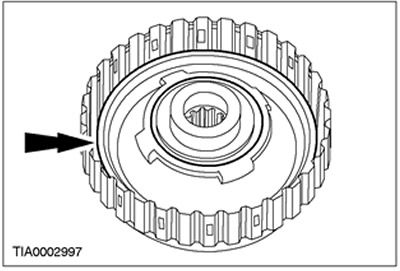
3. Remove the direct drive clutch balancing piston0.
4. Remove the direct drive clutch return spring.

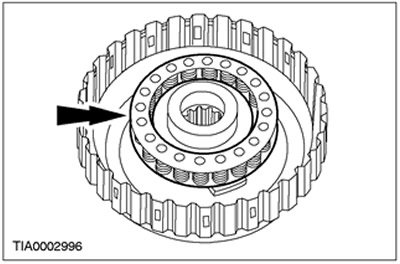
5.
CAUTION: If damage is found in the direct clutch piston seals, install a new direct clutch piston.
Remove the direct drive clutch piston and inspect it.
Assembly
1. Before assembly, soak the internal spline clutch discs in clean automatic transmission fluid for 15 minutes.
2. Inspect the walls of the direct clutch piston bore for nicks or scratches. Install a new direct clutch piston if necessary.
3. Lubricate and install the direct drive clutch piston.

4. Install the direct drive clutch return spring.
5. Install the direct drive clutch balancing piston.

6. Using the special tool, install the snap ring.
7. Install the direct clutch pressure plate retaining ring. For more information, refer to the Specifications chapter in this section.
- 1. Install the direct drive clutch discs and pressure plate.
- 2. Install the direct drive clutch pressure plate retaining ring.
The original source of the publication is on the website (fordbook)