Special tool
 | Ultraviolet Light Diagnostic Kit (12V) 12-Volt Master UV Diagnostic Inspection Kit 164-R0756 or equivalent |
 | Automotive tester 73III 105-R0057 or equivalent |
 | World Diagnostic System (WDS) 418-F224 or equivalent scan tool |
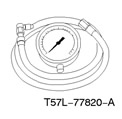 | Pressure gauge 307-004 (T57L-77820-A) |
The Symptom Diagnostic Index provides the technician with diagnostic information, directions for action and, using the symptom as a starting point, suggests possible items.
The symptom diagnostic indicator is divided into two categories of actions: «Electrical Programs», designated by the 200 series numbers, and «Hydraulic/mechanical programs», identified by the 300 series numbers «electrical programs» Lists possible electrical components that may be causing or contributing to the symptom described. IN «Hydraulic/mechanical programs» Lists possible hydraulic or mechanical components that may be causing or contributing to the symptom described.
Diagnostic Guidelines Using the Symptom Table
1. Using the Symptom Index, select the Problem/symptom that best describes the problem condition.
2. Refer to the program indicated in the table «Diagnosis by symptom indicator».
3. Always start troubleshooting with:
- a preliminary inspection
- b confirming the existence of a problem condition,
- c checking fluid levels
NOTE: Not all electrical problems will cause a DTC to be generated (DTC). Be aware that the items listed may still be causing the problem. Before moving on to «Hydraulic/mechanical program» Check if these items work properly.
4. Start as directed with «electrical program». Follow the references or the prescribed course of action. Always perform on-board diagnostic procedures when necessary. Never skip an action. If the problem is still present after electrical diagnosis, go to «Hydraulic/mechanical program».
5. In «Hydraulic/mechanical programs» lists hydraulic or mechanical elements that may be causing the problem. These items are listed in order of removal and most likely cause. To make sure that the repair is correct, you should inspect all of the items listed.
Symptom Index Diagnosis
|
4F27E |
Programs |
|
|
Electrical |
Mechanical/hydraulic |
|
|
Gear shifting problems: |
||
|
No forward movement only in O/D position |
201A |
301A |
|
No forward movement only in O/D position (all provisions) |
201B |
301B |
|
Only reverse gear missing |
202 |
302 |
|
Hard engagement of reverse gear only |
203 |
303 |
|
Hard engagement of reverse gear only |
204A |
304A |
|
Hard engagement of only manual 1st gear |
204B |
304B |
|
Delayed/soft engagement of reverse gear only |
205 |
305 |
|
Delayed/soft engagement of forward gears only |
206 |
306 |
|
Missing forward gear and reverse gear |
207 |
307 |
|
Hard engagement of forward and reverse gears |
208 |
308 |
|
Delayed engagement of forward and reverse gears |
209 |
309 |
|
Shift problems: |
||
|
Missing some/all broadcasts |
210 |
310 |
|
Shift Timing Problems: Early Shift (some/all transmissions) |
211 |
311 |
|
Shift Timing Problems: Erratic/Yawling Shift (some/all transmissions) |
212 |
312 |
|
Feel: Soft/Slipper Shift (some/all transmissions) |
213 |
313 |
|
Feel: hard shifting (some/all transmissions) |
214 |
314 |
|
Missing 1st gear in D range, upshifts |
215 |
315 |
|
Missing first gear in manual range "1" |
216 |
316 |
|
No manual second gear |
217 |
317 |
|
Torque converter clutch problems: |
||
|
Missing commissioning |
240 |
340 |
|
Always on/car stalls |
241 |
341 |
|
Cycling/Vibration/Jitter |
242 |
342 |
|
Other issues: |
||
|
High force on the gearshift lever |
251 |
351 |
|
External leaks |
252 |
352 |
|
Poor vehicle dynamics |
253 |
353 |
|
Noise/Vibration - Forward or Reverse gears |
254 |
354 |
|
Engine won't crank |
255 |
355 |
|
No parking range |
256 |
356 |
|
Overheating |
257 |
357 |
|
No engine braking in manual first gear range |
259 |
359 |
|
Liquid saturation with air or foaming |
261 |
361 |
|
Slip/jitter in manual 1st gear |
263 |
363 |
|
Slip/jitter in manual 2nd gear |
264 |
364 |
|
Slip/Jitter in 3rd gear |
282 |
382 |
|
No engine braking in all gears |
283 |
383 |
Shifting problems: No forward movement only in O/D
|
Possible element |
Referral/Action |
|
201A - ELECTRICAL PROGRAM |
|
|
Powertrain Management System |
|
|
Powertrain control module (PCM), vehicle wiring harness, shift solenoid valve (SSC) (off = low voltage). |
Perform on-board diagnostic checks. For information on PCM diagnostics and checks, refer to the Powertrain Management/Emissions Control System Diagnostic Manual (PCED). |
|
Perform Pinpoint Test A, refer to Pinpoint Test A. |
|
|
Make any necessary repairs. Clear DTCs, perform road test and OBD procedures. |
|
|
301A - HYDRAULIC / MECHANICAL PROGRAM |
|
|
Working fluid |
|
|
Wrong level |
Correct the level of the working fluid to the norm. |
|
State |
Perform a transmission fluid check as described in this section. |
|
Forward Clutch Assembly |
|
|
Damage to seals, piston |
|
|
Check the balancing baffle. |
Check for damage. Make any necessary repairs. |
|
Damaged or worn friction elements |
|
|
Damaged return springs |
|
|
Servo Block |
|
|
Seal damage (pistons and caps) |
Check for damage. Make any necessary repairs. |
|
Band brake |
|
|
Band brake damage |
|
|
Worn or damaged servo unit |
Check for damage. Make any necessary repairs. |
|
Incorrect adjustment |
|
|
Anchor bolt damage or wear |
|
|
Carter |
|
|
Damage |
Check for damage. Make any necessary repairs. |
Shifting problems: Missing ONLY forward movement (all provisions)
|
Possible element |
Referral/Action |
|
201B - ELECTRICAL PROGRAM |
|
|
Powertrain Management System |
|
|
PCM, vehicle wiring harness, SSC, SSD, and SSE. |
Perform the on-board diagnostic procedures. Refer to the PCED Manual for information on PCM diagnostics and checks. |
|
Perform Pinpoint Test A, refer to Pinpoint Test A. |
|
|
Make any necessary repairs. Clear DTCs, perform road test and OBD procedures. |
|
|
301B - HYDRAULIC / MECHANICAL PROGRAM |
|
|
Main control unit |
|
|
Bolt tightening not correct |
Tighten the bolts to the specified torque. |
|
Separation pad damage |
Check for damage. If there is damage, make the necessary repairs. |
|
Pollution |
Disassemble and clean. |
|
Damage, misassembly, missing, stuck valves/springs, or channel damage |
If damaged or missing items, install a new main control box. If there is an incorrect assembly, sort it out by assembling correctly. DO NOT finish with abrasive materials, saw or grind the valves. This will strip off the anodized finish and may result in more damage to the main control unit or the entire transaxle. |
|
Forward Clutch Assembly |
|
|
Damage to seals, piston |
|
|
Check the balancing baffle. |
Check for damage. Make any necessary repairs. |
|
Damaged or worn friction elements |
|
|
Damaged return springs |
|
|
Planetary Forward Drive Assembly |
|
|
Damage to planetary gear elements |
Check for damage. Make any necessary repairs. |
|
Low Gear Single-Acting Clutch |
|
|
Wear, damage or incorrect assembly |
Check for damage. Make any necessary repairs. |
Shifting problems: No reverse gear
|
Possible element |
Referral/Action |
|
202 - ELECTRICAL PROGRAM |
|
|
Powertrain Management System |
|
|
PCM, vehicle wiring harness, SSC, SSD and SSE. |
Perform the on-board diagnostic procedures. Refer to the PCED Manual for information on PCM diagnostics and checks. |
|
Perform Pinpoint tests A and D, refer to Pinpoint tests A and D. |
|
|
Make any necessary repairs. Clear DTCs, perform road test and OBD procedures. |
|
|
302 - HYDRAULIC / MECHANICAL PROGRAM |
|
|
Main control unit |
|
|
Bolt tightening not correct |
Tighten the bolts to the specified torque. |
|
Separation pad damage |
Check for damage. If there is damage, make the necessary repairs. |
|
Pollution |
Disassemble and clean. |
|
Damage, misassembly, missing, stuck valves/springs, or channel damage |
If damaged or missing items, install a new main control box. If there is an incorrect assembly, sort it out by assembling correctly. DO NOT finish with abrasive materials, saw or grind the valves. This will strip off the anodized finish and may result in more damage to the main control unit or the entire transaxle. |
|
Low/Reverse Clutch Assembly |
|
|
Damage to seals, piston |
|
|
Damaged or worn friction elements |
Check for damage. Make any necessary repairs. |
|
Damaged return springs |
|
|
Reverse clutch assembly |
|
|
Damage to seals, piston |
|
|
Check the balancing baffle. |
Check for damage. Make any necessary repairs. |
|
Damaged or worn friction elements |
|
|
Damaged return springs |
|
Problems when shifting gears. Hard engagement of reverse gear only
|
Possible element |
Referral/Action |
|
203 - ELECTRICAL PROGRAM |
|
|
Powertrain Management System |
|
|
PCM, vehicle wiring harness, SSD. |
Perform the on-board diagnostic procedures. Refer to the PCED Manual for information on PCM diagnostics and checks. |
|
Perform Pinpoint Test A, refer to Pinpoint Test A. |
|
|
Make any necessary repairs. Clear DTCs, perform road test and OBD procedures. |
|
|
303 - HYDRAULIC / MECHANICAL PROGRAM |
|
|
Incorrect pressure |
|
|
High pressure |
Check the pressure at the line test port. |
|
Perform a line pressure test; refer to the procedure presented in this section. Perform pressure diagnostics and make any necessary repairs. |
|
|
Main control unit |
|
|
Bolt tightening not correct |
Tighten the bolts to the specified torque. |
|
Separation pad damage |
Check for damage. If there is damage, make the necessary repairs. |
|
Pollution |
Disassemble and clean. |
|
Damage, misassembly, missing, stuck valves/springs, or channel damage |
If damaged or missing items, install a new main control box. If there is an incorrect assembly, sort it out by assembling correctly. DO NOT finish with abrasive materials, saw or grind the valves. This will strip off the anodized finish and may result in more damage to the main control unit or the entire transaxle. |
|
Low/Reverse Clutch Assembly |
|
|
Damage to seals, piston |
|
|
Damaged or worn friction elements |
Check for damage. Make any necessary repairs. |
|
Damaged return springs |
|
|
Reverse clutch assembly |
|
|
Damage to seals, piston |
|
|
Check the balancing baffle. |
Check for damage. Make any necessary repairs. |
|
Damaged or worn friction elements |
|
|
Damaged return springs |
|
Gear Shift Problems: Hard Engagement Only Forward Gears
|
Possible element |
Referral/Action |
|
204A - ELECTRICAL PROGRAM |
|
|
Powertrain Management System |
|
|
PCM, vehicle wiring harness and SSC. |
Perform the on-board diagnostic procedures. Refer to the PCED Manual for information on PCM diagnostics and checks. |
|
Perform Pinpoint Test A, refer to Pinpoint Test A. |
|
|
Make any necessary repairs. Clear DTCs, perform road test and OBD procedures. |
|
|
304A - HYDRAULIC / MECHANICAL PROGRAM |
|
|
Incorrect pressure |
|
|
High pressure |
Check the pressure at the line test port. Refer to the procedure provided in this section. Perform pressure diagnostics and make any necessary repairs. |
|
Main control unit |
|
|
Bolt tightening not correct |
Tighten the bolts to the specified torque. |
|
Separation pad damage |
Check for damage. If there is damage, make the necessary repairs. |
|
Pollution |
Disassemble and clean. |
|
Damage, misassembly, missing, stuck valves/springs, or channel damage |
If damaged or missing items, install a new main control box. If there is an incorrect assembly, sort it out by assembling correctly. DO NOT finish with abrasive materials, saw or grind the valves. This will strip off the anodized finish and may result in more damage to the main control unit or the entire transaxle. |
|
Forward Clutch Assembly |
|
|
Damage to seals, piston |
|
|
Damaged or worn friction elements |
Check for damage. Make any necessary repairs. |
|
Damaged return springs |
|
Gear Shift Problems: Hard Engagement Only Forward Gears
|
Possible element |
Referral/Action |
|
204V - ELECTRICAL PROGRAM |
|
|
Powertrain Management System |
|
|
PCM, vehicle wiring harness, turbine shaft speed sensor (TSS). |
Perform the on-board diagnostic procedures. Refer to the PCED Manual for information on PCM diagnostics and checks. |
|
Perform Pinpoint Test E, refer to Pinpoint Test E. |
|
|
Make any necessary repairs. Clear DTCs, perform road test and OBD procedures. |
|
|
304B - HYDRAULIC / MECHANICAL PROGRAM |
|
|
No hydraulic/mechanical problems |
|
Shifting problems: Delayed/soft shifting into reverse gear only
|
Possible element |
Referral/Action |
|
205 - ELECTRICAL PROGRAM |
|
|
Powertrain Management System |
|
|
PCM, vehicle wiring harness, SSD, PCA. |
Perform the on-board diagnostic procedures. Refer to the PCED Manual for information on PCM diagnostics and checks. |
|
Perform Pinpoint Test A, refer to Pinpoint Test A. |
|
|
Make any necessary repairs. Clear DTCs, perform road test and OBD procedures. |
|
|
305 - HYDRAULIC / MECHANICAL PROGRAM |
|
|
Incorrect pressure |
|
|
Low pressure |
Check the pressure at the line test port. |
|
Perform a line pressure test; refer to the procedure presented in this section. Perform pressure diagnostics and make any necessary repairs. |
|
|
Main control unit |
|
|
Bolt tightening not correct |
Tighten the bolts to the specified torque. |
|
Separation pad damage |
Check for damage. If there is damage, make the necessary repairs. |
|
Pollution |
Disassemble and clean. |
|
Damage, misassembly, missing, stuck valves/springs, or channel damage |
If damaged or missing items, install a new main control box. If there is an incorrect assembly, sort it out by assembling correctly. DO NOT finish with abrasive materials, saw or grind the valves. This will strip off the anodized finish and may result in more damage to the main control unit or the entire transaxle. |
|
Low/Reverse Clutch Assembly |
|
|
Damage to seals, piston |
|
|
Damaged or worn friction elements |
Check for damage. Make any necessary repairs. |
|
Damaged return springs |
|
Shifting Problems: Delayed/Soft Engagement of Forward Gears
|
Possible element |
Referral/Action |
|
206 - ELECTRICAL PROGRAM |
|
|
Powertrain Management System |
|
|
PCM, vehicle wiring harness, SSC, PCA. |
Perform the on-board diagnostic procedures. Refer to the PCED Manual for information on PCM diagnostics and checks. |
|
Perform Pinpoint Test A, refer to Pinpoint Test A. |
|
|
Make any necessary repairs. Clear DTCs, perform road test and OBD procedures. |
|
|
306 - HYDRAULIC / MECHANICAL PROGRAM |
|
|
Incorrect pressure |
|
|
Low pressure |
Check the pressure at the line test port. |
|
Perform a line pressure test; refer to the procedure presented in this section. Perform pressure diagnostics and make any necessary repairs. |
|
|
Main control unit |
|
|
Bolt tightening not correct |
Tighten the bolts to the specified torque. |
|
Separation pad damage |
Check for damage. If there is damage, make the necessary repairs. |
|
Pollution |
Disassemble and clean. |
|
Damage, misassembly, missing, stuck valves/springs, or channel damage |
If damaged or missing items, install a new main control box. If there is an incorrect assembly, sort it out by assembling correctly. DO NOT finish with abrasive materials, saw or grind the valves. This will strip off the anodized finish and may result in more damage to the main control unit or the entire transaxle. |
|
Forward Clutch Assembly |
|
|
Damage to seals, piston |
|
|
Damaged or worn friction elements |
Check for damage. Make any necessary repairs. |
|
Damaged return springs |
|
Shifting problems: Missing forward gear and reverse gear
|
Possible element |
Referral/Action |
|
207 - ELECTRICAL PROGRAM |
|
|
Powertrain Management System |
|
|
PCM and vehicle wiring harnesses (the absence of electrical activity by default equates to a malfunction of the third gear). |
Perform the on-board diagnostic procedures. Refer to the PCED Manual for information on PCM diagnostics and checks. |
|
Make any necessary repairs. Clear DTCs, perform road test and OBD procedures. |
|
|
307 - HYDRAULIC / MECHANICAL PROGRAM |
|
|
Working fluid |
|
|
Wrong level |
Correct the level of the working fluid to normal; refer to the procedure given in this section. |
|
State |
Perform the "Transmission Fluid Check" as described in this section. |
|
Shift Cable/Transmission Range Sensor (TR) |
|
|
Damage, misalignment of cable system or TR sensor |
Inspect and make any necessary repairs. Refer to Section 307-05 for shift cable information. Refer to this section for information on the TR sensor. |
|
Main control unit |
|
|
Bolt tightening not correct |
Tighten the bolts to the specified torque. |
|
Separation pad damage |
Check for damage. If there is damage, make the necessary repairs. |
|
Pollution |
Disassemble and clean. |
|
Damage, misassembly, missing, stuck valves/springs, or channel damage |
If damaged or missing items, install a new main control box. If there is an incorrect assembly, sort it out by assembling correctly. DO NOT finish with abrasive materials, saw or grind the valves. This will strip off the anodized finish and may result in more damage to the main control unit or the entire transaxle. |
|
Turbine Shaft |
|
|
Damage |
Check for damage. If there is damage, make the necessary repairs. |
|
Fluid pump assembly |
|
|
Bolt tightening not correct |
Tighten the bolts to the specified torque. |
|
Gasket damage |
Check for damage. If there is damage, make the necessary repairs. |
|
Porosity, cross-leakage, blockage of holes. |
|
|
Rear planetary gear assembly |
|
|
Damage to planetary gear elements |
Check for damage. If there is damage, make the necessary repairs. |
|
Forward Clutch Assembly |
|
|
Damage to seals, piston |
|
|
Damaged or worn friction elements |
Check for damage. Make any necessary repairs. |
|
Damaged return springs |
|
|
Planetary Forward Drive Assembly |
|
|
Damage to planetary gear elements |
Check for damage. If there is damage, make the necessary repairs. |
|
Final drive and differential |
|
|
Damage |
Check for damage. If there is damage, make the necessary repairs. |
|
Torque converter |
|
|
Damaged elastic plate or adapter plate |
Check for damage. Perform torque converter checks; refer to the procedures provided in this section. Make any necessary repairs. |
|
Impeller hub damage |
|
|
Turbine hub damage |
|
|
Low Gear Single-Acting Clutch |
|
|
Wear, damage or incorrect assembly |
Check for damage. Make any necessary repairs. |
Shifting problems: Hard shifting into forward and reverse gears
|
Possible element |
Referral/Action |
|
208 - ELECTRICAL PROGRAM |
|
|
Powertrain Management System |
|
|
PCM, vehicle wiring harnesses, TR sensor, transmission fluid temperature sensor (TFT), SSC and SSD. |
Perform the on-board diagnostic procedures. Refer to the PCED Manual for information on PCM diagnostics and checks. |
|
Do Pinpoint tests A, B and C, refer to Pinpoint tests A, B and C. |
|
|
Make any necessary repairs. Clear DTCs, perform road test and OBD procedures. |
|
|
308 - HYDRAULIC / MECHANICAL PROGRAM |
|
|
Working fluid |
|
|
Wrong level |
Correct the level of the working fluid to normal; refer to the procedure given in this section. |
|
State |
Perform the "Transmission Fluid Check" as described in this section. |
|
Incorrect pressure |
|
|
High pressure |
Check the pressure at the line test port. |
|
Perform a line pressure test; refer to the procedure presented in this section. Perform pressure diagnostics and make any necessary repairs. |
|
|
Main control unit |
|
|
Bolt tightening not correct |
Tighten the bolts to the specified torque. |
|
Separation pad damage |
Check for damage. If there is damage, make the necessary repairs. |
|
Pollution |
Disassemble and clean. |
|
Damage, misassembly, missing, stuck valves/springs, or channel damage |
If damaged or missing items, install a new main control box. If there is an incorrect assembly, sort it out by assembling correctly. DO NOT finish with abrasive materials, saw or grind the valves. This will strip off the anodized finish and may result in more damage to the main control unit or the entire transaxle. |
|
Forward Clutch Assembly |
|
|
Damage to seals, piston |
|
|
Damaged or worn friction elements |
Check for damage. Make any necessary repairs. |
|
Damaged return springs |
|
|
Reverse and low/reverse clutch assemblies |
|
|
Damage to seals, piston |
|
|
Check the balancing baffle. |
|
|
Damaged or worn friction elements |
Check for damage. Make any necessary repairs. |
|
Damaged return springs |
|
|
Single acting clutch |
|
Shifting Problems: Delayed/Soft Engagement of Forward and Reverse Gears
|
Possible element |
Referral/Action |
|
209 - ELECTRICAL PROGRAM |
|
|
Powertrain Management System |
|
|
PCM, vehicle wiring harnesses, TR sensor, TFT sensor, SSC and SSD. |
Perform the on-board diagnostic procedures. Refer to the PCED Manual for information on PCM diagnostics and checks. |
|
Do Pinpoint tests A, B and C, refer to Pinpoint tests A, B and C. |
|
|
Make any necessary repairs. Clear DTCs, perform road test and OBD procedures. |
|
|
309 - HYDRAULIC / MECHANICAL PROGRAM |
|
|
Working fluid |
|
|
Wrong level |
Adjust the level; refer to the procedure presented in this section. |
|
State |
Check the condition of the working fluid; refer to the procedure presented in this section. |
|
Incorrect pressure |
|
|
High pressure |
Check the pressure at the line test port. |
|
Perform a line pressure test; refer to the procedure presented in this section. Perform pressure diagnostics and make any necessary repairs. |
|
|
Main control unit |
|
|
Bolt tightening not correct |
Tighten the bolts to the specified torque. |
|
Separation pad damage |
Check for damage. If there is damage, make the necessary repairs. |
|
Pollution |
Disassemble and clean. |
|
Damage, misassembly, missing, stuck valves/springs, or channel damage |
If damaged or missing items, install a new main control box. If there is an incorrect assembly, sort it out by assembling correctly. DO NOT finish with abrasive materials, saw or grind the valves. This will strip off the anodized finish and may result in more damage to the main control unit or the entire transaxle. |
|
Fluid pump assembly |
|
|
Bolt tightening not correct |
Tighten the bolts to the specified torque. |
|
Gasket damage |
Check for damage. If there is damage, make the necessary repairs. |
|
Porosity, cross-leakage, blockage of holes. |
|
Shift problems: Skipping some/all gears (ONLY IN AUTOMATIC MODE)
|
Possible element |
Referral/Action |
|
210 - ELECTRICAL PROGRAM |
|
|
Powertrain Management System |
|
|
PCM, vehicle wiring harnesses, TR sensor, intake manifold air temperature sensor (IAT), vehicle speed sensor input (VSS), SSA, SSB, SSC, SSD, SSE and pressure control solenoid valve (PCA) |
Perform the on-board diagnostic procedures. Refer to the PCED Manual for information on PCM diagnostics and checks. |
|
Perform Pinpoint tests A, C, D and E, refer to Pinpoint tests A, C, D and E. |
|
|
Make any necessary repairs. Clear DTCs, perform road test and OBD procedures. |
|
|
310 - HYDRAULIC / MECHANICAL PROGRAM |
|
|
Skip when shifting ONLY some gears |
|
|
If only some gears are skipped when shifting, determine which particular shift (switching) absent. |
|
|
For more information, see Chap. "Problems of not shifting", programs: 220/320 "Missing shift 1-2", 221/321 "Missing shift 2-3", 222/322 "Missing shift 3-4", 223/323 "Missing shift 4- 3", 224/334 "3-2 switch missing", 225/325 "2-1 switch missing". |
|
|
Working fluid |
|
|
Wrong level |
Adjust the level; refer to the procedure presented in this section. |
|
State |
Check the condition of the working fluid; refer to the procedure presented in this section. |
|
Shift Cable/Transmission Range Sensor (TR) |
|
|
Damage, misalignment of cable system or TR sensor |
Inspect and make any necessary repairs. Refer to Section 307-05 for shift cable information. Refer to this section for information on the TR sensor. |
|
Incorrect pressure |
|
|
High/low pressure |
Check the pressure at the line test port. |
|
Perform a line pressure test; refer to the procedure presented in this section. Perform pressure diagnostics and make any necessary repairs. |
|
|
Main control unit |
|
|
Bolt tightening not correct |
Tighten the bolts to the specified torque. |
|
Separation pad damage |
Check for damage. If there is damage, make the necessary repairs. |
|
Pollution |
Disassemble and clean. |
|
Damage, misassembly, missing, stuck valves/springs, or channel damage |
If damaged or missing items, install a new main control box. If there is an incorrect assembly, sort it out by assembling correctly. DO NOT finish with abrasive materials, saw or grind the valves. This will strip off the anodized finish and may result in more damage to the main control unit or the entire transaxle. |
|
Fluid pump assembly |
|
|
Bolt tightening not correct |
Tighten the bolts to the specified torque. |
|
Gasket damage |
Check for damage. If there is damage, make the necessary repairs. |
|
Porosity, cross-leakage, blockage of holes. |
|
|
Direct Clutch Assembly |
|
|
Damage to seals, piston |
|
|
Check the balancing baffle. |
Check for damage. Make any necessary repairs. |
|
Damaged or worn friction elements |
|
|
Damaged return springs |
|
|
Forward Clutch Assembly |
|
|
Damage to seals, piston |
|
|
Check the balancing baffle. |
Check for damage. Make any necessary repairs. |
|
Damaged or worn friction elements |
|
|
Damaged return springs |
|
|
Single-acting coupling |
|
|
Wear, damage or incorrect assembly |
Check for damage. Make any necessary repairs. |
|
Servo Block |
|
|
Damage to the retaining ring of the servo unit |
Check for damage. Make any necessary repairs. |
Shift problems: Shift Timing Problems - Early/Late Shift
|
Possible element |
Referral/Action |
|
211 - ELECTRICAL PROGRAM |
|
|
Powertrain Management System |
|
|
PCM, vehicle harnesses, VSS, TSS sensor, SSA, SSB, SSC, SSD, SSE and VFS. |
Perform the on-board diagnostic procedures. Refer to PCED manual and check PCM and TSS sensor. |
|
Perform Pinpoint Test E, refer to Pinpoint Test E. |
|
|
Make any necessary repairs. Clear DTCs, perform road test and OBD procedures. |
|
|
311 - HYDRAULIC / MECHANICAL PROGRAM |
|
|
Early/late shifting of some gears only |
|
|
If only some switches occur early/late, determine which specific switch (I) happens early/late. |
|
|
For more information on early/late shift problems, refer to the following programs: 226/326 "Soft/Slip Shift 1-2", 227/327 "Soft/Slip Shift 2-3", 228/328 " Soft/Slip Shift 3-4", 229/329 "Soft/Slip Shift 4-3", 230/330 "Soft/Slip Shift 3-2", 231/331 "Soft/Slip Shift 2-1". |
|
|
Working fluid |
|
|
Wrong level |
Adjust the level; refer to the procedure presented in this section. |
|
State |
Check the condition of the working fluid; refer to the procedure presented in this section. |
|
Main control unit |
|
|
Bolt tightening not correct |
Tighten the bolts to the specified torque. |
|
Separation pad damage |
Check for damage. If there is damage, make the necessary repairs. |
|
Pollution |
Disassemble and clean. |
|
Damage, misassembly, missing, stuck valves/springs, or channel damage |
If damaged or missing items, install a new main control box. If there is an incorrect assembly, sort it out by assembling correctly. DO NOT finish with abrasive materials, saw or grind the valves. This will strip off the anodized finish and may result in more damage to the main control unit or the entire transaxle. |
|
Servo Block |
|
|
Damage to the retaining ring of the servo unit |
Check for damage. Make any necessary repairs. |
|
Seal damage (pistons and caps) |
|
|
Band brake |
|
|
Band brake damage |
|
|
Worn or damaged servo unit |
Check for damage. Make any necessary repairs. |
|
Incorrect adjustment |
|
|
Anchor bolt damage or wear |
|
Shift problems: Shift timing problems: erratic/ «prowling» switching
|
Possible element |
Referral/Action |
|
212 - ELECTRICAL PROGRAM |
|
|
Powertrain Management System |
|
|
PCM, vehicle wiring harness, VSS and IAT sensor |
Perform the on-board diagnostic procedures. Refer to the PCED Manual for information on PCM and TSS sensor diagnostics and checks. |
|
Perform Pinpoint Test E, refer to Pinpoint Test E. |
|
|
Make any necessary repairs. Clear DTCs, perform road test and OBD procedures. |
|
|
312 - HYDRAULIC / MECHANICAL PROGRAM |
|
|
Working fluid |
|
|
Wrong level |
Adjust the level; refer to the procedure presented in this section. |
|
State |
Check the condition of the working fluid; refer to the procedure presented in this section. |
|
Main control unit |
|
|
Bolt tightening not correct |
Tighten the bolts to the specified torque. |
|
Separation pad damage |
Check for damage. If there is damage, make the necessary repairs. |
|
Pollution |
Disassemble and clean. |
|
Damage, misassembly, missing, stuck valves/springs, or channel damage |
If damaged or missing items, install a new main control box. If there is an incorrect assembly, sort it out by assembling correctly. DO NOT finish with abrasive materials, saw or grind the valves. This will strip off the anodized finish and may result in more damage to the main control unit or the entire transaxle. |
|
Additional diagnostics |
|
|
Refer to the Reference/Action column for more information on Shift Timing Diagnostics. |
Refer to the following program for specific switching information (am): changeover 1-2 - see program 220/330, changeover 2-3 - see program 221/331, changeover 3-4 - see program 222/332, changeover 4-3 - changeover 3-2 - changeover 2- 1 - soft/slip shift 1-2 - see Program 226/326 soft/slip shift 2-3 - see Program 227/327 soft/slip shift 3-4 - see Program 228/328 soft/slip shifting 4-3 - see Program 229/329, soft/slip shifting 3-2 - soft/slip shifting 2-1 - hard shifting 1-2 - see Program 232/332, hard shifting 2-3 - see Program 233/333 hard shift 3-4 - see Program 224/334 hard shift 4-3 - see Program 235/335 hard shift 3-2 - see Program 236/336 hard shift 2-1 |
Shifting problems: Feel: Soft/slippery shifting
|
Possible element |
Referral/Action |
|
213 - ELECTRICAL PROGRAM |
|
|
Powertrain Management System |
|
|
PCM, vehicle wiring harnesses, TFT sensor, IAT sensor, VSS input, SSA, SSB, SSC, SSD, SSE, VFS and PCA. |
Perform the on-board diagnostic procedures. Refer to the PCED Manual for information on diagnosing and testing the PCM, IAT sensor and VSS. |
|
Perform Pinpoint tests A, B, D and E, refer to Pinpoint tests A, B, D and E. |
|
|
Make any necessary repairs. Clear DTCs, perform road test and OBD procedures. |
|
|
313 - HYDRAULIC / MECHANICAL PROGRAM |
|
|
Soft/slip shifting ONLY some gears |
|
|
If only some shifts are soft/slip, determine which shift (I) has a soft/slip character. |
|
|
For more information on soft shift/slip shift problems, refer to the following programs: 226/326 Soft/Slip Shift 1-2, 227/327 Soft/Slip Shift 2-3, 228/328 " Soft/Slip Shift 3-4", 229/329 "Soft/Slip Shift 4-3", 230/330 "Soft/Slip Shift 3-2", 231/331 "Soft/Slip Shift 2-1". |
|
|
Working fluid |
|
|
Wrong level |
Adjust the level; refer to the procedure presented in this section. |
|
State |
Check the condition of the working fluid; refer to the procedure presented in this section. |
|
Incorrect pressure |
|
|
High/low pressure |
Check the pressure at the line test port. |
|
Perform a line pressure test; refer to the procedure presented in this section. Perform pressure diagnostics and make any necessary repairs. |
|
|
Main control unit |
|
|
Bolt tightening not correct |
Tighten the bolts to the specified torque. |
|
Separation pad damage |
Check for damage. If there is damage, make the necessary repairs. |
|
Pollution |
Disassemble and clean. |
|
Damage, misassembly, missing, stuck valves/springs, or channel damage |
If damaged or missing items, install a new main control box. If there is an incorrect assembly, sort it out by assembling correctly. DO NOT finish with abrasive materials, saw or grind the valves. This will strip off the anodized finish and may result in more damage to the main control unit or the entire transaxle. |
|
Fluid pump assembly |
|
|
Bolt tightening not correct |
Tighten the bolts to the specified torque. |
|
Gasket damage |
Check for damage. Make any necessary repairs. |
|
Porosity, cross-leakage, blockage of holes. |
|
|
Intermediate Servo Block |
|
|
Damage to the retaining ring of the servo unit |
Check for damage. Make any necessary repairs. |
|
Seal damage (pistons and caps) |
|
|
Intermediate band brake |
|
|
Band brake damage |
|
|
Worn or damaged servo unit |
Check for damage. Make any necessary repairs. |
|
Incorrect adjustment |
|
|
Anchor bolt damage or wear |
|
|
Direct Clutch Assembly |
|
|
Damage to seals, piston |
|
|
Check the balancing baffle. |
Check for damage. Make any necessary repairs. |
|
Damaged or worn friction elements |
|
|
Damaged return springs |
|
|
Forward Clutch Assembly |
|
|
Damage to seals, piston |
|
|
Check the balancing baffle. |
Check for damage. Make any necessary repairs. |
|
Damaged or worn friction elements |
|
|
Damaged return springs |
|
|
Carter |
|
|
Damage |
Check for damage. Make any necessary repairs. |
Shifting problems: Feeling: hard shifting (some/all)
|
Possible element |
Referral/Action |
|
214 - ELECTRICAL PROGRAM |
|
|
Powertrain Management System |
|
|
PCM, vehicle wiring harnesses, TR sensor, TFT sensor, IAT sensor, VSS input, SSA, SSB, SSC, SSD,SSE and PCA |
Perform the on-board diagnostic procedures. Refer to the PCED Manual for information on diagnosing and testing the PCM, IAT sensor and VSS. |
|
Perform Pinpoint tests A, B, C, D and E, refer to Pinpoint tests A, B, C, D and E. |
|
|
Make any necessary repairs. Clear DTCs, perform road test and OBD procedures. |
|
|
314 - HYDRAULIC / MECHANICAL PROGRAM |
|
|
Hard shifting only some gears |
|
|
If only some shifts are hard, determine which shift (I) has a rigid character. |
|
|
For more information on hard shift problems, refer to the following programs: 232/332 Hard Shift 1-2, 233/333 Hard Shift 2-3, 234/334 Hard Shift 3-4, 235/335 Hard Shift 4-3, 236/336 Hard Shift 3-2, 237/337 Hard Shift 2-1. |
|
|
Incorrect pressure |
|
|
High/low pressure |
Check the pressure at the line test port. |
|
Perform a line pressure test; refer to the procedure presented in this section. Perform pressure diagnostics and make any necessary repairs. |
|
|
Main control unit |
|
|
Bolt tightening not correct |
Tighten the bolts to the specified torque. |
|
Separation pad damage |
Check for damage. If there is damage, make the necessary repairs. |
|
Pollution |
Disassemble and clean. |
|
Damage, misassembly, missing, stuck valves/springs, or channel damage |
If damaged or missing items, install a new main control box. If there is an incorrect assembly, sort it out by assembling correctly. DO NOT finish with abrasive materials, saw or grind the valves. This will strip off the anodized finish and may result in more damage to the main control unit or the entire transaxle. |
|
Input shaft |
|
|
Damage |
Check for damage. Make any necessary repairs. |
|
Servo Block |
|
|
Damage to the retaining ring of the servo unit |
Check for damage. Make any necessary repairs. |
|
Seal damage (pistons and caps) |
|
|
Band brake |
|
|
Band brake damage |
|
|
Worn or damaged servo unit |
Check for damage. Make any necessary repairs. |
|
Incorrect adjustment |
|
|
Anchor bolt damage or wear |
|
|
Forward Clutch Assembly |
|
|
Damage to seals, piston |
|
|
Check the balancing baffle. |
Check for damage. Make any necessary repairs. |
|
Damaged or worn friction elements |
|
|
Damaged return springs |
|
|
Final drive and differential |
|
|
Damage |
Check for damage. Make any necessary repairs. |
|
Carter |
|
|
Damage |
Check for damage. Make any necessary repairs. |
Shift problems: No first gear in position «D», shifts to a higher gear
|
Possible element |
Referral/Action |
|
215 - ELECTRICAL PROGRAM |
|
|
Powertrain Management System |
|
|
PCM, vehicle wiring harnesses, TR sensor and SSC. |
Perform the on-board diagnostic procedures. Refer to the PCED Manual for information on PCM diagnostics and checks. |
|
Perform Pinpoint tests A and C, refer to Pinpoint tests A and C. |
|
|
Make any necessary repairs. Clear DTCs, perform road test and OBD procedures. |
|
|
315 - HYDRAULIC / MECHANICAL PROGRAM |
|
|
Incorrect pressure |
|
|
High/low pressure |
Check the pressure at the line test port. |
|
To determine which gears are engaged, refer to the Band Brake/Clutch Chart given in this section. To resolve the lack of gear shifting, refer to the diagnostic programs. |
|
|
Main control unit |
|
|
Bolt tightening not correct |
Tighten the bolts to the specified torque. |
|
Separation pad damage |
Check for damage. If there is damage, make the necessary repairs. |
|
Pollution |
Disassemble and clean. |
|
Damage, misassembly, missing, stuck valves/springs, or channel damage |
If damaged or missing items, install a new main control box. If there is an incorrect assembly, sort it out by assembling correctly. DO NOT finish with abrasive materials, saw or grind the valves. This will strip off the anodized finish and may result in more damage to the main control unit or the entire transaxle. |
|
Low Gear Single-Acting Clutch |
|
|
Wear, damage or incorrect assembly |
Check for damage. Make any necessary repairs. |
Shift problems: Missing first gear in manual range «1»
|
Possible element |
Referral/Action |
|
216 - ELECTRICAL PROGRAM |
|
|
Powertrain Management System |
|
|
PCM and vehicle wiring harnesses |
Perform the on-board diagnostic procedures. Refer to the PCED Manual for information on PCM diagnostics and checks. |
|
Make any necessary repairs. Clear DTCs, perform road test and OBD procedures. |
|
|
316 - HYDRAULIC / MECHANICAL PROGRAM |
|
|
Incorrect pressure |
|
|
High/low pressure |
Check the pressure at the line test port. |
|
To determine which gears are engaged, refer to the Band Brake/Clutch Chart given in this section. To resolve the lack of gear shifting, refer to the diagnostic programs. |
|
|
Main control unit |
|
|
Bolt tightening not correct |
Tighten the bolts to the specified torque. |
|
Separation pad damage |
Check for damage. If there is damage, make the necessary repairs. |
|
Pollution |
Disassemble and clean. |
|
Damage, misassembly, missing, stuck valves/springs, or channel damage |
If damaged or missing items, install a new main control box. If there is an incorrect assembly, sort it out by assembling correctly. DO NOT finish with abrasive materials, saw or grind the valves. This will strip off the anodized finish and may result in more damage to the main control unit or the entire transaxle. |
|
Low/Reverse Clutch Assembly |
|
|
Seals |
|
|
Damaged or worn friction elements |
Check for damage. If there is damage, make the necessary repairs. |
|
Damaged return springs |
|
|
O/D planetary gear assembly |
|
|
Damage to planetary gear elements |
Check for damage. If there is damage, make the necessary repairs. |
Shift problems: No manual 2nd gear
|
Possible element |
Referral/Action |
|
217 - ELECTRICAL PROGRAM |
|
|
Powertrain Management System |
|
|
PCM, vehicle wiring harnesses and SSD |
Perform the on-board diagnostic procedures. Refer to the PCED Manual for information on PCM diagnostics and checks. |
|
Perform Pinpoint Test A, refer to Pinpoint Test A. |
|
|
Make any necessary repairs. Clear DTCs, perform road test and OBD procedures. |
|
|
317 - HYDRAULIC / MECHANICAL PROGRAM |
|
|
Incorrect pressure |
|
|
High/low pressure |
Check the pressure at the line test port. |
|
Perform a line pressure test; refer to the procedure presented in this section. Perform pressure diagnostics and make any necessary repairs. |
|
|
Main control unit |
|
|
Bolt tightening not correct |
Tighten the bolts to the specified torque. |
|
Separation pad damage |
Check for damage. If there is damage, make the necessary repairs. |
|
Pollution |
Disassemble and clean. |
|
Damage, misassembly, missing, stuck valves/springs, or channel damage |
If damaged or missing items, install a new main control box. If there is an incorrect assembly, sort it out by assembling correctly. DO NOT finish with abrasive materials, saw or grind the valves. This will strip off the anodized finish and may result in more damage to the main control unit or the entire transaxle. |
|
Servo Block |
|
|
Damage to the retaining ring of the servo unit |
Check for damage. Make any necessary repairs. |
|
Seal damage (pistons and caps) |
|
|
Band brake |
|
|
Band brake damage |
|
|
Worn or damaged servo unit |
Check for damage. Make any necessary repairs. |
|
Incorrect adjustment |
|
|
Anchor bolt damage or wear |
|
|
Low/Direct Single Acting Clutch |
|
|
Wear, damage or incorrect assembly |
Check for damage. Make any necessary repairs. |
Shift Problems: Missing Shift 1-2
|
Possible element |
Referral/Action |
|
220 - ELECTRICAL PROGRAM |
|
|
Powertrain Management System |
|
|
PCM, vehicle wiring harnesses, VSS, TR sensor, TSS sensor and SSD. |
Perform the on-board diagnostic procedures. Refer to the PCED Manual for information on diagnosing and testing the PCM, IAT sensor and VSS. |
|
Perform Pinpoint tests A, C and E, refer to Pinpoint tests A, C and E. |
|
|
Make any necessary repairs. Clear DTCs, perform road test and OBD procedures. |
|
|
320 - HYDRAULIC / MECHANICAL PROGRAM |
|
|
Working fluid |
|
|
Wrong level |
Adjust the level; refer to the procedure presented in this section. |
|
Incorrect pressure |
|
|
High/low pressure |
Check the pressure at the line test port. |
|
Perform a line pressure test; refer to the procedure presented in this section. Perform pressure diagnostics and make any necessary repairs. |
|
|
Main control unit |
|
|
Bolt tightening not correct |
Tighten the bolts to the specified torque. |
|
Separation pad damage |
Check for damage. If there is damage, make the necessary repairs. |
|
Pollution |
Disassemble and clean. |
|
Damage, misassembly, missing, stuck valves/springs, or channel damage |
If damaged or missing items, install a new main control box. If there is an incorrect assembly, sort it out by assembling correctly. DO NOT finish with abrasive materials, saw or grind the valves. This will strip off the anodized finish and may result in more damage to the main control unit or the entire transaxle. |
|
Servo Block |
|
|
Seal damage (pistons and caps) |
Check for damage. Make any necessary repairs. |
|
Band brake |
|
|
Band brake damage |
|
|
Worn or damaged servo unit |
Check for damage. Make any necessary repairs. |
|
Incorrect adjustment |
|
|
Anchor bolt damage or wear |
|
|
O/D planetary gear assembly |
|
|
Planetary gear damage |
Check for damage. If there is damage, make the necessary repairs. |
|
Forward Clutch Assembly |
|
|
Damage to seals, piston |
|
|
Check the balancing baffle. |
Check for damage. Make any necessary repairs. |
|
Damaged or worn friction elements |
|
|
Damaged return springs |
|
Shift Problems: No Shift 2-3
|
Possible element |
Referral/Action |
|
221 - ELECTRICAL PROGRAM |
|
|
Powertrain Management System |
|
|
PCM, vehicle wiring harnesses, TR sensor, VSS, SSD and SSE |
Perform the on-board diagnostic procedures. Refer to the PCED Manual for information on PCM diagnostics and checks. |
|
Perform Pinpoint tests A, C and E, refer to Pinpoint tests A, C and E. |
|
|
Make any necessary repairs. Clear DTCs, perform road test and OBD procedures. |
|
|
321 - HYDRAULIC / MECHANICAL PROGRAM |
|
|
Incorrect pressure |
|
|
High/low pressure |
Check the pressure at the line test port. |
|
Perform a line pressure test; refer to the procedure presented in this section. Perform pressure diagnostics and make any necessary repairs. |
|
|
Main control unit |
|
|
Bolt tightening not correct |
Tighten the bolts to the specified torque. |
|
Separation pad damage |
Check for damage. If there is damage, make the necessary repairs. |
|
Pollution |
Disassemble and clean. |
|
Damage, misassembly, missing, stuck valves/springs, or channel damage |
If damaged or missing items, install a new main control box. If there is an incorrect assembly, sort it out by assembling correctly. DO NOT finish with abrasive materials, saw or grind the valves. This will strip off the anodized finish and may result in more damage to the main control unit or the entire transaxle. |
|
Servo Block |
|
|
Seals. |
Check for damage. Make any necessary repairs. |
|
Forward Clutch Assembly |
|
|
Damage to seals, piston |
|
|
Check the balancing baffle. |
Check for damage. Make any necessary repairs. |
|
Damaged or worn friction elements |
|
|
Damaged return springs |
|
|
Intermediate clutch assembly |
|
|
Damage to seals, piston |
|
|
Check the balancing baffle. |
Check for damage. Make any necessary repairs. |
|
Damaged or worn friction elements |
|
|
Damaged return springs |
|
Shift Problems: No Shift 3-4
|
Possible element |
Referral/Action |
|
222 - ELECTRICAL PROGRAM |
|
|
Powertrain Management System |
|
|
PCM, vehicle wiring harnesses, TR sensor, VSS, SSC and SSA. |
Perform the on-board diagnostic procedures. Refer to the PCED Manual for information on PCM diagnostics and checks. |
|
Perform Pinpoint tests A, C and E, refer to Pinpoint tests A, C and E. |
|
|
Make any necessary repairs. Clear DTCs, perform road test and OBD procedures. |
|
|
322 - HYDRAULIC / MECHANICAL PROGRAM |
|
|
Incorrect pressure |
|
|
High/low pressure |
Check the pressure at the line test port. |
|
Perform a line pressure test; refer to the procedure presented in this section. Perform pressure diagnostics and make any necessary repairs. |
|
|
Main control unit |
|
|
Bolt tightening not correct |
Tighten the bolts to the specified torque. |
|
Separation pad damage |
Check for damage. If there is damage, make the necessary repairs. |
|
Pollution |
Disassemble and clean. |
|
Damage, misassembly, missing, stuck valves/springs, or channel damage |
If damaged or missing items, install a new main control box. If there is an incorrect assembly, sort it out by assembling correctly. DO NOT finish with abrasive materials, saw or grind the valves. This will strip off the anodized finish and may result in more damage to the main control unit or the entire transaxle. |
|
Forward Clutch Assembly |
|
|
Damage to seals, piston |
|
|
Check the balancing baffle. |
Check for damage. Make any necessary repairs. |
|
Damaged or worn friction elements |
|
|
Damaged return springs |
|
|
Servo Block |
|
|
Band brake |
Check for damage. Make any necessary repairs. |
Shift Problems: No Shift 4-3
|
Possible element |
Referral/Action |
|
223 - ELECTRICAL PROGRAM |
|
|
Powertrain Management System |
|
|
PCM, vehicle wiring harnesses, TR sensor, VSS, SSA and SSC. |
Perform the on-board diagnostic procedures. Refer to the PCED Manual for information on PCM diagnostics and checks. |
|
Perform Pinpoint tests A, C and E, refer to Pinpoint tests A, C and E. |
|
|
Make any necessary repairs. Clear DTCs, perform road test and OBD procedures. |
|
|
323 - HYDRAULIC / MECHANICAL PROGRAM |
|
|
Incorrect pressure |
|
|
High/low pressure |
Check the pressure at the line test port. |
|
Perform a line pressure test; refer to the procedure presented in this section. Perform pressure diagnostics and make any necessary repairs. |
|
|
Main control unit |
|
|
Bolt tightening not correct |
Tighten the bolts to the specified torque. |
|
Separation pad damage |
Check for damage. If there is damage, make the necessary repairs. |
|
Pollution |
Disassemble and clean. |
|
Damage, misassembly, missing, stuck valves/springs, or channel damage |
If damaged or missing items, install a new main control box. If there is an incorrect assembly, sort it out by assembling correctly. DO NOT finish with abrasive materials, saw or grind the valves. This will strip off the anodized finish and may result in more damage to the main control unit or the entire transaxle. |
|
Forward Clutch Assembly |
|
|
Damage to seals, piston |
|
|
Check the balancing baffle. |
Check for damage. Make any necessary repairs. |
|
Damaged or worn friction elements |
|
|
Damaged return springs |
|
|
Servo Block |
|
|
Seal |
Check for damage. Make any necessary repairs. |
Shift Problems: No Shift 3-2
|
Possible element |
Referral/Action |
|
224 - ELECTRICAL PROGRAM |
|
|
Powertrain Management System |
|
|
PCM, vehicle wiring harnesses, TR sensor, VSS and SSE. |
Perform the on-board diagnostic procedures. Refer to the PCED Manual for information on PCM diagnostics and checks. |
|
Perform Pinpoint tests A, C and E, refer to Pinpoint tests A, C and E. |
|
|
Make any necessary repairs. Clear DTCs, perform road test and OBD procedures. |
|
|
324 - HYDRAULIC / MECHANICAL PROGRAM |
|
|
Incorrect pressure |
|
|
High/low pressure |
Check the pressure at the line test port. |
|
Perform a line pressure test; refer to the procedure presented in this section. Perform pressure diagnostics and make any necessary repairs. |
|
|
Main control unit |
|
|
Bolt tightening not correct |
Tighten the bolts to the specified torque. |
|
Separation pad damage |
Check for damage. If there is damage, make the necessary repairs. |
|
Pollution |
Disassemble and clean. |
|
Damage, misassembly, missing, stuck valves/springs, or channel damage |
If damaged or missing items, install a new main control box. If there is an incorrect assembly, sort it out by assembling correctly. DO NOT finish with abrasive materials, saw or grind the valves. This will strip off the anodized finish and may result in more damage to the main control unit or the entire transaxle. |
|
Servo Block |
|
|
Seal damage (pistons and caps) |
Check for damage. Make any necessary repairs. |
|
Band brake |
|
|
Band brake damage |
|
|
Worn or damaged servo unit |
Check for damage. Make any necessary repairs. |
|
Incorrect adjustment |
|
|
Anchor bolt damage or wear |
|
|
Direct Clutch Assembly |
|
|
Damage to seals, piston |
|
|
Check the balancing baffle. |
Check for damage. Make any necessary repairs. |
|
Damaged or worn friction elements |
|
|
Damaged return springs |
|
Shift Problems: Missing Shift 2-1
|
Possible element |
Referral/Action |
|
225 - ELECTRICAL PROGRAM |
|
|
Powertrain Management System |
|
|
PCM, vehicle wiring harnesses, TR sensor, VSS and SSD. |
Perform the on-board diagnostic procedures. Refer to the PCED Manual for information on PCM diagnostics and checks. |
|
Perform Pinpoint tests A, C and E, refer to Pinpoint tests A, C and E. |
|
|
Make any necessary repairs. Clear DTCs, perform road test and OBD procedures. |
|
|
325 - HYDRAULIC / MECHANICAL PROGRAM |
|
|
Incorrect pressure |
|
|
High/low pressure |
Check the pressure at the line test port. |
|
Perform a line pressure test; refer to the procedure presented in this section. Perform pressure diagnostics and make any necessary repairs. |
|
|
Main control unit |
|
|
Bolt tightening not correct |
Tighten the bolts to the specified torque. |
|
Separation pad damage |
Check for damage. If there is damage, make the necessary repairs. |
|
Pollution |
Disassemble and clean. |
|
Damage, misassembly, missing, stuck valves/springs, or channel damage |
If damaged or missing items, install a new main control box. If there is an incorrect assembly, sort it out by assembling correctly. DO NOT finish with abrasive materials, saw or grind the valves. This will strip off the anodized finish and may result in more damage to the main control unit or the entire transaxle. |
|
Single-acting coupling |
|
|
Damage |
Check for damage. Make any necessary repairs. |
|
Band brake |
|
|
Damage |
Check for damage. Make any necessary repairs. |
Shift Problems: Soft/Slipper Shift 1-2
|
Possible element |
Referral/Action |
|
226 - ELECTRICAL PROGRAM |
|
|
Incorrect pressure |
|
|
PCM, vehicle wiring harnesses, TSS sensor, VSS, TFT sensor and SSD. |
Perform the on-board diagnostic procedures. Refer to the PCED Manual for information on diagnosing and testing the PCM, IAT sensor and VSS. |
|
Perform Pinpoint tests A, B and E, refer to Pinpoint tests A, B and E. |
|
|
Make any necessary repairs. Clear DTCs, perform road test and OBD procedures. |
|
|
326 - HYDRAULIC / MECHANICAL PROGRAM |
|
|
Working fluid |
|
|
Wrong level |
Adjust the level; refer to the procedure presented in this section. |
|
State |
Check the condition of the working fluid; refer to the procedure presented in this section. |
|
Incorrect pressure |
|
|
High/low pressure |
Check the pressure at the line test port. |
|
Perform a line pressure test; refer to the procedure presented in this section. Perform pressure diagnostics and make any necessary repairs. |
|
|
Main control unit |
|
|
Bolt tightening not correct |
Tighten the bolts to the specified torque. |
|
Separation pad damage |
Check for damage. If there is damage, make the necessary repairs. |
|
Pollution |
Disassemble and clean. |
|
Damage, misassembly, missing, stuck valves/springs, or channel damage |
If damaged or missing items, install a new main control box. If there is an incorrect assembly, sort it out by assembling correctly. DO NOT finish with abrasive materials, saw or grind the valves. This will strip off the anodized finish and may result in more damage to the main control unit or the entire transaxle. |
|
Servo Block |
|
|
Seal damage (pistons and caps) |
Check for damage. Make any necessary repairs. |
|
Band brake |
|
|
Band brake damage |
|
|
Worn or damaged servo unit |
Check for damage. Make any necessary repairs. |
|
Incorrect adjustment |
|
|
Anchor bolt damage or wear |
|
Shift Problems: Soft/Slipper Shift 2-3
|
Possible element |
Referral/Action |
|
227 - ELECTRICAL PROGRAM |
|
|
Powertrain Management System |
|
|
PCM, vehicle wiring harnesses, TSS sensor, TFT sensor and SSE. |
Perform the on-board diagnostic procedures. Refer to the PCED Manual for information on PCM diagnostics and checks. |
|
Perform Pinpoint tests A, B and E, refer to Pinpoint tests A, B and E. |
|
|
Make any necessary repairs. Clear DTCs, perform road test and OBD procedures. |
|
|
327 - HYDRAULIC / MECHANICAL PROGRAM |
|
|
Incorrect pressure |
|
|
High/low pressure |
Check the pressure at the line test port. |
|
Perform a line pressure test; refer to the procedure presented in this section. Perform pressure diagnostics and make any necessary repairs. |
|
|
Main control unit |
|
|
Bolt tightening not correct |
Tighten the bolts to the specified torque. |
|
Separation pad damage |
Check for damage. If there is damage, make the necessary repairs. |
|
Pollution |
Disassemble and clean. |
|
Damage, misassembly, missing, stuck valves/springs, or channel damage |
If damaged or missing items, install a new main control box. If there is an incorrect assembly, sort it out by assembling correctly. DO NOT finish with abrasive materials, saw or grind the valves. This will strip off the anodized finish and may result in more damage to the main control unit or the entire transaxle. |
|
Servo Block |
|
|
Seal damage (pistons and caps) |
Check for damage. Make any necessary repairs. |
|
Band brake |
|
|
Band brake damage |
|
|
Worn or damaged servo unit |
Check for damage. Make any necessary repairs. |
|
Incorrect adjustment |
|
|
Anchor bolt damage or wear |
|
|
Direct Clutch Assembly |
|
|
Damage to seals, piston |
|
|
Check the balancing baffle. |
Check for damage. Make any necessary repairs. |
|
Damaged or worn friction elements |
|
|
Damaged return springs |
|
Shift Problems: Soft/Slipper Shift 3-4
|
Possible element |
Referral/Action |
|
228 - ELECTRICAL PROGRAM |
|
|
Powertrain Management System |
|
|
PCM, SSA, SSC, vehicle wiring harnesses and TFT sensor. |
Perform the on-board diagnostic procedures. Refer to the PCED Manual for information on PCM diagnostics and checks. |
|
Perform Pinpoint B, refer to Pinpoint B. |
|
|
Make any necessary repairs. Clear DTCs, perform road test and OBD procedures. |
|
|
328 - HYDRAULIC / MECHANICAL PROGRAM |
|
|
Incorrect pressure |
|
|
High/low pressure |
Check the pressure at the line test port. |
|
Perform a line pressure test; refer to the procedure presented in this section. Perform pressure diagnostics and make any necessary repairs. |
|
|
Main control unit |
|
|
Bolt tightening not correct |
Tighten the bolts to the specified torque. |
|
Separation pad damage |
Check for damage. If there is damage, make the necessary repairs. |
|
Pollution |
Disassemble and clean. |
|
Damage, misassembly, missing, stuck valves/springs, or channel damage |
If damaged or missing items, install a new main control box. If there is an incorrect assembly, sort it out by assembling correctly. DO NOT finish with abrasive materials, saw or grind the valves. This will strip off the anodized finish and may result in more damage to the main control unit or the entire transaxle. |
|
Forward Clutch Assembly |
|
|
Damage to seals, piston |
|
|
Check the balancing baffle. |
Check for damage. Make any necessary repairs. |
|
Damaged or worn friction elements |
|
|
Servo Block |
|
|
Seal damage (pistons and caps) |
Check for damage. Make any necessary repairs. |
|
Band brake |
|
|
Band brake damage |
|
|
Worn or damaged servo unit |
Check for damage. Make any necessary repairs. |
|
Incorrect adjustment |
|
|
Anchor bolt damage or wear |
|
Shift Problems: Soft/Slip Shift 4-3
|
Possible element |
Referral/Action |
|
229 - ELECTRICAL PROGRAM |
|
|
Powertrain Management System |
|
|
PCM, vehicle wiring harnesses, TFT sensor, SSA and SSC. |
Perform the on-board diagnostic procedures. Refer to the PCED Manual for information on PCM diagnostics and checks. |
|
Do Pinpoint tests A and B, refer to Pinpoint tests A and B. |
|
|
Make any necessary repairs. Clear DTCs, perform road test and OBD procedures. |
|
|
329 - HYDRAULIC / MECHANICAL PROGRAM |
|
|
Incorrect pressure |
|
|
High/low pressure |
Check the pressure at the line test port. |
|
Perform a line pressure test; refer to the procedure presented in this section. Perform pressure diagnostics and make any necessary repairs. |
|
|
Main control unit |
|
|
Bolt tightening not correct |
Tighten the bolts to the specified torque. |
|
Separation pad damage |
Check for damage. If there is damage, make the necessary repairs. |
|
Pollution |
Disassemble and clean. |
|
Damage, misassembly, missing, stuck valves/springs, or channel damage |
If damaged or missing items, install a new main control box. If there is an incorrect assembly, sort it out by assembling correctly. DO NOT finish with abrasive materials, saw or grind the valves. This will strip off the anodized finish and may result in more damage to the main control unit or the entire transaxle. |
|
Forward Clutch Assembly |
|
|
Damage to seals, piston |
|
|
Check the balancing baffle. |
Check for damage. Make any necessary repairs. |
|
Damaged or worn friction elements |
|
|
Damaged return springs |
|
|
Servo Block |
|
|
Damage to seals, piston |
Check for damage. Make any necessary repairs. |
Shift Problems: Soft/Slip Shift 3-2
|
Possible element |
Referral/Action |
|
230 - ELECTRICAL PROGRAM |
|
|
Powertrain Management System |
|
|
PCM, vehicle wiring harnesses, TFT sensor and SSE. |
Perform the on-board diagnostic procedures. Refer to the PCED Manual for information on PCM diagnostics and checks. |
|
Do Pinpoint tests A and B, refer to Pinpoint tests A and B. |
|
|
Make any necessary repairs. Clear DTCs, perform road test and OBD procedures. |
|
|
330 - HYDRAULIC / MECHANICAL PROGRAM |
|
|
Incorrect pressure |
|
|
High/low pressure |
Check the pressure at the line test port. |
|
Perform a line pressure test; refer to the procedure presented in this section. Perform pressure diagnostics and make any necessary repairs. |
|
|
Main control unit |
|
|
Bolt tightening not correct |
Tighten the bolts to the specified torque. |
|
Separation pad damage |
Check for damage. If there is damage, make the necessary repairs. |
|
Pollution |
Disassemble and clean. |
|
Damage, misassembly, missing, stuck valves/springs, or channel damage |
If damaged or missing items, install a new main control box. If there is an incorrect assembly, sort it out by assembling correctly. DO NOT finish with abrasive materials, saw or grind the valves. This will strip off the anodized finish and may result in more damage to the main control unit or the entire transaxle. |
|
Servo Block |
|
|
Seal damage (pistons and caps) |
Check for damage. Make any necessary repairs. |
|
Band brake |
|
|
Band brake damage |
|
|
Worn or damaged servo unit |
Check for damage. Make any necessary repairs. |
|
Incorrect adjustment |
|
|
Anchor bolt damage or wear |
|
Shift Problems: Soft/Slip Shift 2-1
|
Possible element |
Referral/Action |
|
231 - ELECTRICAL PROGRAM |
|
|
Powertrain Management System |
|
|
PCM, SSD, VSS, TSS, TR sensor, vehicle wiring harnesses and TFT sensor. |
Perform the on-board diagnostic procedures. Refer to the PCED Manual for information on PCM diagnostics and checks. |
|
Run Pinpoint tests. |
|
|
Make any necessary repairs. Clear DTCs, perform road test and OBD procedures. |
|
|
331 - HYDRAULIC / MECHANICAL PROGRAM |
|
|
Incorrect pressure |
|
|
High/low pressure |
Check the pressure at the line test port. |
|
Perform a line pressure test; refer to the procedure presented in this section. Perform pressure diagnostics and make any necessary repairs. |
|
|
Main control unit |
|
|
Bolt tightening not correct |
Tighten the bolts to the specified torque. |
|
Separation pad damage |
Check for damage. If there is damage, make the necessary repairs. |
|
Pollution |
Disassemble and clean. |
|
Damage, misassembly, missing, stuck valves/springs, or channel damage |
If damaged or missing items, install a new main control box. If there is an incorrect assembly, sort it out by assembling correctly. DO NOT finish with abrasive materials, saw or grind the valves. This will strip off the anodized finish and may result in more damage to the main control unit or the entire transaxle. |
|
Servo Block |
|
|
Seal damage (pistons and caps) |
Check for damage. Make any necessary repairs. |
|
Band brake |
|
|
Band brake damage |
|
|
Worn or damaged servo unit |
Check for damage. Make any necessary repairs. |
|
Incorrect adjustment |
|
|
Anchor bolt damage or wear |
|
Shift Problems: Hard shifting 1-2
|
Possible element |
Referral/Action |
|
232 - ELECTRICAL PROGRAM |
|
|
Powertrain Management System |
|
|
PCM, vehicle wiring harnesses, TSS sensor, TR sensor, TFT sensor and SSD |
Perform the on-board diagnostic procedures. Refer to the PCED Manual for information on PCM diagnostics and checks. |
|
Perform Pinpoint tests A, B, C and E, refer to Pinpoint tests A, B, C and E. |
|
|
Make any necessary repairs. Clear DTCs, perform road test and OBD procedures. |
|
|
332 - HYDRAULIC / MECHANICAL PROGRAM |
|
|
Incorrect pressure |
|
|
High/low pressure |
Check the pressure at the line test port. |
|
Perform a line pressure test; refer to the procedure presented in this section. Perform pressure diagnostics and make any necessary repairs. |
|
|
Main control unit |
|
|
Bolt tightening not correct |
Tighten the bolts to the specified torque. |
|
Separation pad damage |
Check for damage. If there is damage, make the necessary repairs. |
|
Pollution |
Disassemble and clean. |
|
Damage, misassembly, missing, stuck valves/springs, or channel damage |
If damaged or missing items, install a new main control box. If there is an incorrect assembly, sort it out by assembling correctly. DO NOT finish with abrasive materials, saw or grind the valves. This will strip off the anodized finish and may result in more damage to the main control unit or the entire transaxle. |
|
Servo Block |
|
|
Seal damage (pistons and caps) |
Check for damage. Make any necessary repairs. |
|
Band brake |
|
|
Band brake damage |
|
|
Worn or damaged servo unit |
Check for damage. Make any necessary repairs. |
|
Incorrect adjustment |
|
|
Anchor bolt damage or wear |
|
Shift Problems: Hard shifting 2-3
|
Possible element |
Referral/Action |
|
233 - ELECTRICAL PROGRAM |
|
|
Powertrain Management System |
|
|
PCM, vehicle wiring harnesses, TSS sensor, TR sensor, TFT sensor and SSE. |
Perform the on-board diagnostic procedures. Refer to the PCED Manual for information on PCM diagnostics and checks. |
|
Perform Pinpoint tests A, B, C and E, refer to Pinpoint tests A, B, C and E. |
|
|
Make any necessary repairs. Clear DTCs, perform road test and OBD procedures. |
|
|
333 - HYDRAULIC / MECHANICAL PROGRAM |
|
|
Incorrect pressure |
|
|
High/low pressure |
Check the pressure at the line test port. |
|
Perform a line pressure test; refer to the procedure presented in this section. Perform pressure diagnostics and make any necessary repairs. |
|
|
Main control unit |
|
|
Bolt tightening not correct |
Tighten the bolts to the specified torque. |
|
Separation pad damage |
Check for damage. If there is damage, make the necessary repairs. |
|
Pollution |
Disassemble and clean. |
|
Damage, misassembly, missing, stuck valves/springs, or channel damage |
If damaged or missing items, install a new main control box. If there is an incorrect assembly, sort it out by assembling correctly. DO NOT finish with abrasive materials, saw or grind the valves. This will strip off the anodized finish and may result in more damage to the main control unit or the entire transaxle. |
|
Direct Clutch Assembly |
|
|
Damage to seals, piston |
|
|
Check the balancing baffle. |
Check for damage. Make any necessary repairs. |
|
Damaged or worn friction elements |
|
|
Damaged return springs |
|
|
Servo Block |
|
|
Seal damage (pistons and caps) |
Check for damage. Make any necessary repairs. |
|
Band brake |
|
|
Band brake damage |
|
|
Worn or damaged servo unit |
Check for damage. Make any necessary repairs. |
|
Incorrect adjustment |
|
|
Anchor bolt damage or wear |
|
Shift Problems: Hard Shift 3-4
|
Possible element |
Referral/Action |
|
234 - ELECTRICAL PROGRAM |
|
|
Powertrain Management System |
|
|
PCM, vehicle wiring harnesses, TR sensor, TFT sensor, SSA and SSC. |
Perform the on-board diagnostic procedures. Refer to the PCED Manual for information on PCM diagnostics and checks. |
|
Do Pinpoint tests A, B and C, refer to Pinpoint tests A, B and C. |
|
|
Make any necessary repairs. Clear DTCs, perform road test and OBD procedures. |
|
|
334 - HYDRAULIC / MECHANICAL PROGRAM |
|
|
Incorrect pressure |
|
|
High/low pressure |
Check the pressure at the line test port. |
|
Perform a line pressure test; refer to the procedure presented in this section. Perform pressure diagnostics and make any necessary repairs. |
|
|
Main control unit |
|
|
Bolt tightening not correct |
Tighten the bolts to the specified torque. |
|
Separation pad damage |
Check for damage. If there is damage, make the necessary repairs. |
|
Pollution |
Disassemble and clean. |
|
Damage, misassembly, missing, stuck valves/springs, or channel damage |
If damaged or missing items, install a new main control box. If there is an incorrect assembly, sort it out by assembling correctly. DO NOT finish with abrasive materials, saw or grind the valves. This will strip off the anodized finish and may result in more damage to the main control unit or the entire transaxle. |
|
Direct Clutch Assembly |
|
|
Damage to seals, piston |
|
|
Check the balancing baffle. |
Check for damage. Make any necessary repairs. |
|
Damaged or worn friction elements |
|
|
Damaged return springs |
|
|
Forward Clutch Assembly |
|
|
Damage to seals, piston |
|
|
Check the balancing baffle. |
Check for damage. Make any necessary repairs. |
|
Damaged or worn friction elements |
|
|
Damaged return springs |
|
Shift Problems: Hard shifting 4-3
|
Possible element |
Referral/Action |
|
235 - ELECTRICAL PROGRAM |
|
|
Powertrain Management System |
|
|
PCM, vehicle wiring harnesses, TR sensor, TFT sensor, SSA, SSC. |
Perform the on-board diagnostic procedures. Refer to the PCED Manual for information on PCM diagnostics and checks. |
|
Do Pinpoint tests A, B and C, refer to Pinpoint tests A, B and C. |
|
|
Make any necessary repairs. Clear DTCs, perform road test and OBD procedures. |
|
|
335 - HYDRAULIC / MECHANICAL PROGRAM |
|
|
Incorrect pressure |
|
|
High/low pressure |
Check the pressure at the line test port. |
|
Perform a line pressure test; refer to the procedure presented in this section. Perform pressure diagnostics and make any necessary repairs. |
|
|
Main control unit |
|
|
Bolt tightening not correct |
Tighten the bolts to the specified torque. |
|
Separation pad damage |
Check for damage. Make any necessary repairs. |
|
Pollution |
Disassemble and clean. |
|
Damage, misassembly, missing, stuck valves/springs, or channel damage |
If damaged or missing items, install a new main control box. If there is an incorrect assembly, sort it out by assembling correctly. DO NOT finish with abrasive materials, saw or grind the valves. This will strip off the anodized finish and may result in more damage to the main control unit or the entire transaxle. |
|
Forward Clutch Assembly |
|
|
Damage to seals, piston |
|
|
Check the balancing baffle. |
Check for damage. Make any necessary repairs. |
|
Damaged or worn friction elements |
|
|
Damaged return springs |
|
|
Servo Block |
|
|
Seal damage (pistons and caps) |
Check for damage. Make any necessary repairs. |
|
Band brake |
|
|
Band brake damage |
|
|
Worn or damaged servo unit |
Check for damage. Make any necessary repairs. |
|
Incorrect adjustment |
|
|
Anchor bolt damage or wear |
|
Shift Problems: Hard Shift 3-2
|
Possible element |
Referral/Action |
|
236 - ELECTRICAL PROGRAM |
|
|
Powertrain Management System |
|
|
PCM, vehicle wiring harnesses, TSS sensor, TR sensor, TFT sensor and SSE. |
Perform the on-board diagnostic procedures. Refer to the PCED Manual for information on PCM diagnostics and checks. |
|
Perform Pinpoint tests A, B, C and E, refer to Pinpoint tests A, B, C and E. |
|
|
Make any necessary repairs. Clear DTCs, perform road test and OBD procedures. |
|
|
336 - HYDRAULIC / MECHANICAL PROGRAM |
|
|
Incorrect pressure |
|
|
High/low pressure |
Check the pressure at the line test port. |
|
Perform a line pressure test; refer to the procedure presented in this section. Perform pressure diagnostics and make any necessary repairs. |
|
|
Bolt tightening not correct |
Tighten the bolts to the specified torque. |
|
Separation pad damage |
Check for damage. If there is damage, make the necessary repairs. |
|
Pollution |
Disassemble and clean. |
|
Damage, misassembly, missing, stuck valves/springs, or channel damage |
If damaged or missing items, install a new main control box. If there is an incorrect assembly, sort it out by assembling correctly. DO NOT finish with abrasive materials, saw or grind the valves. This will strip off the anodized finish and may result in more damage to the main control unit or the entire transaxle. |
|
Servo Block |
|
|
Seal damage (pistons and caps) |
Check for damage. Make any necessary repairs. |
|
Band brake |
|
|
Band brake damage |
|
|
Worn or damaged servo unit |
Check for damage. Make any necessary repairs. |
|
Incorrect adjustment |
|
|
Anchor bolt damage or wear |
|
|
Direct Clutch Assembly |
|
|
Damage to seals, piston |
|
|
Check the balancing baffle. |
Check for damage. Make any necessary repairs. |
|
Damaged or worn friction elements |
|
|
Damaged return springs |
|
Shift Problems: Hard shifting 2-1
|
Possible element |
Referral/Action |
|
237 - ELECTRICAL PROGRAM |
|
|
Powertrain Management System |
|
|
PCM, vehicle wiring harnesses, TSS sensor, TR sensor, TFT sensor, VFS and SSD. |
Perform the on-board diagnostic procedures. Refer to the PCED Manual for information on PCM diagnostics and checks. |
|
Perform Pinpoint tests A, B, C and E, refer to Pinpoint tests A, B, C and E. |
|
|
Make any necessary repairs. Clear DTCs, perform road test and OBD procedures. |
|
|
337 - HYDRAULIC / MECHANICAL PROGRAM |
|
|
Incorrect pressure |
|
|
High/low pressure |
Check the pressure at the line test port. |
|
Perform a line pressure test; refer to the procedure presented in this section. Perform pressure diagnostics and make any necessary repairs. |
|
|
Main control unit |
|
|
Bolt tightening not correct |
Tighten the bolts to the specified torque. |
|
Separation pad damage |
Check for damage. Make any necessary repairs. |
|
Pollution |
Disassemble and clean. |
|
Damage, misassembly, missing, stuck valves/springs, or channel damage |
If damaged or missing items, install a new main control box. If there is an incorrect assembly, sort it out by assembling correctly. DO NOT finish with abrasive materials, saw or grind the valves. This will strip off the anodized finish and may result in more damage to the main control unit or the entire transaxle. |
|
Single-acting coupling |
|
|
Wear, damage or incorrect assembly |
Check for damage. Make any necessary repairs. |
|
Servo Block |
|
|
Seal damage (pistons and caps) |
Check for damage. Make any necessary repairs. |
|
Band brake |
|
|
Band brake damage |
|
|
Worn or damaged servo unit |
Check for damage. Make any necessary repairs. |
|
Incorrect adjustment |
|
|
Anchor bolt damage or wear |
|
Torque Converter Clutch Operation Problems: No commissioning
|
Possible element |
Referral/Action |
|
240 - ELECTRICAL PROGRAM |
|
|
Powertrain Management System |
|
|
PCM, vehicle wiring harnesses, TFT sensor, SSB and SSC |
Perform the on-board diagnostic procedures. Refer to the PCED Manual for information on PCM diagnostics and checks. |
|
Do Pinpoint tests A and B, refer to Pinpoint tests A and B. |
|
|
Make any necessary repairs. Clear DTCs, perform road test and OBD procedures. |
|
|
340 - HYDRAULIC / MECHANICAL PROGRAM |
|
|
Incorrect pressure |
|
|
High/low pressure |
Check the pressure at the line test port. |
|
Perform a line pressure test; refer to the procedure presented in this section. Perform pressure diagnostics and make any necessary repairs. |
|
|
Main control unit |
|
|
Bolt tightening not correct |
Tighten the bolts to the specified torque. |
|
Separation pad damage |
Check for damage. If there is damage, make the necessary repairs. |
|
Pollution |
Disassemble and clean. |
|
Damage, misassembly, missing, stuck valves/springs, or channel damage |
If damaged or missing items, install a new main control box. If there is an incorrect assembly, sort it out by assembling correctly. DO NOT finish with abrasive materials, saw or grind the valves. This will strip off the anodized finish and may result in more damage to the main control unit or the entire transaxle. |
|
Fluid pump assembly |
|
|
Bolt tightening not correct |
Tighten the bolts to the specified torque. |
|
Gasket damage |
Check for damage. If there is damage, make the necessary repairs. |
|
Porosity, cross-leakage, blockage of holes. |
Check for damage. If there is damage, make the necessary repairs. |
|
Torque converter assembly |
|
|
Torque converter internal failure preventing clutch engagement, piston operation |
Remove a transmission in the block with the leading bridge. Check for damage. Perform torque converter checks; refer to the procedures provided in this section. If the torque converter fails these checks or is damaged, install a new or remanufactured torque converter. |
Torque Converter Clutch Problem: Always On/Vehicle Stalls
|
Possible element |
Referral/Action |
|
241 - ELECTRICAL PROGRAM |
|
|
Powertrain Management System |
|
|
PCM, vehicle wiring harnesses, SSC and SSB. |
Perform the on-board diagnostic procedures. Refer to the PCED Manual for information on PCM diagnostics and checks. |
|
Perform Pinpoint Test A, refer to Pinpoint Test A. |
|
|
Make any necessary repairs. Clear DTCs, perform road test and OBD procedures. |
|
|
341 - HYDRAULIC / MECHANICAL PROGRAM |
|
|
Main control unit |
|
|
Bolt tightening not correct |
Tighten the bolts to the specified torque. |
|
Separation pad damage |
Check for damage. If there is damage, make the necessary repairs. |
|
Pollution |
Disassemble and clean. |
|
Damage, misassembly, missing, stuck valves/springs, or channel damage |
If damaged or missing items, install a new main control box. If there is an incorrect assembly, sort it out by assembling correctly. DO NOT finish with abrasive materials, saw or grind the valves. This will strip off the anodized finish and may result in more damage to the main control unit or the entire transaxle. |
|
Low Gear Single-Acting Clutch |
|
|
Wear, damage or incorrect assembly |
Check for damage. Make any necessary repairs. |
|
Torque converter assembly |
|
|
Torque converter internal failure preventing clutch engagement, piston operation |
Remove a transmission in the block with the leading bridge. Check for damage. Perform torque converter checks; refer to the procedures provided in this section. If the torque converter fails these checks or is damaged, install a new or remanufactured torque converter. |
Torque Converter Clutch Problems: Cycling/Vibration/Jitter
|
Possible element |
Referral/Action |
|
242 - ELECTRICAL PROGRAM |
|
|
Powertrain Management System |
|
|
PCM, vehicle wiring harnesses, SSB and SSC. |
Perform the on-board diagnostic procedures. Refer to the PCED Manual for information on PCM diagnostics and checks. |
|
Perform Pinpoint Test A, refer to Pinpoint Test A. |
|
|
Make any necessary repairs. Clear DTCs, perform road test and OBD procedures. |
|
|
342 - HYDRAULIC / MECHANICAL PROGRAM |
|
|
Working fluid |
|
|
A state of pollution, deterioration in quality. |
Check the condition of the working fluid; refer to the procedure presented in this section. If there is contamination, find the cause of the contamination. In case of burning, inspect the mechanical elements of the band brakes and clutches. Make any necessary repairs. Change transmission fluid. When draining and priming, follow the procedures in this section. Follow the fluid cooler and torque converter cleaning procedures as described in this section and Section 307-02. |
|
Main control unit |
|
|
Bolt tightening not correct |
Tighten the bolts to the specified torque. |
|
Separation pad damage |
Check for damage. If there is damage, make the necessary repairs. |
|
Pollution |
Disassemble and clean. |
|
Damage, misassembly, missing, stuck valves/springs, or channel damage |
If damaged or missing items, install a new main control box. If there is an incorrect assembly, sort it out by assembling correctly. DO NOT finish with abrasive materials, saw or grind the valves. This will strip off the anodized finish and may result in more damage to the main control unit or the entire transaxle. |
|
Torque converter assembly |
|
|
Torque converter internal failure preventing clutch engagement, piston operation |
Remove a transmission in the block with the leading bridge. Check for damage. Perform torque converter checks; refer to the procedures provided in this section. If the torque converter fails these checks or is damaged, install a new or remanufactured torque converter. |
Other problems: High effort on the shift lever
|
Possible element |
Referral/Action |
|
251 - ELECTRICAL PROGRAM |
|
|
Powertrain Management System |
|
|
TR sensor. |
Perform the on-board diagnostic procedures. Refer to the PCED Manual for information on PCM diagnostics and checks. |
|
Perform Pinpoint Test C, refer to Pinpoint Test C. |
|
|
Make any necessary repairs. Clear DTCs, perform road test and OBD procedures. |
|
|
351 - HYDRAULIC / MECHANICAL PROGRAM |
|
|
Shift Cable/Transmission Range Sensor (TR) |
|
|
Damage, misalignment of cable system or TR sensor |
Inspect and make any necessary repairs. Refer to Section 307-05 for shift cable information. Refer to this section for information on the TR sensor. |
|
Main control unit |
|
|
Bolt tightening not correct |
Tighten the bolts to the specified torque. |
|
Carter |
|
|
Damage to the manual gear selector lever, deformation of the pin of the internal lever of the manual valve, damage to the internal lever of the manual valve, damage to the spring rod. |
Check for damage. If there is damage, make the necessary repairs. |
|
Damage to the pin of the manual valve lever |
|
Other issues: External leaks
|
Possible element |
Referral/Action |
|
252 - ELECTRICAL PROGRAM |
|
|
Powertrain Management System |
|
|
VSS, TSS sensor and TR sensor wiring harness. |
Check for leaks. If the areas around the sensors show signs of leakage, install a new sensor O-ring. If the area behind the TR sensor shows signs of leakage, install a new hand lever shaft seal. |
|
352 - HYDRAULIC / MECHANICAL PROGRAM |
|
|
Working fluid |
|
|
Wrong level |
Adjust the level; refer to the procedure presented in this section. |
|
Carter |
|
|
Damage |
Check for damage. If there is damage, make the necessary repairs. |
|
Seals/gaskets |
|
|
Leaks in gaskets, seals, etc. |
Refer to the Torque Converter Area Leak and Fluid Leak Inspection chart in this section for information on potential leak locations. |
|
Wipe off all traces of grease from the exposed surfaces of the transaxle. Check the ventilation holes for blockage. Bring the vehicle to normal temperature and follow the leak test procedures in this section. Make any necessary repairs. |
|
Other problems: Poor vehicle dynamics
|
Possible element |
Referral/Action |
|
233 - ELECTRICAL PROGRAM |
|
|
Powertrain Management System |
|
|
PCM, vehicle wiring harnesses, VSS, TSS sensor, TFT sensor, TR sensor, SSA, SSB, SSC, SSD,SSE and PCA |
Perform the on-board diagnostic procedures. Refer to the PCED Manual for information on PCM diagnostics and checks. |
|
Perform Pinpoint tests A, B, C, D and E, refer to Pinpoint tests A, B, C, D and E. |
|
|
Make any necessary repairs. Clear DTCs, perform road test and OBD procedures. |
|
|
353 - HYDRAULIC / MECHANICAL PROGRAM |
|
|
Working fluid |
|
|
Wrong level |
Adjust the level; refer to the procedure presented in this section. |
|
Input shaft |
|
|
Damage |
Check for damage. Make any necessary repairs. |
|
Forward Clutch Assembly |
|
|
Damage to seals, piston |
|
|
Check the balancing baffle. |
Check for damage. Make any necessary repairs. |
|
Damaged or worn friction elements |
|
|
Damaged return springs |
|
|
Torque converter assembly |
|
|
Torque Converter Single-Acting Clutch Slip |
Perform the torque converter single acting clutch test as described in this section. If the single acting clutch is faulty, install a new or remanufactured torque converter. |
|
The wrong type of torque converter was used during assembly |
Inspect the torque converter for the correct type. If the type is incorrect, install a torque converter of the correct type. |
Other problems: Noise/vibration: forward or reverse gears
|
Possible element |
Referral/Action |
|
254 - ELECTRICAL PROGRAM |
|
|
Powertrain Management System |
|
|
PCM, vehicle wiring harnesses, SSA, SSB, SSC, SSD,SSE and PCA |
Perform the on-board diagnostic procedures. Refer to the PCED Manual for information on PCM diagnostics and checks. |
|
Perform Pinpoint Test A, refer to Pinpoint Test A. |
|
|
Make any necessary repairs. Clear DTCs, perform road test and OBD procedures. |
|
|
354 - HYDRAULIC / MECHANICAL PROGRAM |
|
|
Fluid pump assembly |
|
|
Bolt tightening not correct |
Tighten the bolts to the specified torque. |
|
Gasket damage |
Check for damage. If there is damage, make the necessary repairs. |
|
Porosity, cross-leakage, blockage of holes. |
|
|
Flexible plate or adapter plate |
|
|
Damage |
Check for damage. Make repairs if necessary. |
|
Adapter plate misaligned. |
Remove a transmission in the block with the leading bridge. Check the position of the adapter plate. |
Other Problems: Engine won't crank
|
Possible element |
Referral/Action |
|
255 - ELECTRICAL PROGRAM |
|
|
Powertrain Management System |
|
|
PCM, vehicle wiring harnesses and TR sensor |
Perform the on-board diagnostic procedures. Refer to the PCED Manual for information on PCM diagnostics and checks. |
|
Perform Pinpoint Test C, refer to Pinpoint Test C. |
|
|
Make any necessary repairs. Clear DTCs, perform road test and OBD procedures. |
|
|
355 - HYDRAULIC / MECHANICAL PROGRAM |
|
|
Shift Cable/Transmission Range Sensor (TR) |
|
|
Damage, misalignment of cable system or TR sensor |
Inspect and make any necessary repairs. Refer to Section 307-05 for shift cable information. Refer to this section for information on the TR sensor. |
|
Flexible plate or adapter plate |
|
|
Damage |
Check for damage. Make any necessary repairs. |
Other issues: Missing parking range
|
Possible element |
Referral/Action |
|
256 - ELECTRICAL PROGRAM |
|
|
Powertrain Management System |
|
|
No electrical problems |
|
|
356 - HYDRAULIC / MECHANICAL PROGRAM |
|
|
Shift Cable/Transmission Range Sensor (TR) |
|
|
Damage, misalignment of cable system or TR sensor |
Inspect and make any necessary repairs. Refer to Section 307-05 for shift cable information. Refer to this section for information on the TR sensor. |
|
Carter |
|
|
Damage to the manual gear selector lever, deformation of the pin of the internal lever of the manual valve, damage to the internal lever of the manual valve, damage to the spring rod. |
Check for damage. If there is damage, make the necessary repairs. |
|
Damage to the pin of the manual valve lever |
Check for damage. If there is damage, make the necessary repairs. |
|
Parking system |
|
|
Damaged or incorrectly assembled parking gear, support, base plate, parking latch return spring, parking or guide plate, actuating stem, park latch pin, hand lever stop spring |
Check for damage. If there is damage, make the necessary repairs. |
|
Damage to external linkage/brackets |
|
Other problems: Overheating
|
Possible element |
Referral/Action |
|
257 - ELECTRICAL PROGRAM |
|
|
Powertrain Management System |
|
|
PCM, vehicle wiring harnesses, TFT sensor and SSB. |
Perform the on-board diagnostic procedures. Refer to the PCED Manual for information on PCM diagnostics and checks. |
|
Do Pinpoint tests A and B, refer to Pinpoint tests A and B. |
|
|
Make any necessary repairs. Clear DTCs, perform road test and OBD procedures. |
|
|
357 - HYDRAULIC / MECHANICAL PROGRAM |
|
|
Working fluid |
|
|
Wrong level |
Adjust the level; refer to the procedure presented in this section. |
|
Incorrect pressure |
|
|
High/low pressure |
Check the pressure at the line test port. |
|
Perform a line pressure test; refer to the procedure presented in this section. Perform pressure diagnostics and make any necessary repairs. |
|
|
Main control unit |
|
|
Bolt tightening not correct |
Tighten the bolts to the specified torque. |
|
Separation pad damage |
Check for damage. If there is damage, make the necessary repairs. |
|
Pollution |
Disassemble and clean. |
|
Damage, misassembly, missing, stuck valves/springs, or channel damage |
If damaged or missing items, install a new main control box. If there is an incorrect assembly, sort it out by assembling correctly. DO NOT finish with abrasive materials, saw or grind the valves. This will strip off the anodized finish and may result in more damage to the main control unit or the entire transaxle. |
|
Fluid pump assembly |
|
|
Bolt tightening not correct |
Tighten the bolts to the specified torque. |
|
Gasket damage |
Check for damage. If there is damage, make the necessary repairs. |
|
Porosity, cross-leakage, blockage of holes. |
|
|
Carter |
|
|
Crankcase ventilation damage |
Check for damage. If there is damage, make the necessary repairs. |
|
Torque converter assembly |
|
|
Torque converter internal failure preventing clutch engagement, piston operation |
Remove a transmission in the block with the leading bridge. Check for damage. Perform torque converter checks; refer to the procedures provided in this section. If the torque converter fails these checks or is damaged, install a new or remanufactured torque converter. |
|
Other |
|
|
Clogging of the cooling system of the gearbox in the block with the drive axle |
Refer to Section 307-02 for cooling system diagnostic information. |
|
Increased load when towing a trailer |
See Owner's Manual for information on towing a trailer. |
|
Poor engine performance |
Check the dynamic characteristics of the motor; refer to Section 303-00. |
Other issues: No engine braking in manual first gear range
|
Possible element |
Referral/Action |
|
259 - ELECTRICAL PROGRAM |
|
|
Powertrain Management System |
|
|
PCM, vehicle wiring harnesses and SSD |
Perform the on-board diagnostic procedures. Refer to the PCED Manual for information on PCM diagnostics and checks. |
|
Perform Pinpoint Test A, refer to Pinpoint Test A. |
|
|
Make any necessary repairs. Clear DTCs, perform road test and OBD procedures. |
|
|
359 - HYDRAULIC / MECHANICAL PROGRAM |
|
|
Working fluid |
|
|
Wrong level |
Adjust the level; refer to the procedure presented in this section. |
|
Incorrect pressure |
|
|
High/low pressure |
Check the pressure at the line test port. |
|
Perform a line pressure test; refer to the procedure presented in this section. Perform pressure diagnostics and make any necessary repairs. |
|
|
Fluid pump assembly |
|
|
Bolt tightening not correct |
Tighten the bolts to the specified torque. |
|
Gasket damage |
Check for damage. If there is damage, make the necessary repairs. |
|
Porosity, cross-leakage, blockage of holes. |
|
|
Low/Reverse Clutch Assembly |
|
|
Damage to seals, piston |
|
|
Check the balancing baffle. |
Check for damage. Make any necessary repairs. |
|
Damaged or worn friction elements |
|
|
Damaged return springs |
|
Other Problems: Transmission fluid saturated with air or foaming
|
Possible element |
Referral/Action |
|
261 - ELECTRICAL PROGRAM |
|
|
Powertrain Management System |
|
|
No electrical problems |
|
|
361 - HYDRAULIC / MECHANICAL PROGRAM |
|
|
Working fluid |
|
|
Wrong level |
Adjust the level; refer to the procedure presented in this section. |
|
State |
Check the condition of the working fluid; refer to the procedure presented in this section. |
|
Fluid pump assembly |
|
|
Bolt tightening not correct |
Tighten the bolts to the specified torque. |
|
Gasket damage |
Check for damage. If there is damage, make the necessary repairs. |
|
Porosity, cross-leakage, blockage of holes. |
|
|
Carter |
|
|
Crankcase ventilation damage |
Check for damage. If there is damage, make the necessary repairs. |
|
Other |
|
|
Overheating of the gearbox in the block with the drive axle |
Refer to program 257/357 presented in this section. |
Other problems: 1st gear slip/jitter
|
Possible element |
Referral/Action |
|
263 - ELECTRICAL PROGRAM |
|
|
Powertrain Management System |
|
|
PCM, vehicle wiring harnesses and SSC |
Perform the on-board diagnostic procedures. Refer to the PCED Manual for information on PCM diagnostics and checks. |
|
Perform Pinpoint Test A, refer to Pinpoint Test A. |
|
|
Make any necessary repairs. Clear DTCs, perform road test and OBD procedures. |
|
|
363 - HYDRAULIC / MECHANICAL PROGRAM |
|
|
Working fluid |
|
|
Wrong level |
Adjust the level; refer to the procedure presented in this section. |
|
State |
Check the condition of the working fluid; refer to the procedure presented in this section. |
|
Incorrect pressure |
|
|
High/low pressure |
Check the pressure at the line test port. |
|
Perform a line pressure test; refer to the procedure presented in this section. Perform pressure diagnostics and make any necessary repairs. |
|
|
Main control unit |
|
|
Bolt tightening not correct |
Tighten the bolts to the specified torque. |
|
Separation pad damage |
Check for damage. If there is damage, make the necessary repairs. |
|
Pollution |
Disassemble and clean. |
|
Damage, misassembly, missing, stuck valves/springs, or channel damage |
If damaged or missing items, install a new main control box. If there is an incorrect assembly, sort it out by assembling correctly. DO NOT finish with abrasive materials, saw or grind the valves. This will strip off the anodized finish and may result in more damage to the main control unit or the entire transaxle. |
|
Fluid pump assembly |
|
|
Bolt tightening not correct |
Tighten the bolts to the specified torque. |
|
Gasket damage |
Check for damage. If there is damage, make the necessary repairs. |
|
Porosity, cross-leakage, blockage of holes. |
|
|
Forward Clutch Assembly |
|
|
Damage to seals, piston |
|
|
Check the balancing baffle. |
Check for damage. Make any necessary repairs. |
|
Damaged or worn friction elements |
|
|
Damaged return springs |
|
|
Low Gear Single-Acting Clutch |
|
|
Wear, damage or incorrect assembly |
Check for damage. Make any necessary repairs. |
Other problems: 2nd gear slip/jitter
|
Possible element |
Referral/Action |
|
264 - ELECTRICAL PROGRAM |
|
|
Powertrain Management System |
|
|
PCM, vehicle wiring harnesses and SSD |
Perform the on-board diagnostic procedures. Refer to the PCED Manual for information on PCM diagnostics and checks. |
|
Perform Pinpoint Test A, refer to Pinpoint Test A. |
|
|
Make any necessary repairs. Clear DTCs, perform road test and OBD procedures. |
|
|
364 - HYDRAULIC / MECHANICAL PROGRAM |
|
|
Working fluid |
|
|
Wrong level |
Adjust the level; refer to the procedure presented in this section. |
|
State |
Check the condition of the working fluid; refer to the procedure presented in this section. |
|
Incorrect pressure |
|
|
High/low pressure |
Check the pressure at the line test port. |
|
Perform a line pressure test; refer to the procedure presented in this section. Perform pressure diagnostics and make any necessary repairs. |
|
|
Fluid pump assembly |
|
|
Bolt tightening not correct |
Tighten the bolts to the specified torque. |
|
Gasket damage |
|
|
Porosity, cross-leakage, blockage of holes. |
Check for damage. If there is damage, make the necessary repairs. |
|
Servo Block |
|
|
Seal damage (pistons and caps) |
Check for damage. Make any necessary repairs. |
|
Band brake |
|
|
Band brake damage |
|
|
Worn or damaged servo unit |
Check for damage. Make any necessary repairs. |
|
Incorrect adjustment |
|
|
Anchor bolt damage or wear |
|
|
O/D planetary gear assembly |
|
|
Damage to planetary gear elements |
Check for damage. If there is damage, make the necessary repairs. |
|
Forward Clutch Assembly |
|
|
Damage to seals, piston |
|
|
Check the balancing baffle. |
Check for damage. Make any necessary repairs. |
|
Damaged or worn friction elements |
|
|
Damaged return springs |
|
Other problems: 3rd gear slip/jitter
|
Possible element |
Referral/Action |
|
282 - ELECTRICAL PROGRAM |
|
|
Powertrain Management System |
|
|
No electrical problems |
|
|
382 - HYDRAULIC / MECHANICAL PROGRAM |
|
|
Working fluid |
|
|
Wrong level |
Adjust the level; refer to the procedure presented in this section. |
|
State |
Check the condition of the working fluid; refer to the procedure presented in this section. |
|
Incorrect pressure |
|
|
High/low pressure |
Check the pressure at the line test port. |
|
Perform a line pressure test; refer to the procedure presented in this section. Perform pressure diagnostics and make any necessary repairs. |
|
|
Fluid pump assembly |
|
|
Bolt tightening not correct |
Tighten the bolts to the specified torque. |
|
Gasket damage |
Check for damage. If there is damage, make the necessary repairs. |
|
Porosity, cross-leakage, blockage of holes. |
Check for damage. Make any necessary repairs. |
|
Forward Clutch Assembly |
|
|
Damage to seals, piston |
|
|
Check the balancing baffle. |
Check for damage. Make any necessary repairs. |
|
Damaged or worn friction elements |
|
|
Damaged return springs |
|
Other issues: No engine braking in ALL gears
|
Referral/Action |
|
|
283 - ELECTRICAL PROGRAM |
|
|
Powertrain Management System |
|
|
PCM, vehicle wiring harnesses and SSD |
Perform the on-board diagnostic procedures. Refer to the PCED Manual for information on PCM diagnostics and checks. |
|
Perform Pinpoint Test A, refer to Pinpoint Test A. |
|
|
Make any necessary repairs. Clear DTCs, perform road test and OBD procedures. |
|
|
383 - HYDRAULIC / MECHANICAL PROGRAM |
|
|
No hydraulic/mechanical problems |
|
Visitor comments