Contents: Removal ↳ Installation ↳
Fuel injection system
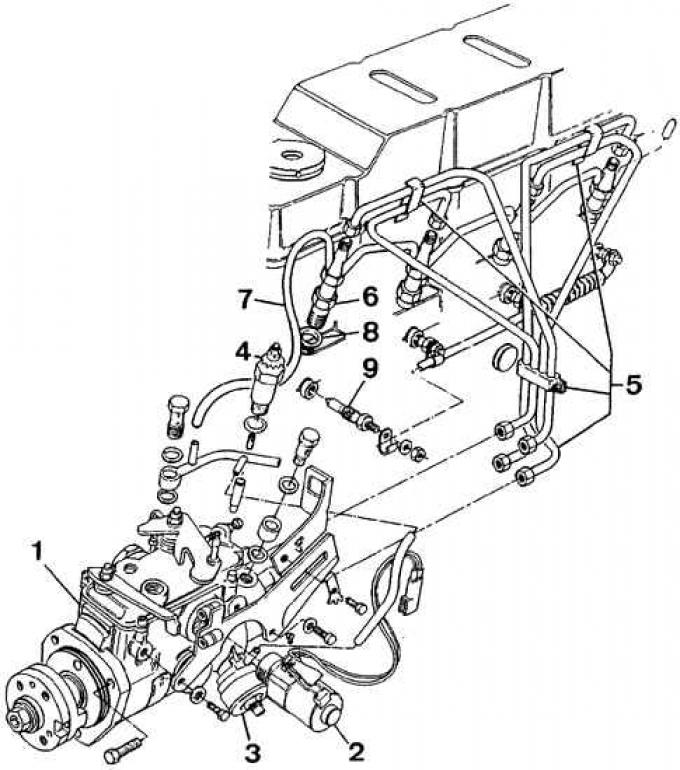
1 – fuel pump, 2 – cold engine injection advance corrector, 3 – fuel dose regulator, 4 – engine shut-off electromagnetic valve (STOP valve), 5 – injection lines, 6 – injector, 7 – fuel return line, 8 – thermal insulation washer, 9 – glow plug
Fuel filter assembly
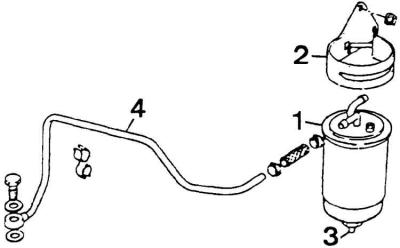
1 – replaceable filter element, 2 – filter bracket, 3 – drain bolt, 4 – pipe connecting the filter to the fuel pump
Air filter assembly
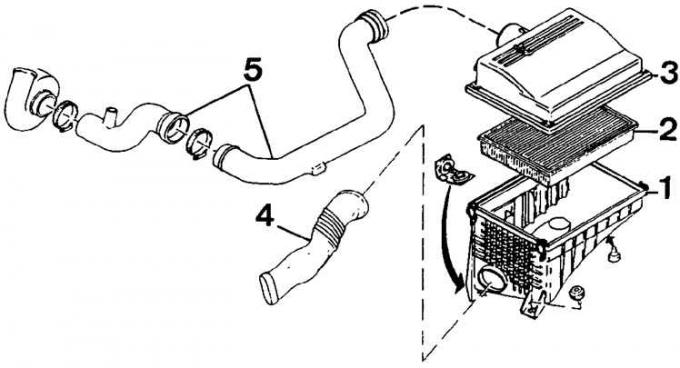
1 – filter housing, 2 – replaceable filter element, 3 – filter cover, 4 – air supply pipe to the filter, 5 – air supply pipe to the turbocharger
Removal
1. Disconnect the ground wire from the battery.
2. Place a container under the fuel filter to collect the leaking fuel.
3. Unscrew the middle fuel filter mounting bolt while holding the filter and glass sump.
4. Remove the fuel filter element to be replaced.
5. Remove the O-ring and the upper and lower filter housing gaskets.
Installation
1. Install a new O-ring for the fuel filter element being replaced and new gaskets for both filter housing halves.
2. Insert the replacement filter element and sump, lightly screw in the middle bolt and, making sure all elements are in place, tighten the middle bolt.
3. Unscrew the air bleed screw from the filter and pump with a hand pump until the flowing fuel does not contain air bubbles.
4. Tighten the filter air bleed bolt.
5. Connect the ground wire to the battery.
6. Start the engine and check the tightness of the connections.
7. Remove the container with the leaked fuel.
For details, please visit the website (FORDBOOK.RU)