Disassembly
1. Remove the intake and exhaust manifolds.
2. Unscrew the two brackets with holes for lifting the engine and the oil pressure sensor from the cylinder head.
3. Remove the vacuum pump by unscrewing the two mounting bolts in sequence (and at the same angle).
4. Remove bearing caps No.2 and 4 of the camshaft.
5. Unscrew the nuts of the remaining camshaft bearing caps by 1/4 turn.
6. Remove the camshaft bearing caps together with the upper bearing shells, seals and remove the camshaft.
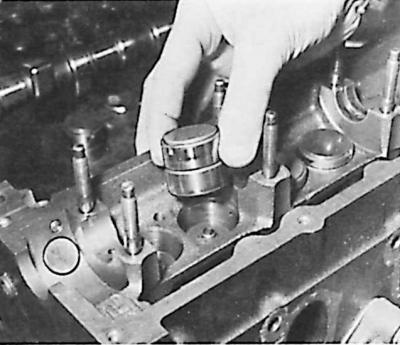
7. Remove the tappets together with the valve clearance adjusting plates and position them so that during assembly they can be installed in the same cylinder head sockets in which they were previously installed.
8. Remove the vacuum pump drive plunger.
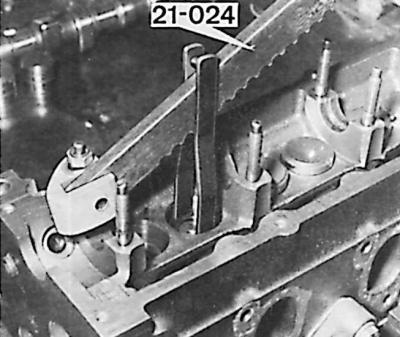
9. Using the tool (21.024), compress the springs of the individual valves and remove the crackers.
10. Remove the tool and remove the upper spring support plates, springs and valves.
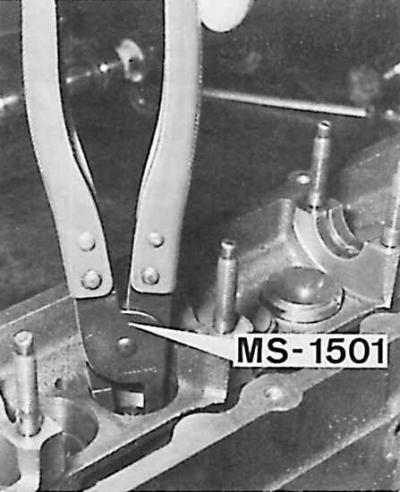
11. Using special pliers (MS-1501), remove the oil deflector caps from the valve stems.
Examination
After disassembling the cylinder head, you should thoroughly wash all parts, check their technical condition and assess their suitability for further work (see subsection 3.2.1.2.2). All gaskets should be replaced and the valves should be ground in.
Assembly
1. Lubricate the valve stems with engine oil and insert them into the guides.
2. Wrap the ends of the valve stems with adhesive tape to prevent them from damaging the working edges of the caps and use tool 21.007 to install the caps on the valve stems.
3. Install the valve springs, upper plates and, using tool 21.024, compress the springs and insert the crackers.
4. Lubricate the vacuum pump drive rod with engine oil and insert it into the cylinder head hole.
5. Lubricate the tappets with oil and install them together with the valve clearance adjusting plates into the sockets in the cylinder head in which they were previously installed.
6. Insert the lower camshaft bearing shells into the sockets in the cylinder head and lubricate them with engine oil.
7. Install the camshaft on the liners; the eccentric at the end of the shaft must point upwards.
8. Install the upper bearing shells into the camshaft bearing caps and lubricate them with oil.
9. Place washers under the cylinder head to allow the valves to move in the guides.
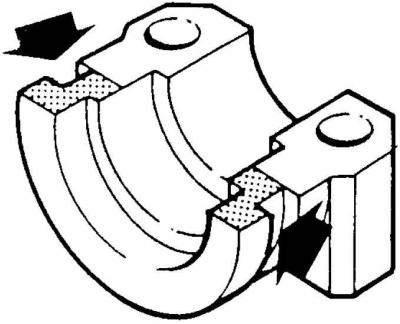
10. Apply sealing paste SPM-4G911 ZF/G to the sealing plane of bearing No.1 of the camshaft (from the timing drive side).
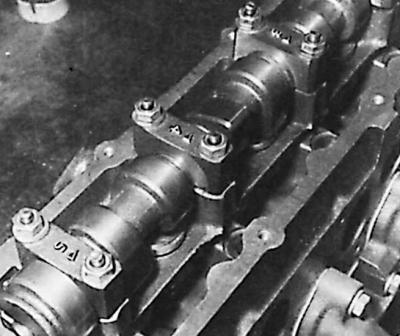
11. Install camshaft bearing caps No.1, 3 and 5. The markings on them (arrows) should be facing forward (towards the timing drive).
12. Tighten the camshaft bearing cap nuts by hand.
13. Tighten camshaft bearing cap nuts No.3, then No.1, and then No.2 by 180° with a wrench.
14. Repeat the last operation until the lids are exactly in place.
15. Install bearing caps No.2 and 4 using a hammer made of artificial material.
16. Tighten all camshaft bearing cap bolts to the specified torque.
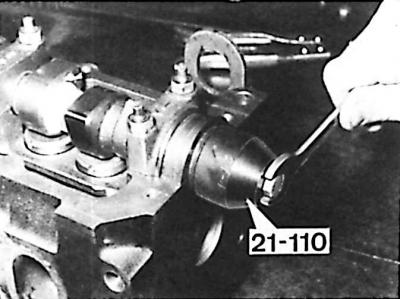
17. Lubricate the camshaft sealing ring with engine oil and insert it using tool 21.110.
18. Install the vacuum pump together with the O-ring and tighten its mounting bolts sequentially and evenly to the appropriate torque.
19. Screw two brackets with holes to the cylinder head to lift the engine and screw in the oil pressure sensor.
20. Screw the exhaust and intake manifolds together with new gaskets to the cylinder head and tighten the bolts and nuts securing them to the appropriate torque.