Contents: Removal ↳ Installation ↳
Special tool
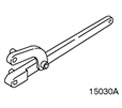 | Universal Flange Holding Wrench 205-072 (15030A) |
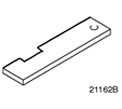 | Camshaft Top Dead Center Setting Tool 303-376 (21-162B) |
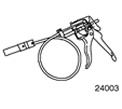 | Radiator Hose Clamp Remover and Installer 303-397 (24-003) |
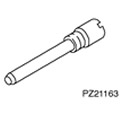 | Crankshaft Top Dead Center Pin 303-620 (21-163) |
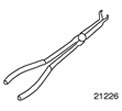 | Spark Plug Pliers 303-622 (21-226) |
General equipment:
- Rolling jack
- Wooden block
| Name | Specification |
| Never Seeze | ESE-M1244-A |
| Clamps | |
| Silicone grease for spark plug connector seals | A960-M1C171-AA |
| Sealant | WSK-M2G348-A5 |
Removal
All cars
1. General instructions:
- The position of the engine mounts and engine tilt limiters in the description corresponds to the view directed from the gearbox towards the engine.
- If necessary, use special tool 303-397 to remove coolant and ventilation hoses.
- Due to the existence of different variants of the same car model, some working steps are not applicable to all cars. In such cases, this is clearly stated in the text.
- If necessary, cut the clamps and replace them during installation.
2. Standard preparatory activities:
- Please mark the radio key code.
- Mark the preset radio stations.
3.
CAUTION: Disconnect the ground cable from the battery.
Raise the vehicle. Refer to Section 100-02 for additional information.
4. Disconnect the drive belt cover.

5.
NOTE: Mark the direction of travel of the drive belt.
Remove the drive belt.
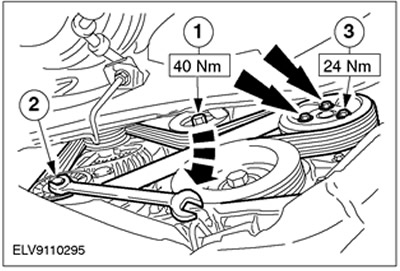
- 1.Loosen the bolts on the coolant pump pulley.
- 2. Loosen the drive belt tension by turning it clockwise and remove it.
- Disconnect the coolant pump pulley.
- 3. Disconnect the intermediate pulley of the poly V-belt.

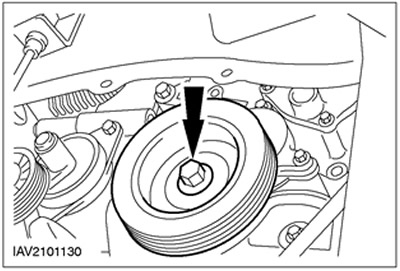
6. Disconnect the crankshaft pulley/damper.
7.
CAUTION: To avoid damaging the timing belt, always remove the timing belt cover.
Remove the lower timing belt cover.
8. Lower the vehicle.
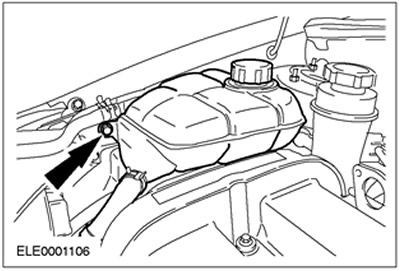
9. Disconnect the expansion tank of the cooling system and set it aside.
10. Remove the PAS tank and set it aside.

11.
CAUTION: Place a wooden block between the oil pan and the trolley jack.
Place a trolley jack with a wooden block under the oil pan and lift it up to take the load off the front engine mount.
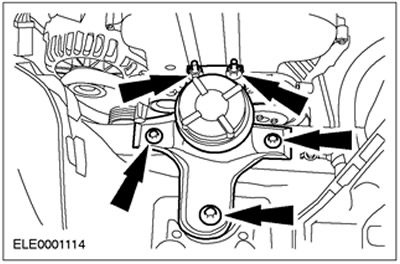
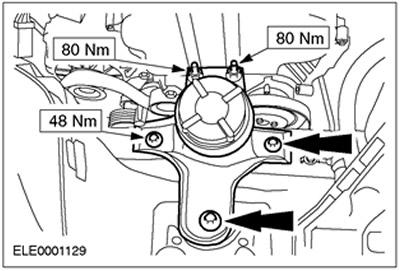
12.
NOTE: Mark the position of the engine mount.
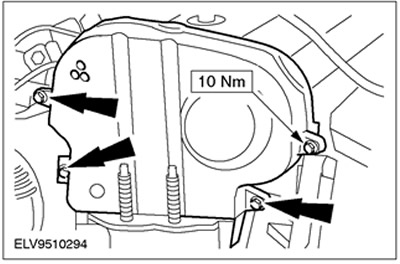
Remove the front engine mount.
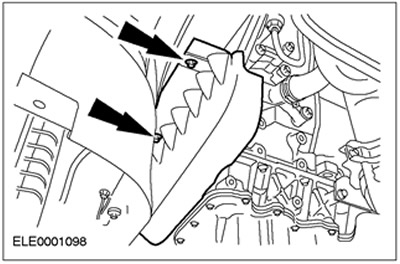
13. Disconnect the upper timing belt cover. Leave the timing belt cover in its installed position.
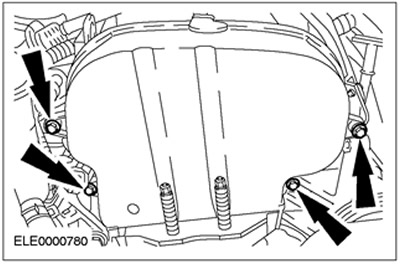
14. Disconnect the center timing belt cover/front engine mount bracket. Remove the upper timing belt cover.
Cars with LPG mode
15. Remove the LPG fuel rail. For more information, refer to Section 303-04A / 303-04B / 303-04C / 303-04D / 303-04E / 303-04F / 303-04G.
All cars
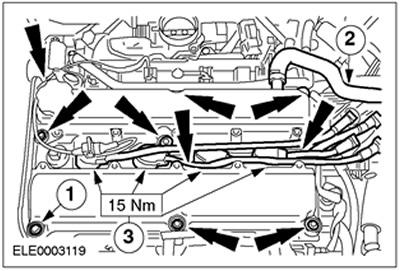
16.
NOTE: Release sequence: from outside to inside, working in a criss-cross pattern.
Remove the cylinder head cover.
CAUTION: When disconnecting the spark plug connector, do not pull on the wire. If necessary, disconnect the ignition wires from the ignition coil to prevent twisting. Before disconnecting the spark plug connector, twist it slightly to release the seal.
CAUTION: When disconnecting the spark plug connector, apply force along the spark plug axis (for angled spark plug connectors, use special tool 303-622).
- 1. Disconnect the spark plug connector.
- 2. Disconnect the PCV hose.
- 3. Unscrew ten bolts.

17.
CAUTION: To adjust the valve timing, the spark plugs must be removed.
Remove the spark plugs.
18. Turn the crankshaft to the top dead center position. Insert the special tool.

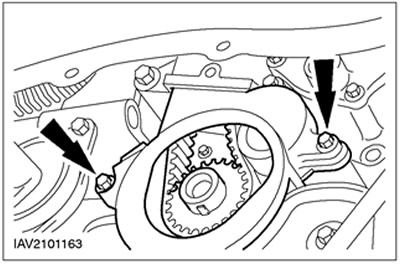
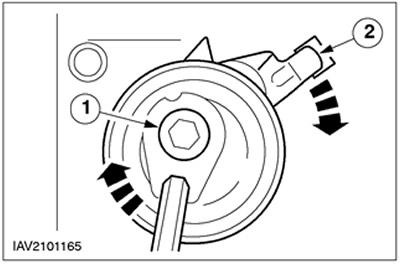
19. Loosen the timing belt tension.
- 1. Loosen the bolt and timing belt tensioner by turning the latter clockwise.
- 2. Loosen the bolt four turns and unhook the timing belt tensioner.
- Remove the timing belt.
Installation
All cars
1.
WARNING: Use a new timing belt.
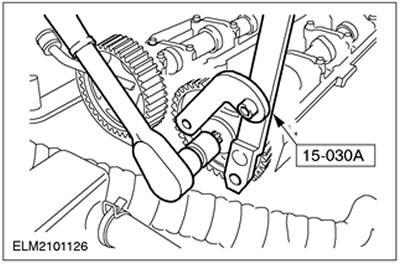
CAUTION: Do not tighten the camshaft pulley bolts using special tool 21-162B to lock the camshaft; to prevent the shaft from turning, use special tool 15-030A.
NOTE: The camshaft pulleys must be able to rotate on the camshafts.
Release the camshaft pulleys.
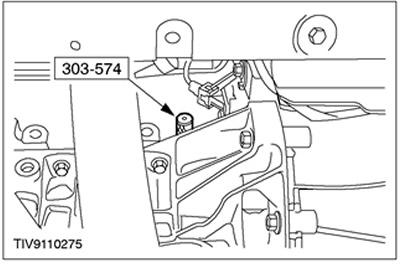
2. Set the crankshaft to top dead center for cylinder No.1.
3. Remove the plug and screw the special tool in completely.
CAUTION: Do not twist the timing belt (the bend diameter should not be less than 35 mm).
4.
CAUTION: Do not turn the crankshaft. If necessary, check that the crankshaft rests against Special Tool 303-620.
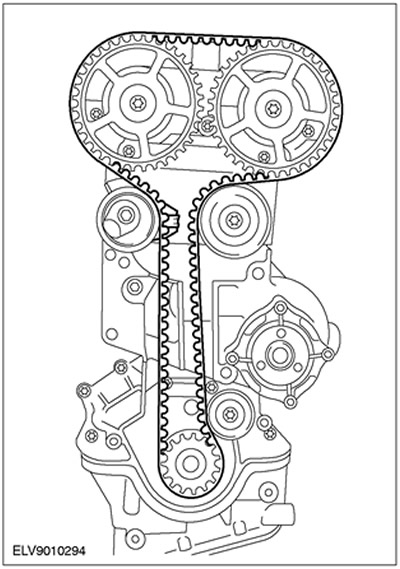
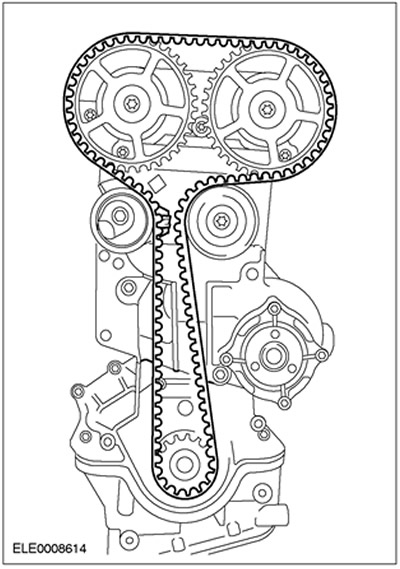
Install a new timing belt (shown with the engine removed). Slide the timing belt into place, starting at the crankshaft pulley and working counterclockwise. Tighten the belt as you slide it on.
5.
CAUTION: Do not turn the crankshaft. If necessary, check that the crankshaft rests against Special Tool 303-620.
NOTE: Construction shown without lower idler pulley (manufactured from about 01/99 onwards).
NOTE: The timing belt tensioner clip must not be secured in the stamped steel cover.
Install a new timing belt (shown with the engine removed). Slide the timing belt into place, starting at the crankshaft pulley and working counterclockwise. Tighten the belt as you slide it on.
6.
CAUTION: If the timing belt tension is incorrect, the valve timing will also be incorrect.
NOTE: Tighten the timing belt by turning it counterclockwise.
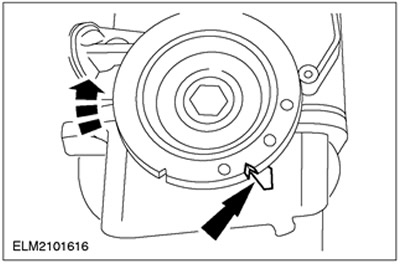
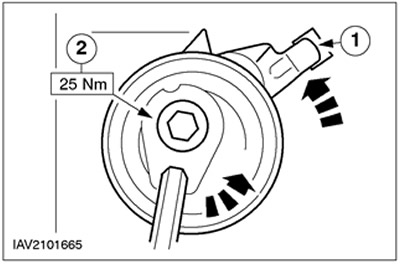
Tighten the timing belt.
- 1. Fix the belt tensioner in the stamped steel cover and screw in the bolt, but do not tighten it.
- 2.Tighten the timing belt by turning the tensioner counterclockwise until the arrow aligns with the mark, and tighten the bolt.
7.
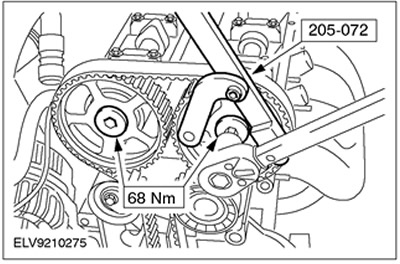
CAUTION: Do not tighten the camshaft pulley bolts using special tool 303-376 to lock the camshaft; to prevent the shaft from turning, use special tool 205-072.
NOTE: The crankshaft must remain at top dead center for cylinder #1.
Tighten the camshaft pulley bolts.
8. Unscrew and remove special tool 303-620.
9. Remove special tool 303-376 from the camshafts.
10.
NOTE: Rotate the crankshaft two revolutions in the direction of normal rotation.
Check the valve timing by installing a special tool. Correct them if necessary.
- Screw in special tool 303-620 and make sure the crankshaft rests against it.
- Insert special tool 303-376 into the camshafts; if necessary, loosen the pulleys and adjust the camshaft alignment.
- Disconnect the special tools.
11. Screw in and tighten the plug.
12. Apply sealant to the camshaft bearing caps.
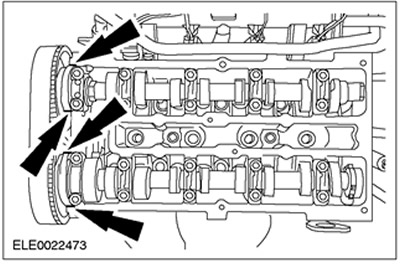
13. Install the cylinder head cover and spark plugs.
- 1.Tighten the bolts, working in two stages.
- Stage 1: 2 Nm
- Stage 2: 7 Nm
- 2.Connect the PCV hose.
CAUTION: To avoid damaging the spark plug connector seal, use a blunt object (such as a plastic zip tie) to apply silicone grease.
CAUTION: When mating the spark plug connector, keep it in line with the spark plug.
NOTE: Coat the inside of the spark plug connector with silicone grease to a depth of (5-10) mm.
- 3.Apply Never Seeze to spark plug threads, screw in spark plugs and fully seat spark plug connectors.
Cars with LPG mode
14. Install the LPG fuel rail. For more information, refer to Section 303-04A / 303-04B / 303-04C / 303-04D / 303-04E / 303-04F / 303-04G.
All cars
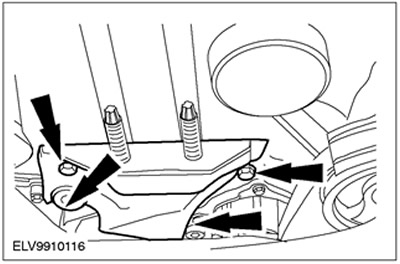
15.
NOTE: Install the upper timing belt cover together with the center timing belt cover.
Connect the timing belt center cover/front engine mount bracket.
16.
NOTE: Check the fit of the upper timing belt cover gasket and adjust if necessary.
Install the upper timing belt cover.
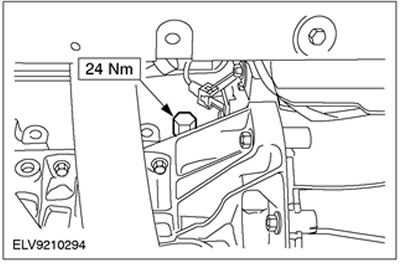
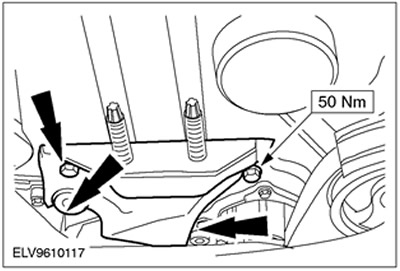
17. Install the front engine mount.
18. Connect the PAS tank.

19. Install the expansion tank of the cooling system.

20. Pull the trolley jack towards the front of the vehicle.
21. Raise the vehicle. Refer to Section 100-02 for additional information.
22. Install the lower timing belt cover.
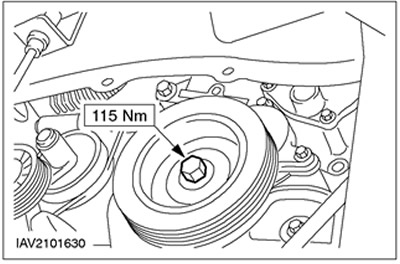
23. Install the crankshaft pulley/damper.
24.
NOTE: Direction of travel on used drive belt.
Install the drive belt.
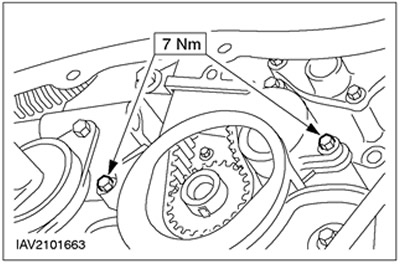
- 1. Install the intermediate pulley of the poly V-belt.
NOTE: Tighten the bolts just enough to hold them, but do not tighten them.
- Install the coolant pump pulley.
- 2. Put on the drive belt by moving it clockwise and tighten it.
- 3. Tighten the bolts on the coolant pump pulley.
25. Install the drive belt cover.
26. Lower the vehicle.
27. Standard finishing operations:
- Connect the ground wire to the battery.
- Check the fluid levels and adjust them if necessary.
- Check the routing of vacuum hoses, cables and wires and secure them using clamps.
- Enter the radio key code.
- Reprogram preset radio stations.
- Set the clock.
- Perform a road test to allow the PCM to collect data.
[The original version can be found on the website: FordBook]