Special tool
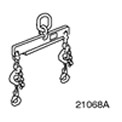 | Engine Lifting Tool 303-122 (21068A) |
General equipment:
- Repair zone crane
- Rolling jack
All cars
1. Relieve fuel system pressure. Refer to Section 310-00 for additional information.
2.
WARNING: There is a risk of scalding when the engine is hot.
Open the expansion tank of the cooling system.
3. Drain the coolant. Refer to Section 303-03 for additional information.
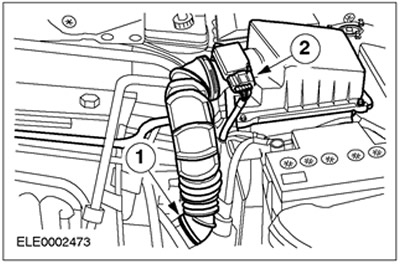
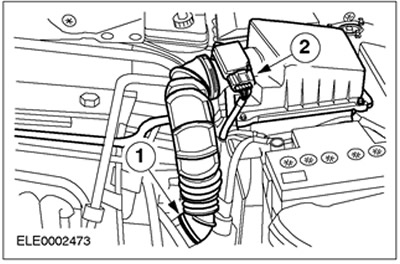
4. Remove the air filter and air intake hose.
- 1.Air intake hose.
- 2. Disconnect the mass air flow (MAF) sensor connector.
- 3. Disconnect the PCV hose from the cylinder head cover.
5. Remove the battery. For more information, refer to Section 414-01.
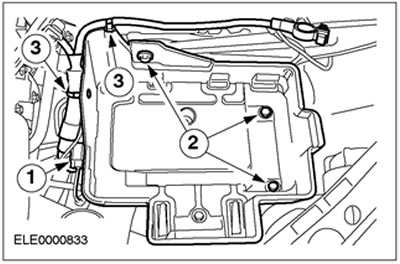
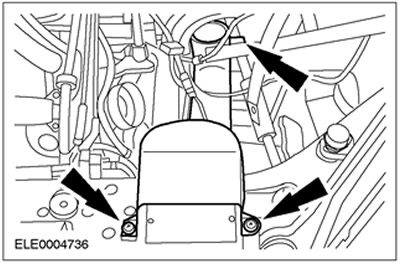
6. Remove the battery tray.
- 1. Release and disconnect the connector.
- 2. Unscrew the bolts.
- 3. Release the wiring harness.
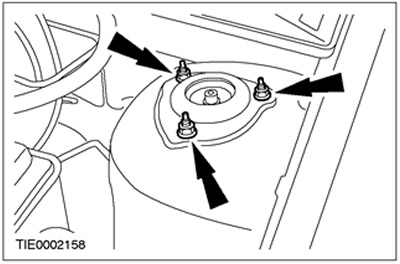
7. Loosen the right suspension strut nut by three turns.
8. Remove the air filter together with the air intake hose.
- 1.Air intake hose
- 2. Disconnect the mass air flow sensor (MAF sensor) connector.
- Disconnect the PCV hose from the cylinder head cover.
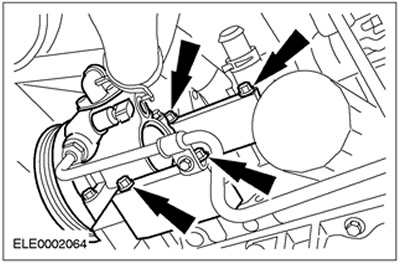
9. Remove the intake manifold.
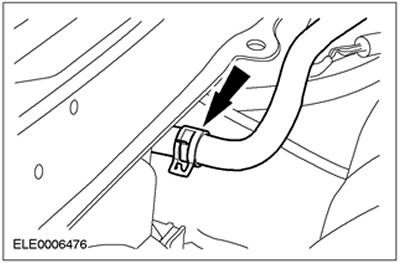
10. Disconnect the accelerator cable.
- 1. Release the clamp.
- 2. Unscrew the cable from the bracket.

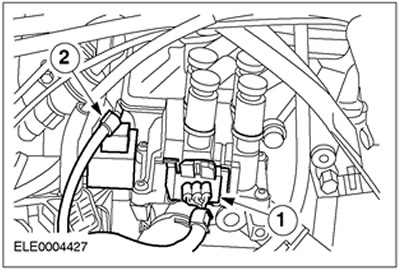
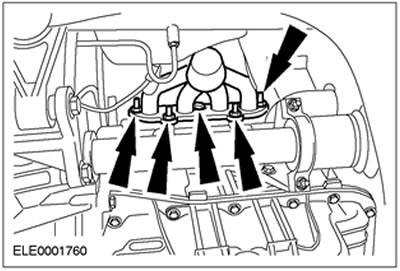
11. Disconnect the plug connector.
- 1. Ignition coil (EI)
- 2. Capacitor
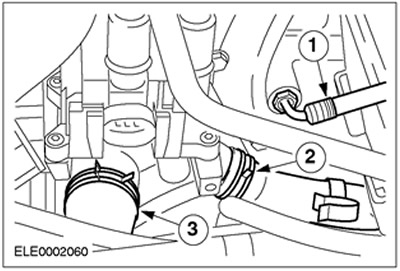
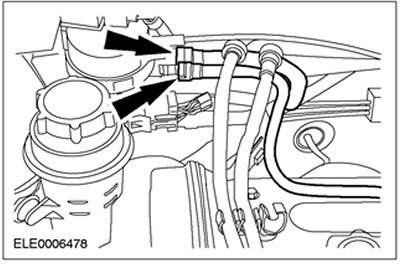
12. Disconnect the coolant and heating hoses.
- 1. Cooling system expansion tank hose
- 2.Heater coolant hose
- 3.Radiator coolant hose
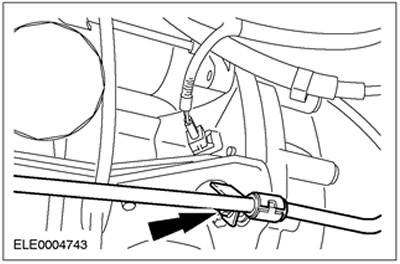
13. Disconnect the carbon filter vacuum line.
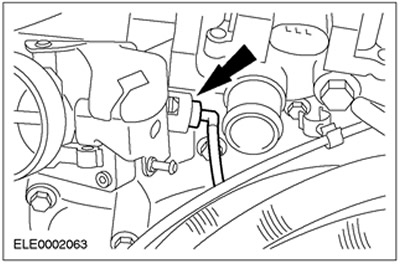
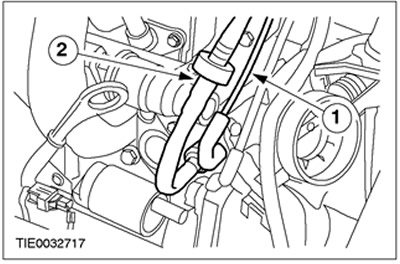
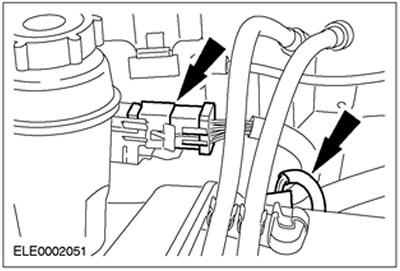
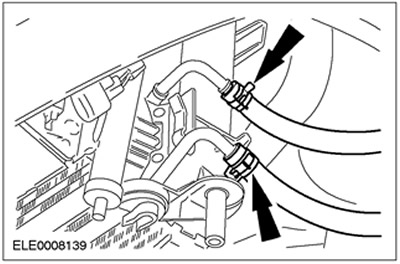
14. Disconnect the hoses and disconnect the plug connector.
- 1.Vacuum hose - fuel pressure control
- 2. Brake booster vacuum hose
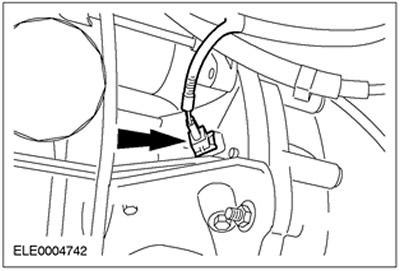
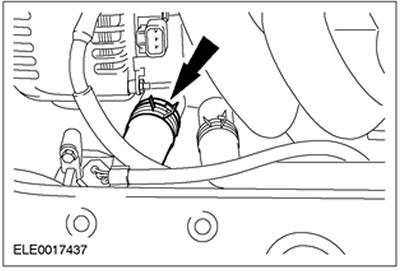
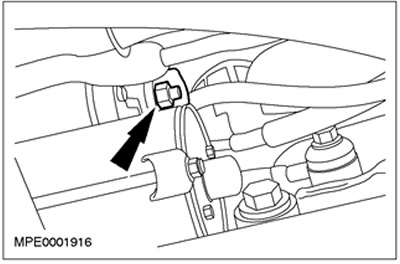
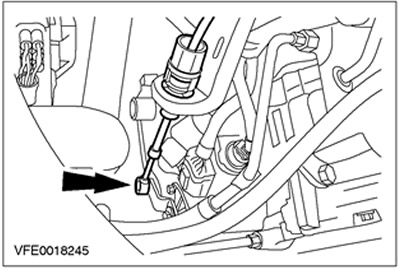
15. Disconnect the crankshaft position sensor (CKP sensor) plug connector.
16. Disconnect the heater coolant hose.
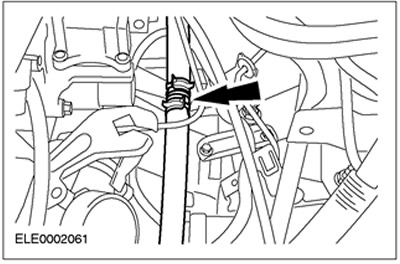
17. Disconnect the coolant hose.
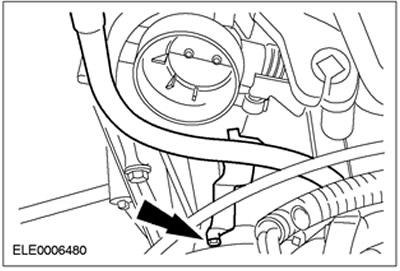
18. Disconnect the coolant hose from the expansion tank.
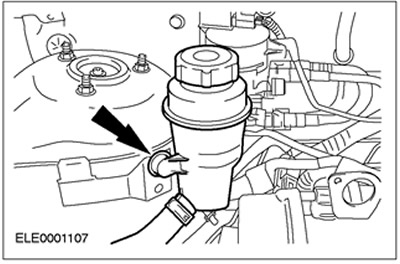
19. Release the power steering fluid reservoir and set it aside.
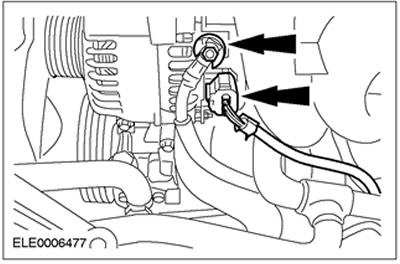
20. Disconnect the electrical wiring from the generator.
- Disconnect the positive cable.
- Disconnect the plug connector.
21. Disconnect the engine wiring harness connector.
22. Disconnect the EVAP canister solenoid valve vacuum lines.
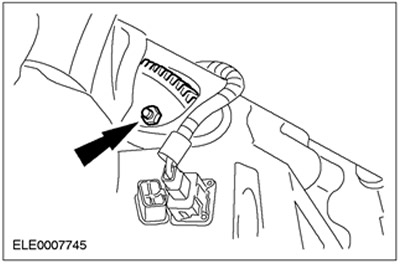
23. Remove the transmission fluid level indicator tube bolt from the automatic transmission and turn the tube to the side.
24. Raise the vehicle. Refer to Section 100-02 for additional information.
25. Disconnect the drive belt cover.
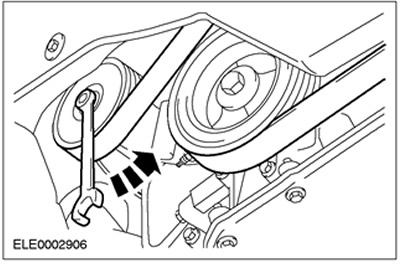
26. Remove the drive belt (vehicle with air conditioning system shown).
27. Disconnect the ground wire from the starter.
28. Disconnect the oil cooler lines from the oil cooler.
Cars without air conditioning
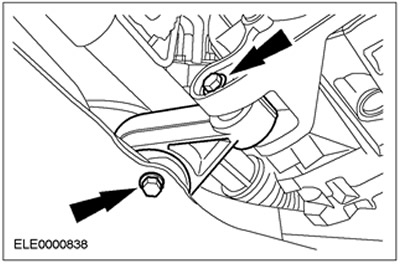
29. Disconnect the power steering line bracket.
30. Disconnect the power steering pump together with the support plate. Tie it up using clamps.
Cars with air conditioning system
31. Disconnect the air conditioning compressor (four bolts). Tie it down using cable ties.
All cars
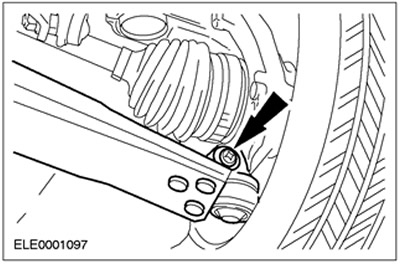
32. Disconnect the lower suspension arm on the right side.
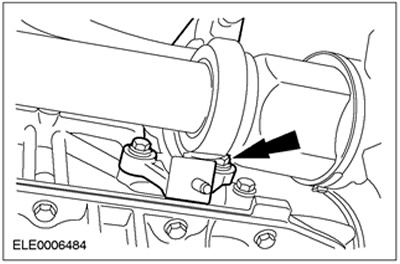
33. Disconnect the clamp from the intermediate bearing of the right front axle shaft. Discard the clamps and nuts as they are no longer needed.

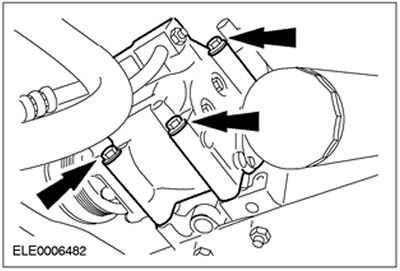
34. Disconnect the right front axle shaft intermediate bearing bracket (four bolts).
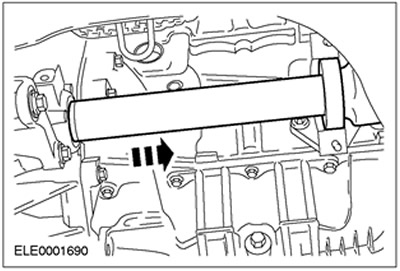
35.
CAUTION: The inner hinge should not be deflected at an angle exceeding 18 degrees. The outer hinge should not be deflected at an angle exceeding 45 degrees.
Remove the right front axle shaft from the gearbox and tie it down. Seal the holes in the gearbox with process plugs.
36.
NOTE: The roll limiter is in a tensioned state.
Remove the roll limiter.
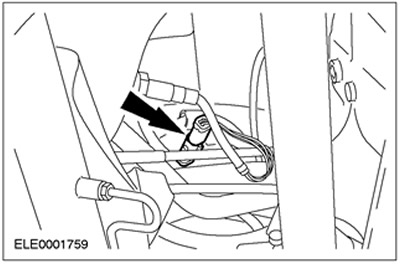
37. Disconnect the heated oxygen sensor (HO2S) connector.
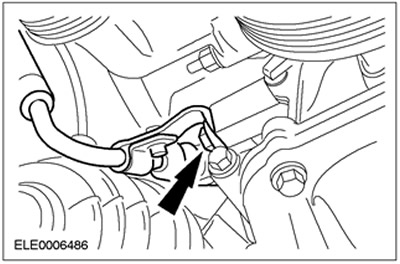
38. Disconnect the power steering high pressure line bracket.
Cars with air conditioning system
39. Disconnect the bracket and the power steering pump together with the drive belt tensioner. Tie them up using cable ties.
All cars
40.
CAUTION: If the flexible exhaust pipe is bent too much, it may become damaged, which will eventually result in component failure.
Secure the flexible exhaust pipe using a support sleeve or suitable tire.
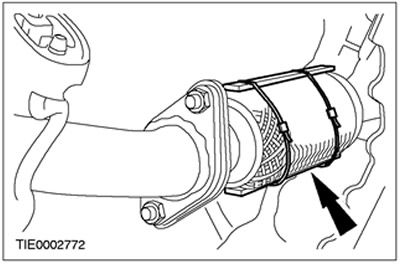
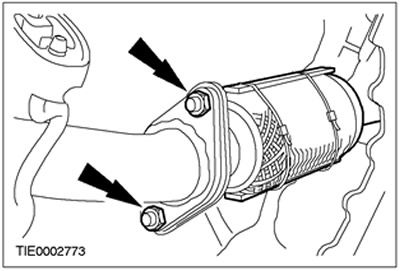
41. Disconnect the exhaust pipe. Remove the gasket.
42. Lower the car.
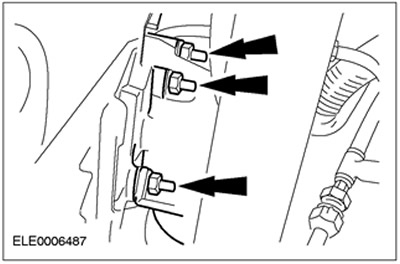
43. Disconnect the engine ground cable and the exhaust manifold heat shield.
- 1.Engine ground cable
- 2. Exhaust system heat shield (three bolts)

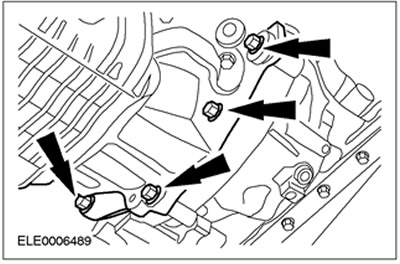
44. Remove the exhaust manifold (shown from below). Tilt the exhaust manifold toward the bulkhead and secure it if necessary.
45. Disconnect the torque converter from the drive plate (four bolts). Use a suitable tool to separate the torque converter from the drive plate.
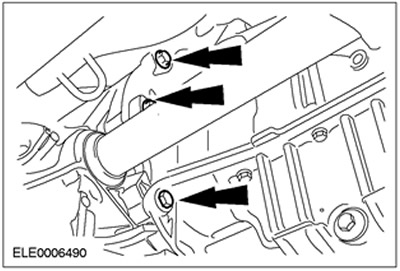
46. Remove the lower gearbox flange bolts.
47. Remove the lower gearbox flange bolts.
48. Lower the car.
49. Disconnect the gear selector cable from the gearbox.
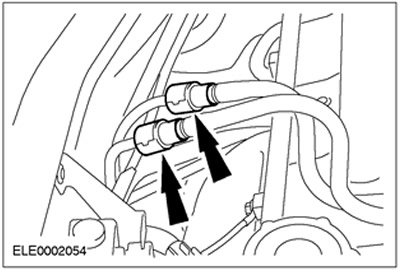
50. Disconnect the fuel lines. Refer to Section 310-00 for additional information.
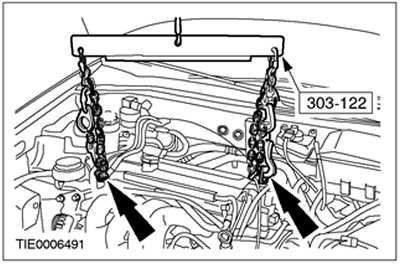
51. Bring the repair area crane to the site and use a special tool to attach the engine to it.
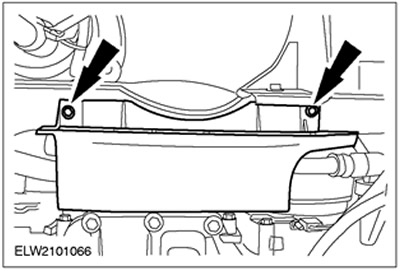
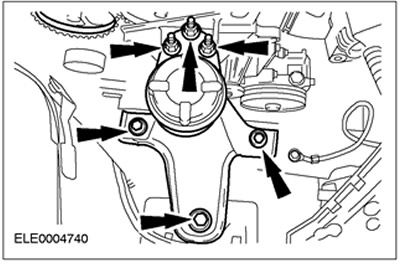
52. Disconnect the front engine mount. Remove the front engine mount bracket.
53.
WARNING: Do not support the automatic transmission under the oil pan.
CAUTION: The inner hinge should not be tilted at an angle exceeding 18 degrees. The outer hinge should not be tilted at an angle exceeding 45 degrees.
Support the gearbox using a wooden block and a workshop jack.
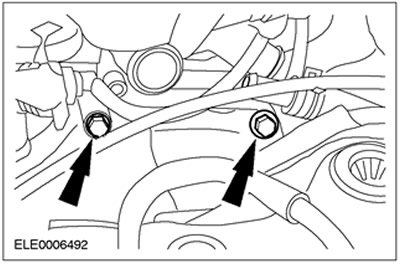
54. Remove the upper gearbox flange bolts.
55.
WARNING: The torque converter may fall out of the automatic transmission.
Disconnect the engine from the gearbox.
56. Remove the engine.
57. Secure the torque converter to prevent it from falling out or remove it if necessary.
(For more information, please visit the specified website: FordBook.ru)