Contents: Removal ↳ Installation ↳
Special tool
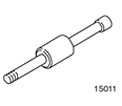 | Hammer with movable striker 205-047 (15-011) |
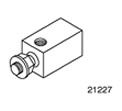 | Adapter for 205-047 303-633 (21-227) |
General equipment: Studs M6 x 20 mm (10 pcs.).
| Name | Specification |
| Sealant | WSE-M4G323-A6 |
Removal
1. Remove the catalytic converter. Refer to Section 309-00 for additional information.
2. Drain the oil from the engine. Allow the oil to drain into a suitable container.
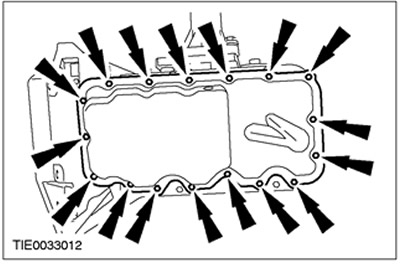
3. Remove the oil pan mounting bolts.
4.
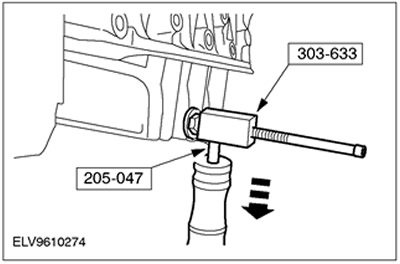
CAUTION: To prevent damage to the sealing surface, use only the special tool shown when removing the oil pan.
NOTE: Tighten the lock nut on the oil pan and tap it several times with the special tool to separate the oil pan from the lower crankcase section.
Using a special tool, remove the oil pan.
Installation
1.
NOTE: Do not damage mating surfaces.
Clean the mating surfaces.
2.
NOTE: The mating surfaces must be free of oil and sealant residue.
Remove all traces of oil from the oil pan.
3.
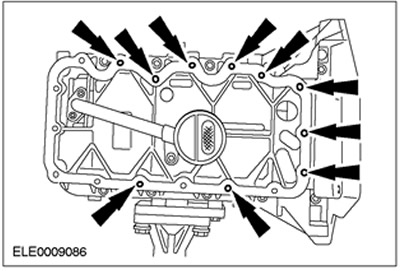
CAUTION: If sealant gets into blind holes, it may damage the lower section of the crankcase.
Install M6 x 20mm studs (10 pcs.) into the blind holes shown (engine shown removed for clarity).
4.
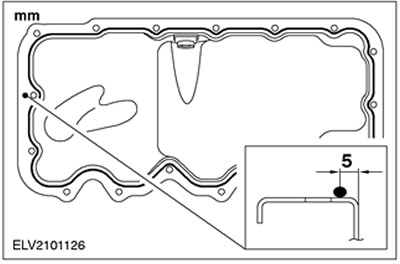
NOTE: Install the oil pan within ten minutes after applying the sealant.
Apply a 3mm diameter bead of sealant to the mating surface of the oil pan.
5.
NOTE: The oil pan should not be removed after it contacts the lower crankcase section.
Remove the oil pan. Remove the M6 x 20 mm studs (10 pcs.).
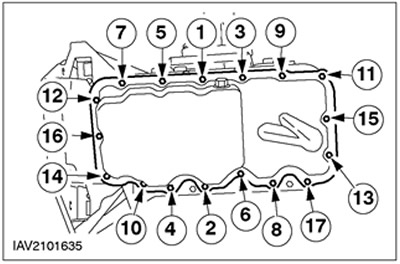
6. Install the oil pan mounting bolts.
- Tighten the bolts in the sequence shown in two stages.
- Stage 1: 6 Nm
- Stage 2: 10 Nm
7.
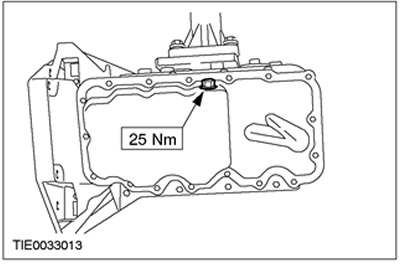
NOTE: Inspect the oil drain plug seal for damage. Install a new oil drain plug seal if necessary.
Install the oil pan drain plug.
8. Install the catalytic converter. Refer to Section 309-00 for additional information.
9. Fill the engine with engine oil. For more information, refer to the Specifications chapter in this section.