Special tool
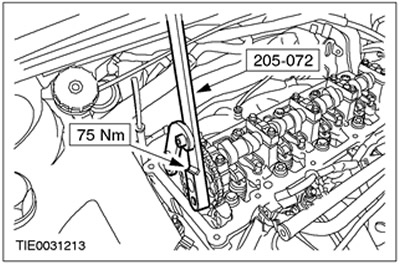
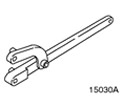 | Universal wrench for holding flanges 205-072 (15-030A) |
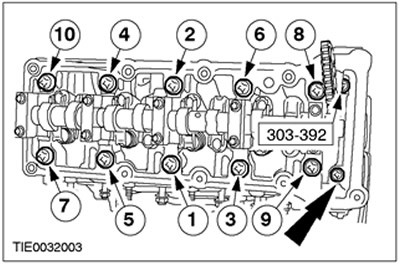
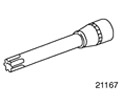 | Socket wrench for cylinder head bolts 303-392 (21-167) |
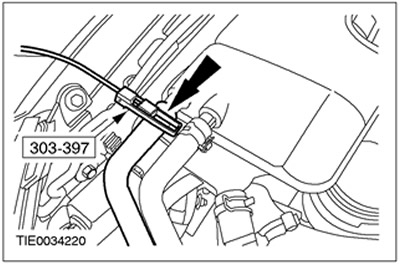
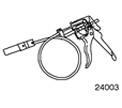 | Hose Clamp Remover/Installer 303-397 (24-003) |
General equipment: Rolling jack.
Withdrawal
WARNING: Do not smoke or walk with a lit cigarette or any type of open flame while working on or near fuel related items. In such situations, there are always highly flammable mixtures that can ignite. Failure to follow these instructions may result in injury.
1. Remove the intake manifold. For more information, refer to the Intake Manifold chapter available in this section.
2. Remove the cylinder head cover. For more information, refer to the Cylinder Head Cover chapter available in this section.
3. Drain the coolant from the cooling system. Refer to Section 303-03 for more information.
4.
CAUTION: Turn the crankshaft in the normal direction of rotation.
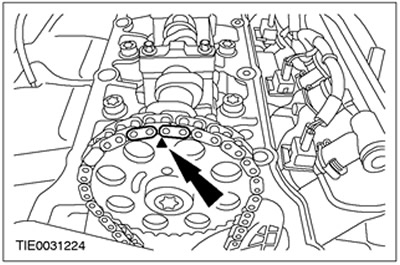
NOTE: The timing mark on the camshaft sprocket must be in position "12 hours".
NOTE: Note the position of the timing chain.
Rotate the engine until the #1 piston is at top dead center (w.m.t.).

5. Remove the exhaust manifold heat shield (for clarity, the engine is shown removed).
6. Remove the hydraulic timing chain tensioner.
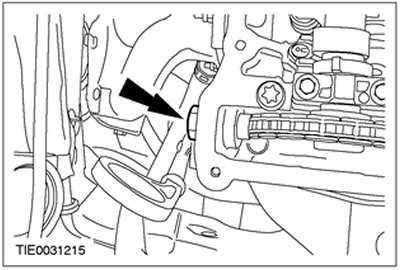
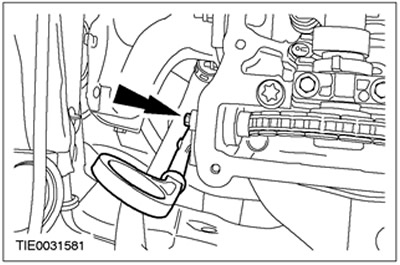
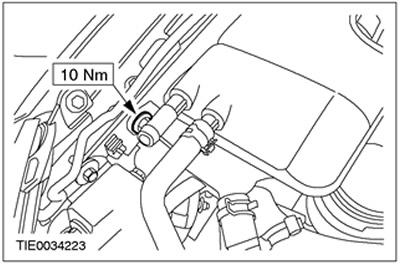
7. Disconnect the oil dipstick tube from the cylinder head.
8. Raise and support the vehicle. Refer to Section 100-02 for more information.
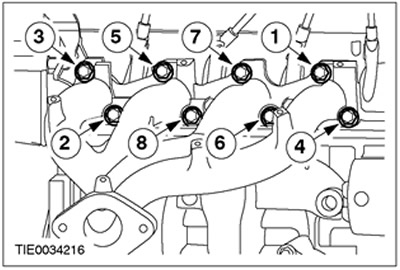
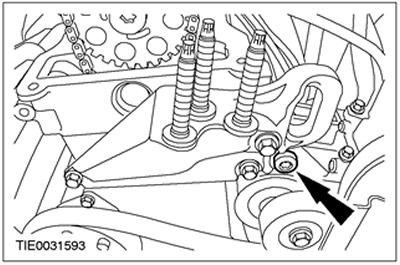
9. Remove the exhaust manifold (for clarity, the engine is shown removed).
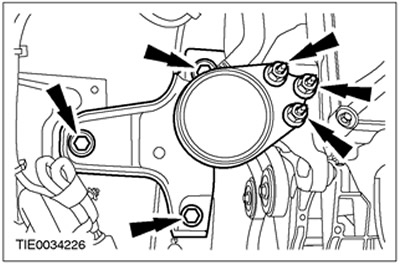
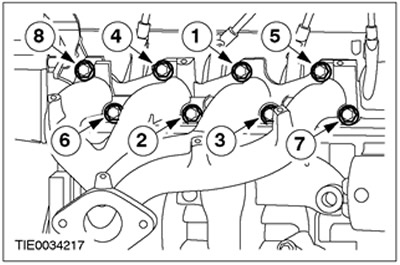
- Loosen the nuts working in the sequence shown.
- Discard the gasket as it is no longer needed.
10. Lower the car.
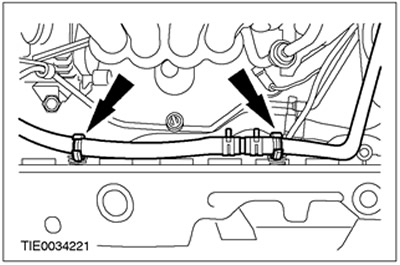
11. Using the special tool, disconnect the coolant hoses from the coolant circulation control unit.
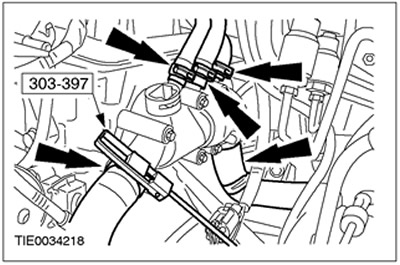
12. Using the special tool, disconnect the coolant hose from the coolant line.

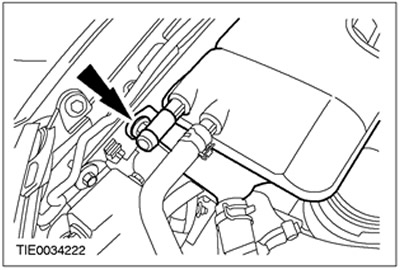
13. Using the special tool, disconnect the coolant hose from the expansion tank of the cooling system.

14. Disconnect a hose of a cooling liquid from the panel with a hole for a radiator grille.
15. Remove a broad tank.
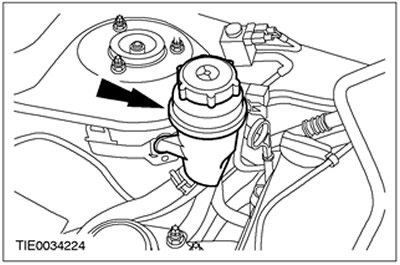
16. Disconnect the power steering reservoir and place it aside.
17. Disconnect the coolant line from the front engine mount.

18. Using a rolling jack, support the engine/gearbox assembly in the drive axle assembly.
19. Remove the front engine mount.
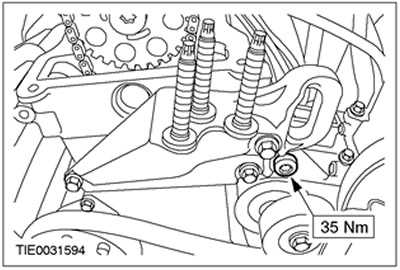
20. Turn out a bolt of fastening of an arm of a forward support of the engine.
21.
NOTE: Using a suitable piece of wire, tie off the timing chain to prevent it from falling into the cylinder block.
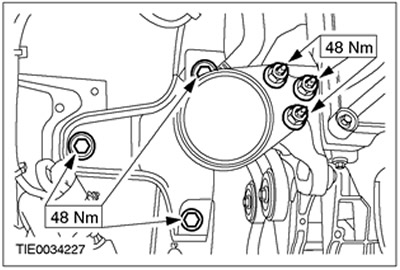
Using the special tool, remove the camshaft sprocket.

22.
NOTE: Loosen the cylinder head bolts in the sequence shown.
Using the special tool, remove the cylinder head.
- Pass the timing chain through the cylinder head and tie it to the cylinder block.
- Discard the gasket as it is no longer needed.
- Discard the cylinder head bolts as they are no longer needed.

Installation
1.
NOTE: Install new cylinder head bolts.
NOTE: Install a new cylinder head gasket.
NOTE: Pass the timing chain through the cylinder head and tie it to the cylinder head.
Using the special tool, install the cylinder head.
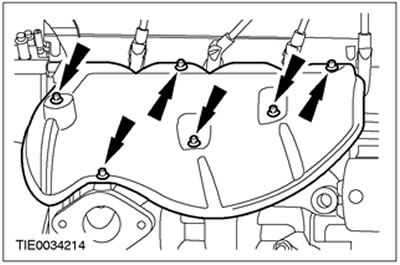
- Tighten the cylinder head bolts in the sequence shown in four steps.
- Stage 1: Tighten bolts 1 to 10 to 40 Nm.
- Stage 2: Tighten the front two bolts (M8) force 15 Nm.
- Stage 3: Tighten the front two bolts (M8) at 45 degrees.
- Step 4: Turn bolts 1 to 10 120 degrees.
2.
NOTE: The timing mark on the camshaft sprocket must be in position "12 hours".
NOTE: The timing mark on the camshaft sprocket and the marked links on the timing chain must be opposite each other.
Install the camshaft sprocket and timing chain.
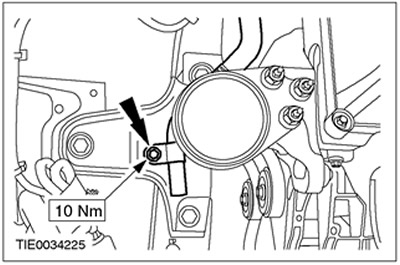
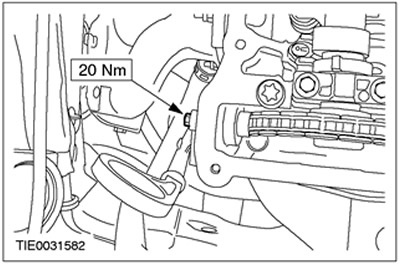
3. Using the special tool, tighten the camshaft sprocket mounting bolt.
4. Establish a bolt of fastening of an arm of a forward support of the engine.
5. Install the front engine mount.
6. Remove the rolling jack.
7. Connect the coolant line to the front engine mount.
8. Fix a tank of the amplifier of a steering on a wheel arch.

9. Install the expansion tank of the cooling system.
10. Connect the coolant hose to the grille hole panel.

11. Using the special tool, connect the coolant hose to the expansion tank of the cooling system.
12. Using the special tool, connect the coolant hose to the coolant line.

13. Using the special tool, connect the coolant hoses to the coolant circulation control unit.

14. Raise and support the vehicle. Refer to Section 100-02 for more information.
15.
NOTE: Install a new exhaust manifold gasket.
Install the exhaust manifold (for clarity, the engine is shown removed).
- Tighten the nuts working in the sequence shown in two steps.
- Stage 1: 15 Nm
- Stage 2: 20 Nm
16. Lower the car.
17. Connect the oil dipstick tube to the cylinder head.
18. Install the hydraulic timing chain tensioner.

19. Install exhaust manifold heat shield (for clarity, the engine is shown removed).
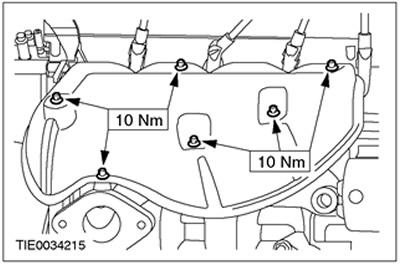
20. Install the cylinder head cover. For more information, refer to the Cylinder Head Cover chapter available in this section.
21. Install the intake manifold. For more information, refer to the Intake Manifold chapter available in this section.
22. Fill in cooling liquid in the cooling system and remove air from the system. See Section 303-03 for more information.
Visitor comments