Contents: OHC, V6 and diesel engines up to 8/84 ↳ DOHC engine, all petrol engines… ↳ Diesel engine only from 9/94 to 12/96 ↳ Only diesel engine from 1/97 ↳
Note: The generator is also an exchangeable unit. This means that when buying a refurbished or new generator, the faulty generator is accepted by the seller as payment, so when going shopping, you should take the old generator with you.
OHC, V6 and diesel engines up to 8/84
Removal
Important: Disconnect the negative (-) battery cable.
Caution: This will erase the contents of electronic memory devices, such as the engine fault code memory or radio memory. Therefore, before disconnecting the battery, be sure to read the instructions in Chapter "Removal and installation the battery".
Remove the V-belt, see p. 29.
Disconnect all electrical wires from the rear of the generator and disconnect the multi-pin plug connector.
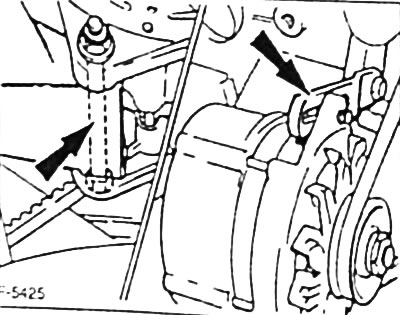
Unscrew the generator mount at the bracket and at the tension bar, remove the generator from the engine compartment.
Installation
Place the generator and tighten the fastening to the bracket by hand.
Insert the bolt into the tension bar.
Check the V-belt for wear and replace if necessary.
Apply the V-belt and tighten it, see p. 29.
Connect all electrical wires to the generator and connect the multi-pin plug connector.
Connect the ground (-) cable to the battery.
If available, set the clock and enter the radio theft protection code.
DOHC engine, all petrol engines since 9/94
Removal
Important: Disconnect the negative (-) battery cable.
Caution: This erases the contents of electronic memory devices, such as the engine fault code memory or radio memory. Therefore, before disconnecting the battery, be sure to read the instructions in the chapter "Removal and installation the battery".
2.3L engine: Remove the air intake hose, see p. 59.
Remove the poly V-belt, see p. 29.

To facilitate subsequent assembly, mark 2 or 3 electrical wires on the back of the generator with tags, and then disconnect the wires.
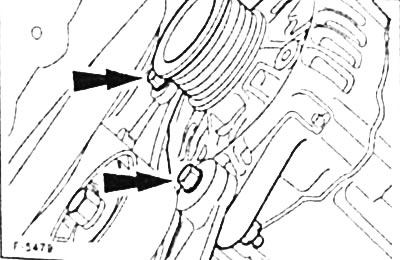
Unscrew the 2 mounting bolts from the front side of the generator and remove the generator.
Installation
Place the generator in the installation position. Screw in the mounting bolts from the front side and tighten them to a torque of 25 Nm.
Connect the electrical wires in accordance with the existing marks.
Check the poly V-belt for wear and replace if necessary.
Place the poly V-belt on and tighten it. see p. 29.
2.3L engine: Install the air intake hose, see p. 59.
Connect the ground (-) wire to the battery. Set the clock. Enter the radio theft protection code.
Diesel engine only from 9/94 to 12/96
Note: This section only describes differences that need to be kept in mind when removing the alternator.
Unscrew the 3 bolts securing the vacuum pump from the rear of the generator and remove it together with the attached hoses. The vacuum pump is connected to the brake booster by one hose and, in addition, has connections for supplying and discharging lubricant, connecting it to the engine oil circulation system.
Remove the sealing ring between the generator and the vacuum pump. Replace the sealing ring when installing.
Only diesel engine from 1/97
Note: This only describes differences that need to be kept in mind when removing the generator.
Disconnect the hoses from the vacuum pump at the front of the alternator (poly V-belt drive side). The vacuum pump is connected to the brake booster by one hose and also has connections for supplying and discharging lubricant, connecting it to the engine oil circulation system.
Caution: Collect and dispose of leaking engine oil in an environmentally friendly manner.