Special tool
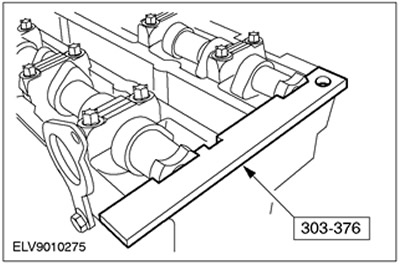
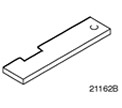 | Camshaft alignment plate 303-376 (21-162V) |
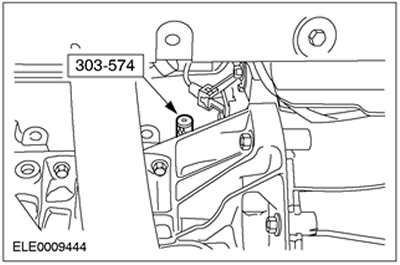
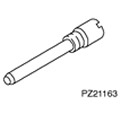 | Pin for setting the top dead center of the crankshaft 303-574 (21-163) |
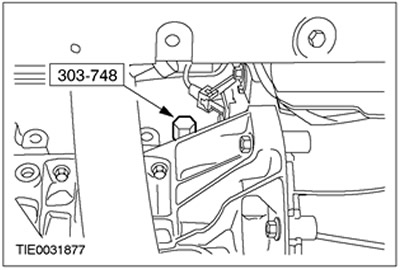
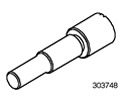 | Crankshaft Lock Tool 303-748 (21-259) |
General equipment:
- rolling jack
- wooden block
| Name | Specification |
| Extreme pressure lubricant | WSD-M1244-A |
| Silicone Grease | A960-M1S171-AA |
Withdrawal
1. Remove the battery cover.
2. Disconnect a wire of weight from the accumulator. See Section 414-01 for more information.
3. Raise and support the vehicle. See Section 100-02 for more information.
4.
NOTE: Note the direction of travel of the drive belt.
Remove the accessory drive belt.
- 1. Loosen the bolts on the water pump pulley.
- 2.Turn the tensioner clockwise.
- 3.Disconnect the accessory drive idler pulley.
- Disconnect the water pump pulley.
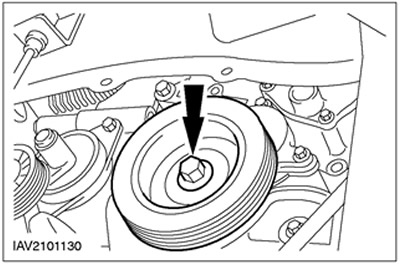
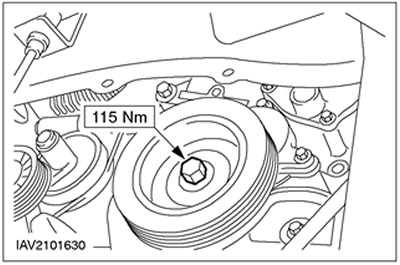
5. Remove the crankshaft pulley.
6.
CAUTION: To avoid damage to the timing belt, the bottom of the engine front cover must be removed.
Disconnect the lower timing belt cover.
7. Lower the car.
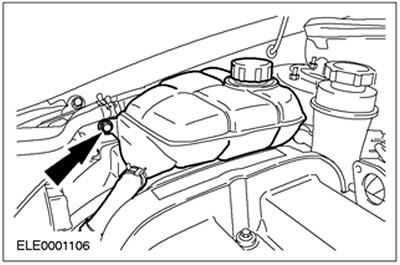
8. Disconnect the expansion tank of the cooling system and place it aside.

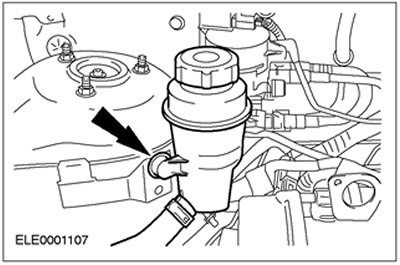
9. Disconnect the power steering reservoir and place it aside.
10.
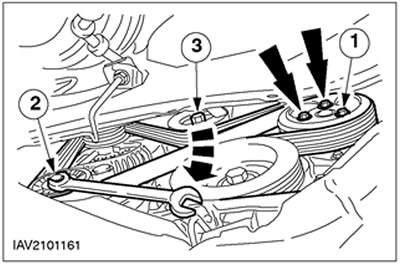
CAUTION: Insert a suitable block of wood between the oil sump and the rolling jack.
Place a rolling jack and block of wood under the oil sump and raise the engine just enough to relieve the front engine mount.
11.
NOTE: Mark the position of the front engine mount.
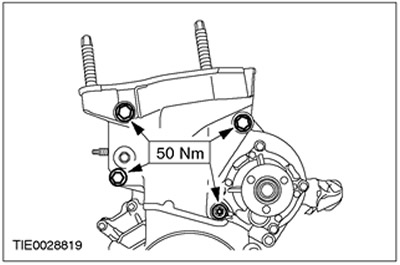
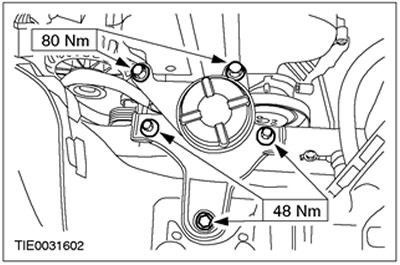
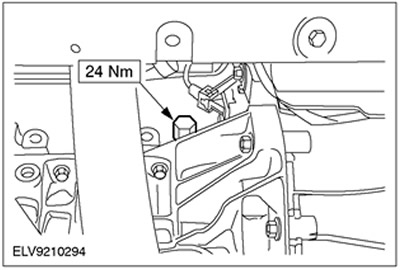
Remove the front engine mount.
12. Disconnect the upper timing belt cover. Leave the timing belt cover in its installation position.
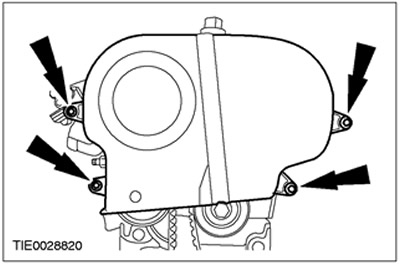
13. Remove an arm of a forward support of the engine. Remove the upper timing belt cover.
14. Remove the spark plug cover.
15.
CAUTION: Do not pull on wire when disconnecting spark plug connectors. If necessary, disconnect the ignition wires from the ignition coil to avoid twisting the ignition wires. To loosen the seal, turn the spark plug connectors slightly before disconnecting them.
CAUTION: Disconnect the spark plug connectors according to the spark plug order.
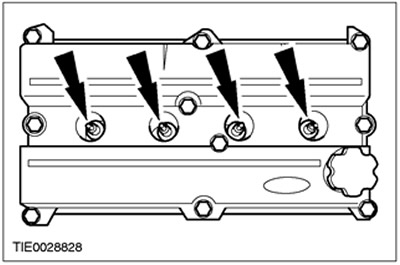
NOTE: Release sequence: from outside to inside, working in a cross way.
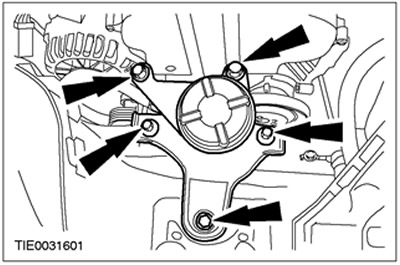
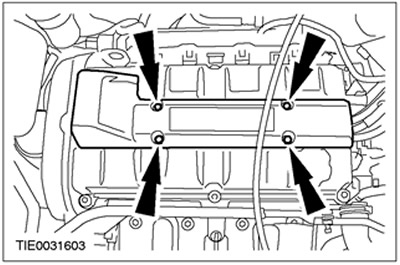
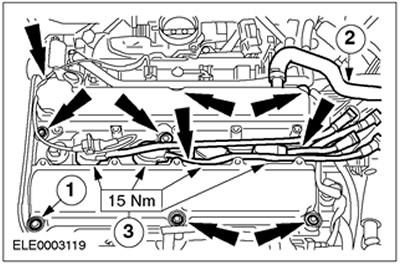
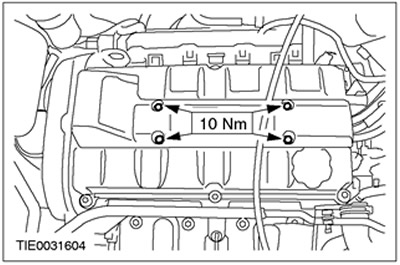
Remove the cylinder head cover.
- 1.Disconnect the spark plug connectors.
- 2. Disconnect the positive crankcase ventilation hose (PCV).
- 3. Turn out ten bolts.
16. Remove spark plugs.
17.
NOTE: The engine should only be turned in the normal direction of rotation of the crankshaft.
Rotate the engine until piston no. 1 is at top dead center (w.m.t.).
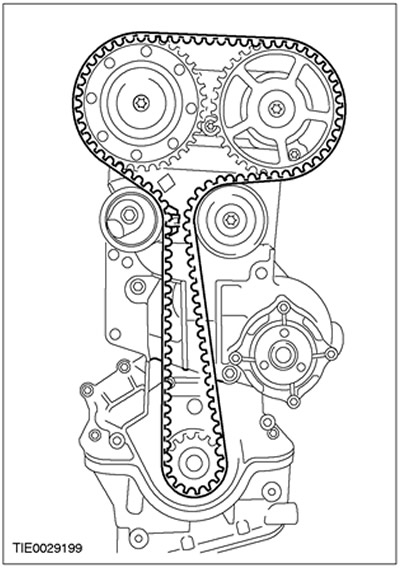
18. Loosen the tension of the timing belt (for clarity, the timing belt is shown removed).
- 1. Loosen the bolt four turns.
- 2. Position the tensioner so that the locking element is approximately in position «4 hours».
- 3. Align the hex wrench slot in the tensioner adjusting washer with the pointer behind the pulley.
19. Remove the timing belt.
20.
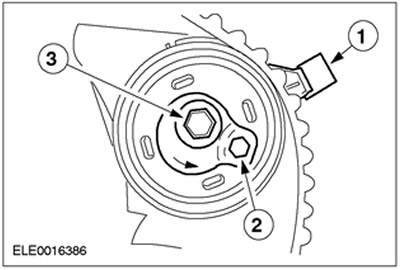
NOTE: Use an open end wrench to prevent the camshaft from turning.
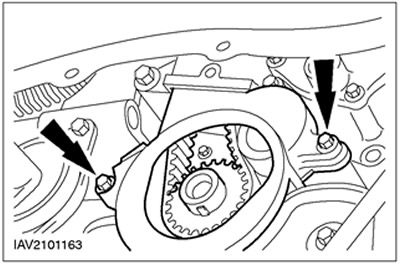
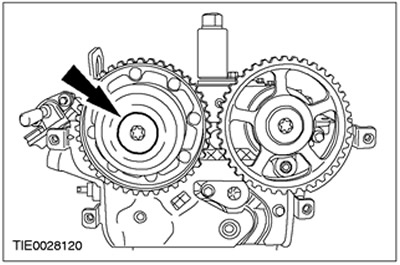
Remove the intake camshaft pulley cap.
21.
NOTE: Use an open end wrench to prevent the camshaft from turning.
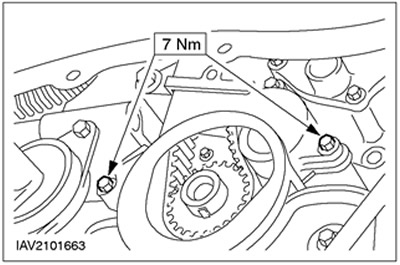
Loosen the camshaft pulley bolts.
Installation
1.
NOTE: Do not overtighten the bolts. The pulleys must be able to rotate freely on the camshafts.
Rotate the camshafts to the ignition position for cylinder no. 1 and insert the special tool into the camshafts.
2.
NOTE: The engine should only be turned in the normal direction of rotation of the crankshaft.
Rotate the crankshaft to top dead center for cylinder no. 1.
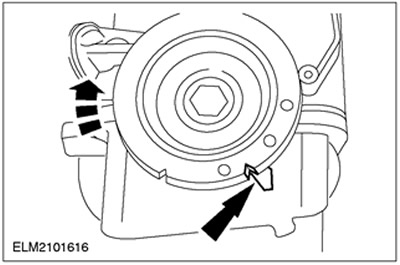
3. Remove the plug, install the special tool.
4.
CAUTION: Do not twist the timing belt (the diameter of the bend of the timing belt is not allowed, less than 35 mm).
CAUTION: Do not rotate the crankshaft; make sure it still rests on the alignment pin.
NOTE: When installing the timing belt, the tab on the belt tensioner must not be hung from the sheet metal cover.
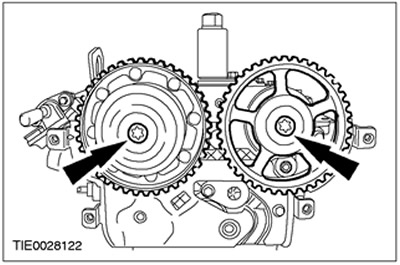
Install a new timing belt. Starting at the crankshaft pulley and working counterclockwise, fit the timing belt while keeping it taut.
5.
CAUTION: Incorrect timing belt tension will result in incorrect valve timing.
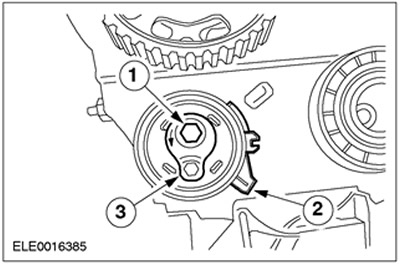
Pre-tension the timing belt.
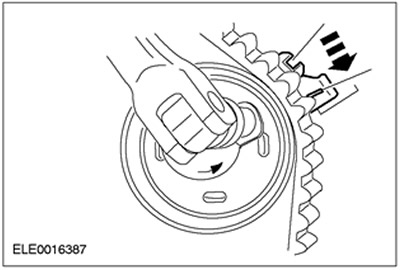
- 1.Turn the tensioner locking element counterclockwise and insert the locking element into the groove on the timing cover.
- 2. Position the hex wrench slot provided in the tensioner adjusting washer to position «4 hours».
- 3. Using a 6mm hex wrench, tighten the bolt just enough to pull the tensioner against the rear timing cover, but still allowing the tensioner shim to rotate.
6.
CAUTION: Tighten the timing belt by working counterclockwise.
Using a hex wrench, turn the adjusting washer counterclockwise until the mark on the pointer is centered on the index line on the locking element (during adjustment, the pointer will move clockwise).
7. Tighten the bolt while holding the shim in place.

8.
NOTE: Use an open end wrench to prevent the camshaft from turning.
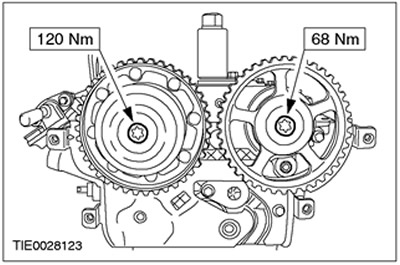
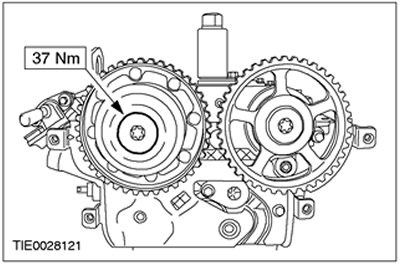
Tighten the camshaft pulley bolts.
9.
NOTE: Use an open end wrench to prevent the camshaft from turning.
Install the intake camshaft pulley cap.
10. Remove the special tool.

11. Remove the special tool from the camshafts.
12.
NOTE: Rotate the crankshaft two turns in the direction of normal rotation.
Check the valve timing by installing a special tool. Correct them if necessary.
- Install the special tool and make sure it contacts the crankshaft.
- Install the special tool in the camshafts; if necessary, release the pulleys and correct the alignment of the camshafts.
- Remove special tools.
13. Install the special tool.
14.
CAUTION: To avoid damaging the spark plug connectors, use an object with a blunt end (plastic clamp), to apply silicone grease.
CAUTION: When mating the spark plug connector, keep it in line with the spark plugs.
NOTE: Apply silicone grease 5-10 mm deep to the inside of the spark plug connectors.
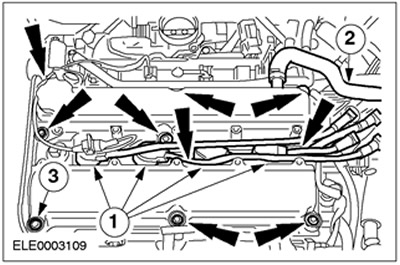
Install the cylinder head cover.
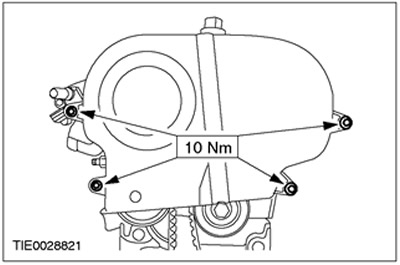
- 1. Tighten the bolts, working in two steps. Stage 1: 2 Nm. Stage 2: 7 Nm
- 2. Attach the PCV hose to the valve cover. Connect the plug connector of the VCT actuator.
- 3. Apply a grease such as anti-seize to the threads of the spark plugs, install the spark plugs, and connect the spark plug connectors.
15. Install the spark plug cap.
16.
NOTE: Install the upper timing belt cover and center timing belt.
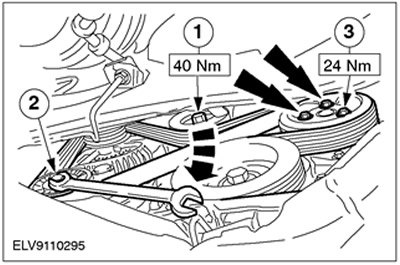
Install the front engine mount bracket.
17.
NOTE: Check the location of the timing belt top cover gasket and adjust if necessary.
Install the timing belt top cover.
18. Install the front engine mount.
19. Install the power steering pump reservoir.

20. Fix a broad tank of system of cooling.
21. Remove the rolling jack and block of wood.
22. Raise and support the car. See Section 100-02 for more information.
23. Install the lower timing belt cover.
24. Install the crankshaft pulley.
25. Install the plug.
26.
NOTE: Direction of travel on used drive belt.
Install the drive belt.
- 1.Install the intermediate pulley of the V-ribbed belt. Install the water pump pulley. Do not tighten the bolts at this stage.
- 2. Put on the drive belt by turning it clockwise and tension it.
- 3. Tighten the bolts on the water pump pulley.
27. Lower the car.
28. Connect a wire of weight to the accumulator. See Section 414-01 for more information.
Visitor comments