Special tool
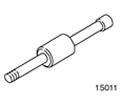 | Hammer with moving hammer 205-047 (15-011) |
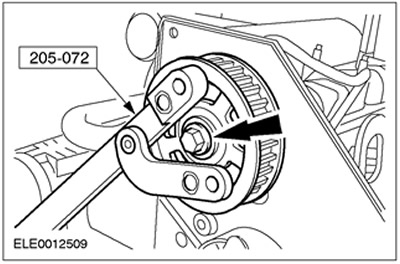
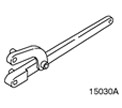 | Universal wrench for holding flanges 205-072 (15-030A) |
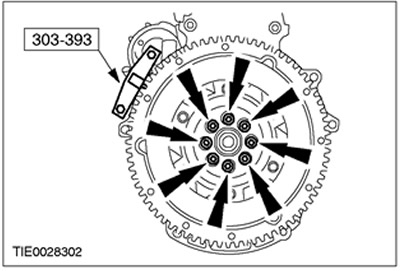
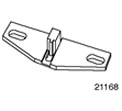 | Flywheel locking tool 303-393 (21-168) |
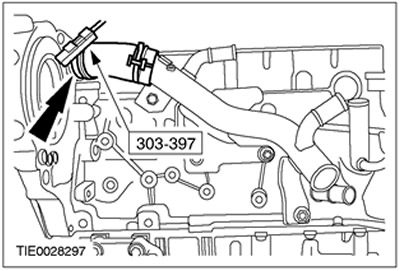
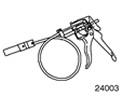 | Clamp remover/installer 303-397 (24-003) |
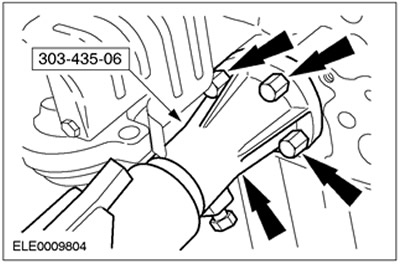
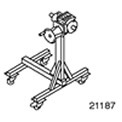 | Stand 303-435 (21-187) |
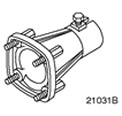 | Support bracket for 303-435 (21-187) 303-435-06 (21-031V) |
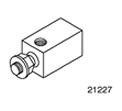 | Adapter for 205-047 303-633 (21-227) |
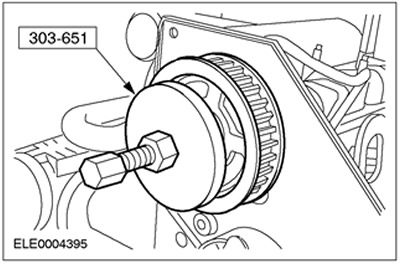
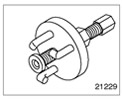 | Camshaft sprocket puller 303-651 (21-229) |
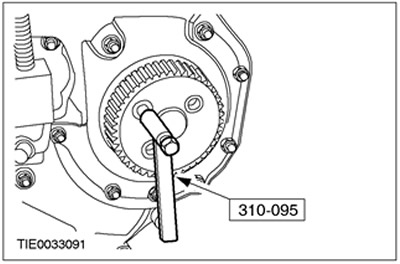
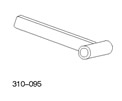 | High pressure fuel pump pulley puller 310-095 (23-067) |
General Equipment: Scraper.
CAUTION: Diesel fuel injection equipment is manufactured to very precise tolerances and very close clearances. Therefore, when working with these elements, it is especially important to observe absolute cleanliness. Always insert plugs into any open holes or lines.
All cars
1. Using the special tool, fix the engine on the stand.
- Connect the support bracket.
- Install the engine on the stand.
2. Drain the engine oil. Allow the oil to drain into a suitable container.
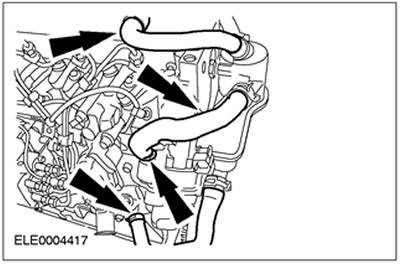
3. Disconnect the housing of the forced crankcase ventilation system (PCV). Disconnect the ventilation hoses.
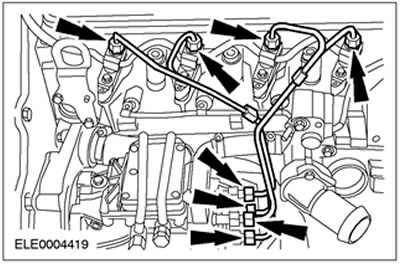
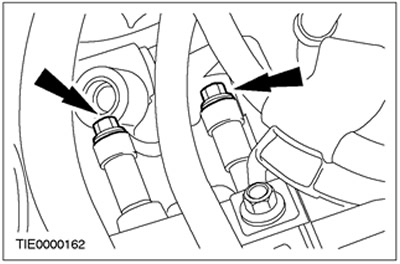
4. Remove the high pressure fuel lines. Discard the high pressure fuel supply lines as they are no longer needed.
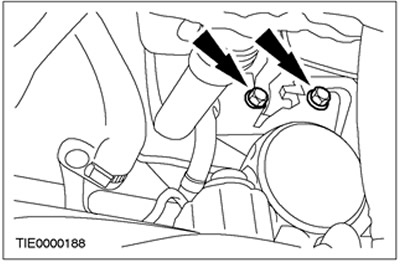
5. Turn out the bottom bolts of fastening of the pump of the amplifier of a steering.
6. Remove the power steering pump.
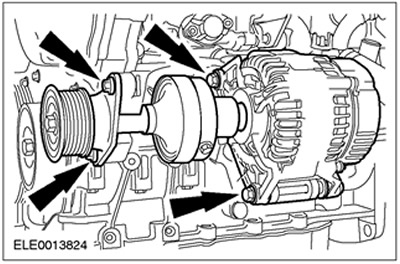
7. Remove the generator with a power shaft.
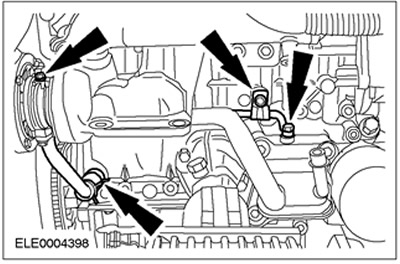
8. Disconnect the turbocharger supply and return oil lines. Discard the sealing washers as they are no longer needed.
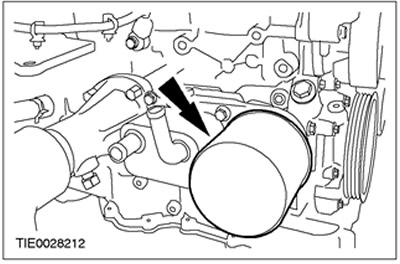
9. Remove the oil filter. Discard the filter as it is no longer needed.
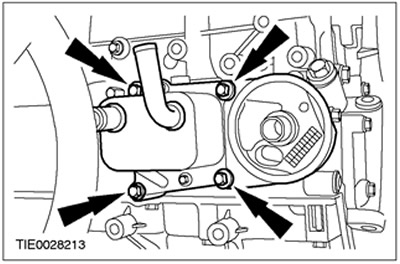
10. Remove the oil cooler. Discard the gasket as it is no longer needed.
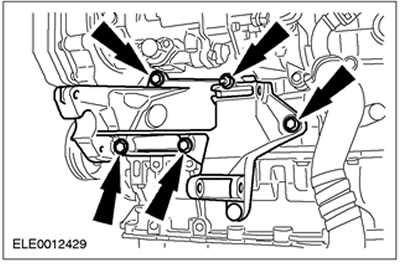
11. Remove the generator bracket.
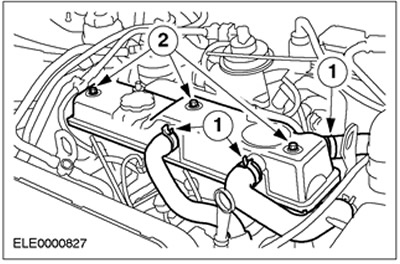
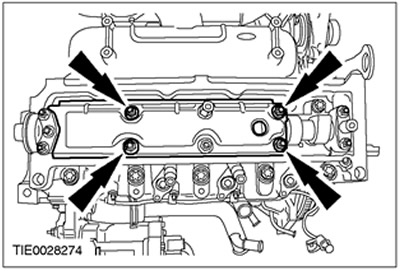
12. Remove the cylinder head cover.
- 1.Remove the PCV hoses.
- 2. Turn out bolts of a cover of a head of cylinders.
Vehicles without aftercooler
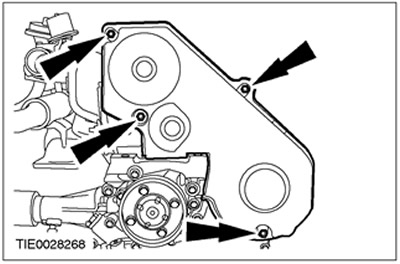
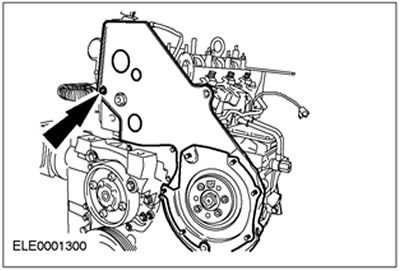
13. Remove the lower timing belt cover.
14. Remove an arm of a forward support of the engine.

Vehicles with an aftercooler.
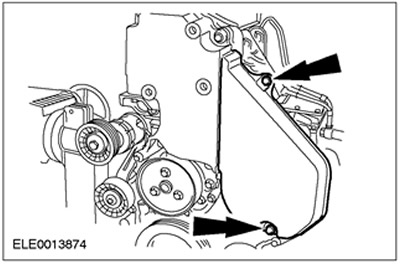
15. Remove the timing belt cover.
16. Remove an arm of a forward support of the engine.
All cars
17. Loosen the timing belt tension. Loosen the timing belt tensioner bolt.
18. Remove the timing belt. Discard the timing belt as it is no longer needed.
19. Remove the timing belt tensioner.
Engines with mechanical timing belt tensioner
20. Discard the timing belt tensioner as it is no longer needed.
All cars
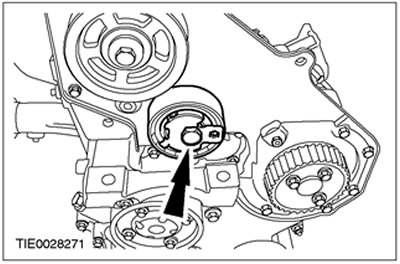
21. Using the special tool, remove the camshaft pulley bolt.
22. Using the special tool, remove the pulley from the camshaft.
23. Turn out bolts of a pulley of the fuel pump of a high pressure.
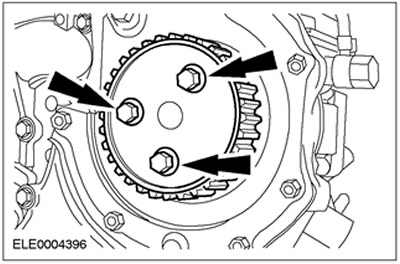
24. Using the special tool, remove the high pressure fuel pump pulley.
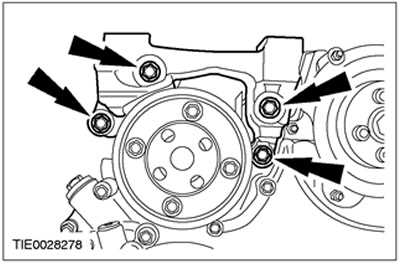
25. Remove the high pressure fuel pump oil seal retainer. Discard the seal as it is no longer needed.
26. Remove the rear timing belt cover.
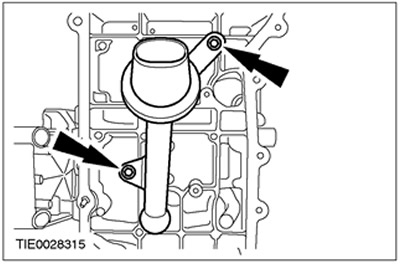
27. Remove the oil separator.
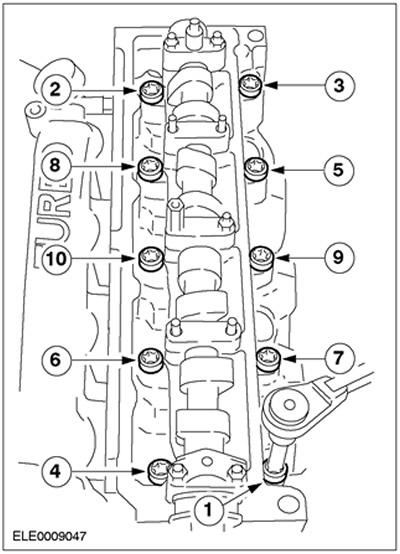
28.
CAUTION: Remove the cylinder head bolts in the sequence shown.
Remove the cylinder head. Discard the gasket as it is no longer needed.
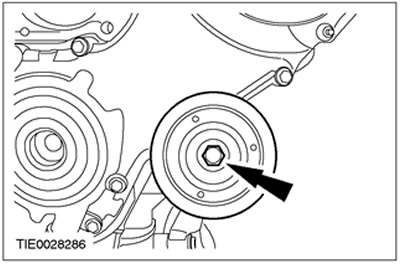
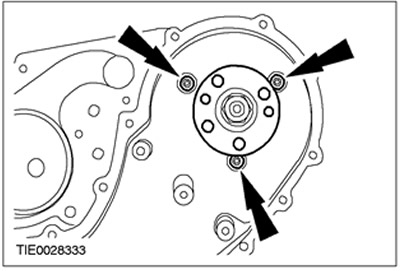
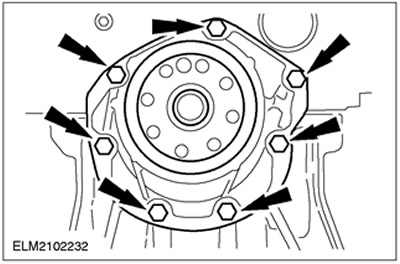
29. Using the special tool, remove the water pump pulley.

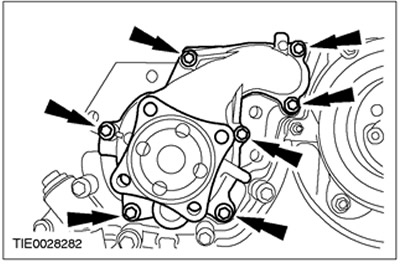
30. Remove the water pump. Discard the gasket as it is no longer needed.
31. Using the special tool, remove the crankshaft pulley. Discard the bolt as it is no longer needed.

32. Remove the accessory drive belt pulley.
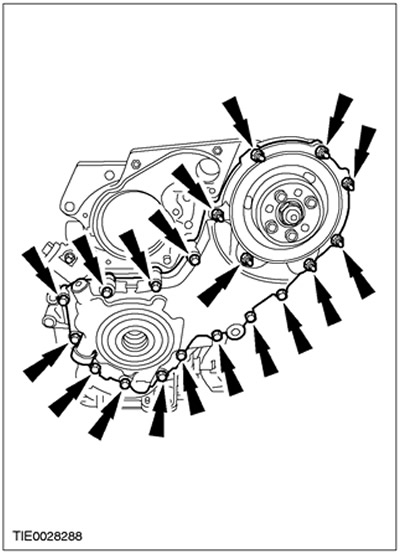
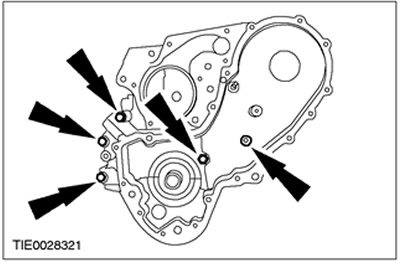
33. Remove the timing chain case cover. Discard the gasket as it is no longer needed.
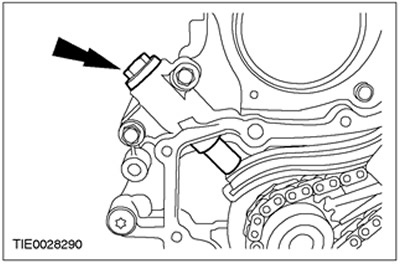
34. Remove the timing chain tensioner.
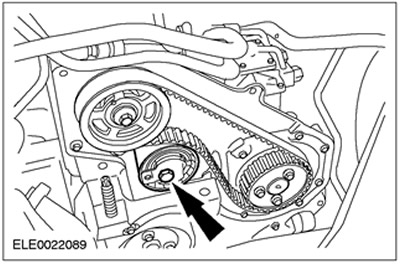
35. Disconnect the high pressure fuel pump sprocket
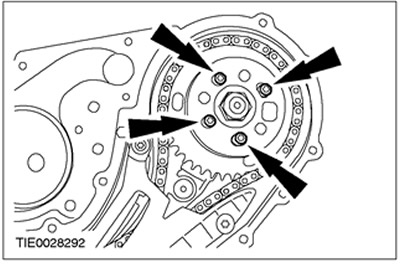
36. Remove the chain, sprockets and timing guides.

37. Remove the high pressure fuel pump bracket.
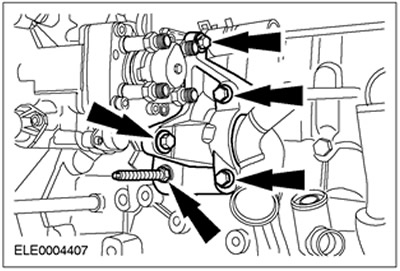
38. Remove the high pressure fuel pump. Discard the gasket as it is no longer needed.
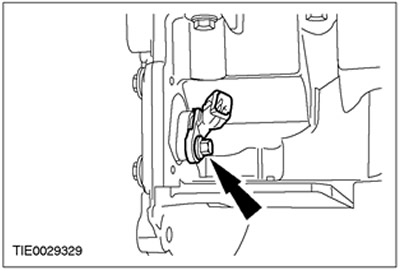
39. Using the special tool, disconnect the upper coolant hose from the coolant distribution pipe.
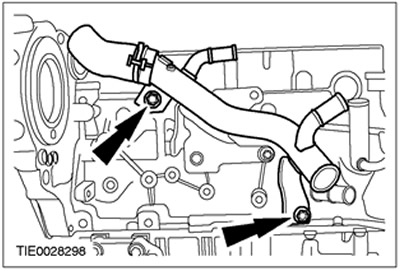
40. Remove the distributive pipeline of a cooling liquid.
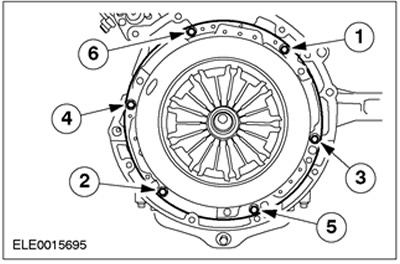
41.
CAUTION: The clutch pressure plate bolts must be loosened two turns at a time and in the sequence shown.
Remove the driven and pressure plates of the clutch.
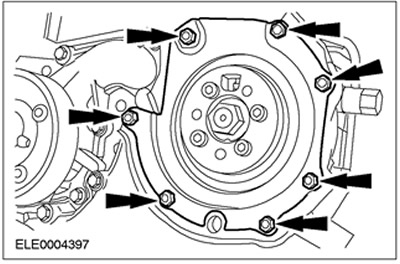
42. Using the special tool, remove the flywheel. Discard the bolts as they are no longer needed.
43. Remove the crankshaft position sensor (TFR).
44. Remove the CKP sensor support bracket.
45. Remove the crankshaft rear oil seal retainer. Discard the holder as it is no longer needed.
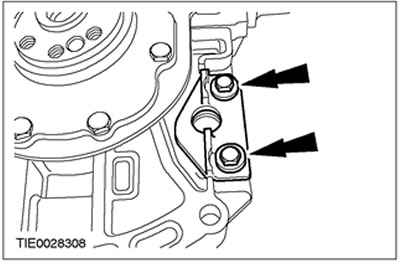
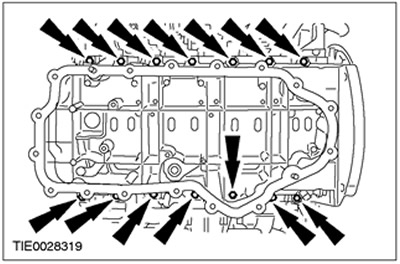
46. Remove the nuts and bolts of the oil pan (sixteen bolts, two nuts).
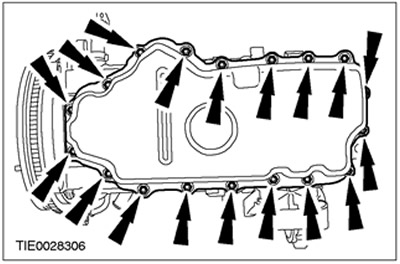
47. Using the special tools, remove the oil pan.

48. Remove the oil pump connecting pipe. Discard O-rings as they are no longer needed.
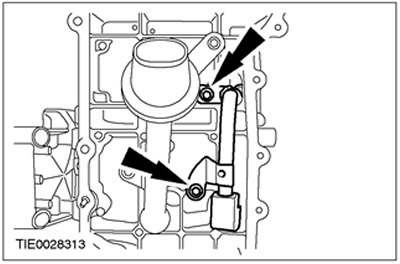
49. Remove the oil pump intake pipe. Discard the O-ring as it is no longer needed.
Vehicles with air conditioning
50. Remove the air conditioning compressor support bracket (A/C).
All cars
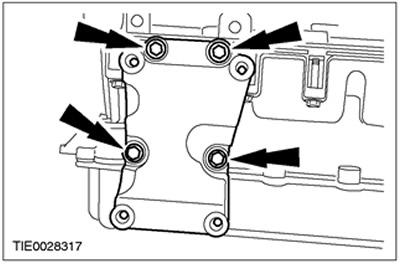
51. Remove the ladder frame (14 bolts). Discard the gasket as it is no longer needed.
52. Remove the rear timing chain case. Discard the gasket as it is no longer needed.
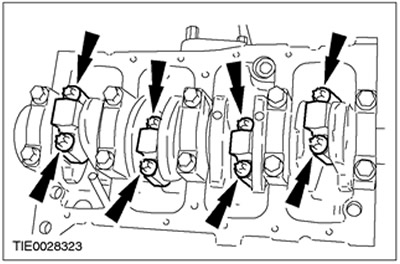
53.
CAUTION: Keep the connecting rod bearing caps in order for later installation.
CAUTION: Keep the connecting rod bearing shells and connecting rod bearing cap shells in order for later installation.
Remove the pistons.
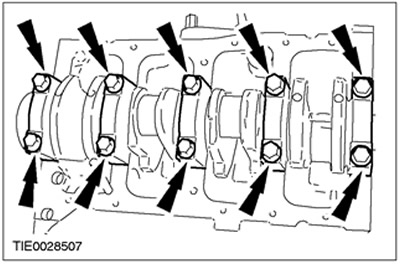
54.
CAUTION: Keep the lower and upper main bearing shells in order for later installation.
Remove the crankshaft.
Visitor comments