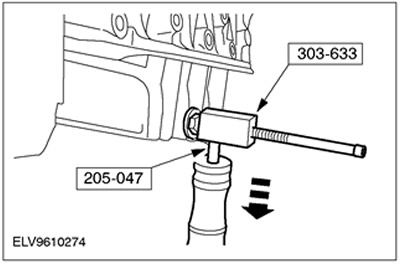
Special tool
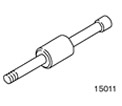 | Hammer with moving hammer 205-047 (15-011) |
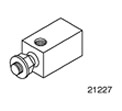 | Adapter for 205-047 303-633 (21-227) |
| Name | Specification |
| sealant | WSE-M4G323-A6 |
| Engine oil | WSS-M2C912-A1 |
Withdrawal
1. Raise and support the vehicle. Refer to Section 100-02 for more information.
2. Drain the engine oil.
3. Turn out bolts and remove nuts of fastening of an oil crankcase.
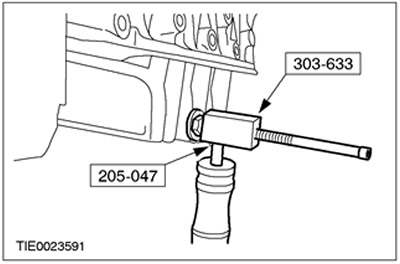
4. Install special tools.
5.
CAUTION: To avoid damage to the mating surface of the oil pan, use only the special tool when removing the latter.
Using the special tools, remove the oil pan (for clarity, the engine is shown removed).
Installation
1.
NOTE: Do not damage mating surfaces.
NOTE: Mating surfaces and blind holes must be free of oil and sealant residue.
Clean the mating surfaces of the oil pan and ladder frame.
2.
CAUTION: Do not allow sealant to get into the blind holes of the ladder frame. Failure to follow this instruction may result in engine damage.
NOTE: Connect oil sump within 10 minutes of applying sealant.
NOTE: Once the oil sump is in contact with the ladder frame, do not remove it.
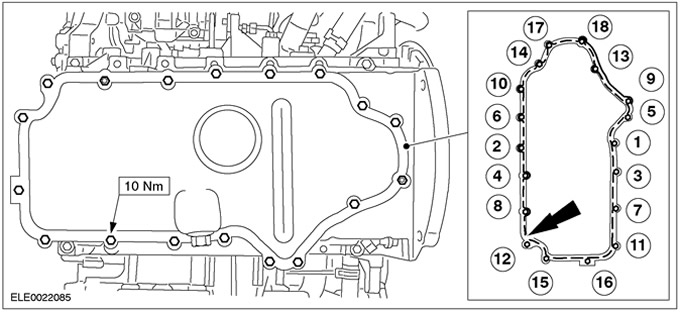
Install the oil pan.
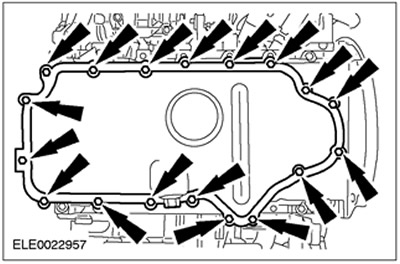
- Apply a 2.5 mm bead of sealant to the ladder frame (intermittently).
- Tighten the bolts and nuts in the sequence shown.
3.
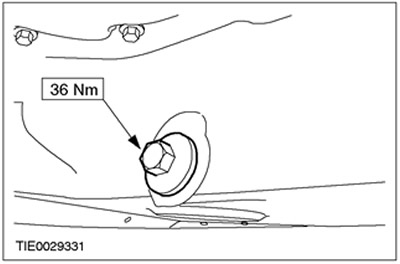
NOTE: Inspect the oil sump drain plug seal for damage. Install a new drain plug and seal if necessary.
Install drain plug.
4. Lower the car.
5. Fill the engine with engine oil.
Visitor comments