|
STATES |
DETAILS/RESULTS/ACTIONS |
|
AK1: CHECK POWER SIGNALS |
|
|
1 Drive the ON position. |
|
|
2 Turn on the front and rear fog lights/lights. |
|
|
3 Check the enable signal. |
|
|
• Do both switch-on signals light up? |
|
|
→ Yes |
|
|
Go to AK2 |
|
|
→ No |
|
|
Both enable signals do not work: Go to AK3 |
|
|
Front fog light signal not working: REPLACE light switch. CHECK the system is working properly. |
|
|
AK2: INSPECT ELECTRICAL CIRCUIT 15S-LD1 / 15S-LD11. |
|
|
1 Enter the OFF position. |
|
|
2 Disconnect C302 left front fog lamp. |
|
|
3 Drive the ON position. |
|
|
4Turn on the front fog lights. |
|
|
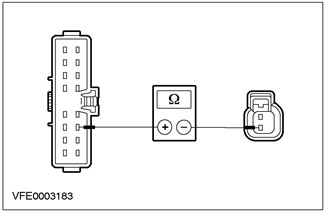
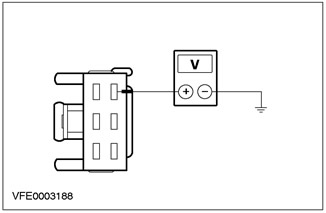
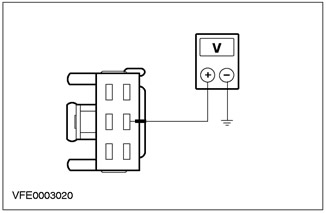
5 Measure the voltage between pin 2 of connector C302 of the light switch, circuit 15S-LD11, wiring side, and "weight". |
|
• Does the meter show battery voltage? |
|
|
→ Yes |
|
|
The system is OK after checking the lamp. |
|
|
→ No |
|
|
Check and if necessary REPAIR the 15S-LD1/15S-LD11 circuit using the wiring diagrams. If the circuit is OK, REPLACE the light switch. CHECK the system is working properly. |
|
|
AK3: CHECK F44 FUSE |
|
|
1 Enter the OFF position. |
|
|
2 Disconnect Fuse F44 (CJB). |
|
|
3 Check fuse F44 (CJB) |
|
|
• Is fuse F44 OK? |
|
|
→ Yes |
|
|
Go to AK4 |
|
|
→ No |
|
|
REPLACE fuse F44. If fuse F44 fails again, FIND and REPAIR the short circuit using the wiring diagrams. CHECK the system is working properly. |
|
|
AK4: CHECK CJB |
|
|
1 Enter the OFF position. |
|
|
2 Disconnect C17 CJB. |
|
|
3 Connect Fuse F44 (CJB). |
|
|
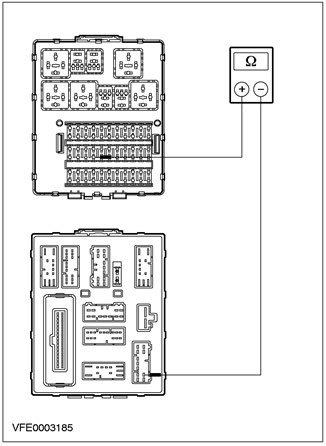
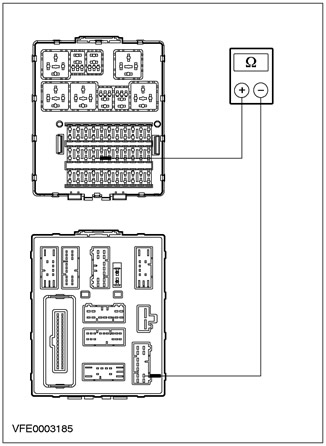
4 Verify that fuse F44 is installed and measure the resistance between socket F44 and C17 CJB pin 3, element side. |
|
• Is the resistance less than 2 ohms? |
|
|
→ Yes |
|
|
Go to AK5 |
|
|
→ No |
|
|
REPLACE CJB. CHECK the system is working properly. |
|
|
AK5: INSPECT CIRCUIT 15-LD16. |
|
|
1 Disconnect C17 CJB. |
|
|
2 Disconnect the C320 light switch. |
|
|
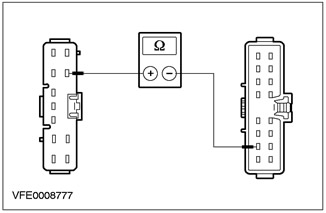
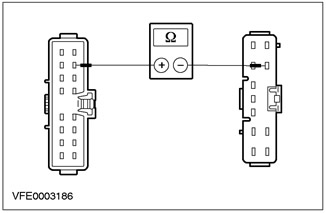
3Measure the resistance between pin 3 of connector C17 of the central electrical box (CJB), circuit 15-LD16, on the wiring side, and pin 7 of the light switch connector C320, on the wiring side. |
|
• Is the resistance less than 2 ohms? |
|
|
→ Yes |
|
|
REPLACE light switch. CHECK the system is working properly. |
|
|
→ No |
|
|
REPAIR circuit 15S-LD16. CHECK the system is working properly. |
|
PINPOINT TEST AL: REAR FOG LAMP (AND) DOES NOT WORK
|
STATES |
DETAILS/RESULTS/ACTIONS |
|
AL1: INSPECT REAR FOG LAMP SIGNAL |
|
|
1 Drive the ON position. |
|
|
2 Turns on the rear fog light (And) |
|
|
3 Check the operation of the enable signal. |
|
|
• Does the rear fog light indicator come on? |
|
|
→ Yes |
|
|
Go to AL2 |
|
|
→ No |
|
|
Vehicles with front fog lamps: Go to AK1 |
|
|
Vehicles without front fog lamps: Go to AL3 |
|
|
AL2: CHECK ELECTRICAL CIRCUIT 15S-LD6 |
|
|
1 Drive the ON position. |
|
|
2 Disconnect C474/C475 left rear light unit. |
|
|
3 Turn on the rear fog light (And). |
|
|
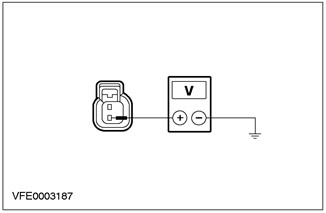
4 Measure the voltage between pin 4 of connector C474/C475, wiring side, and "weight". |
|
• Does the meter show battery voltage? |
|
|
→ Yes |
|
|
After checking the bulbs, REPLACE the rear light assembly. CHECK the system is working properly. |
|
|
→ No |
|
|
Check and if necessary REPAIR the 15S-LD6 circuit using the wiring diagrams. If circuit 15S-LD6 is OK, REPLACE light switch. CHECK the system is working properly. |
|
|
AL3: CHECK FUSE F44 |
|
|
1 Enter the OFF position. |
|
|
2CHECK F44 (20 A) (CJB). |
|
|
3 Check fuse F44 (CJB). |
|
|
• Is the fuse good? |
|
|
→ Yes |
|
|
Go to AL4 |
|
|
→ No |
|
|
REPLACE fuse F44. If F44 fails again, FIND and REPAIR the short circuit using the wiring diagrams. CHECK the system is working properly. |
|
|
AL4: CHECK CJB |
|
|
1 Disconnect C17 CJB. |
|
|
2 Connect Fuse F44 (CJB). |
|
|
3 Verify that fuse F44 is installed and measure the resistance between socket F44 and C17 CJB pin 3, element side. |
|
• Is the resistance less than 2 ohms? |
|
|
→ Yes |
|
|
Go to AL5 |
|
|
→ No |
|
|
REPLACE CJB. CHECK the system is working properly. |
|
|
AL5: INSPECT CIRCUIT 15-LD16 |
|
|
1 Enter the OFF position. |
|
|
2 Disconnect C17 CJB. |
|
|
3 Disconnect the C320 light switch. |
|
|
4 Measure the resistance between pin 7 of light switch connector C320, wiring side, and connector C17 CJB, circuit 15-LD16, wiring side. |
|
• Is the resistance less than 2 ohms? |
|
|
→ Yes |
|
|
Go to AL2 |
|
|
→ No |
|
|
REPAIR circuit 15-LD16. CHECK the system is working properly. |
|
PINPOINT TEST AM: FOG LIGHTS DO NOT WORK
|
STATES |
DETAILS/RESULTS/ACTIONS |
|
AM1: CHECK EQUIPMENT LEVEL |
|
|
1 Check equipment level. |
|
|
• Is the vehicle equipped with front fog lamps? |
|
|
→ Yes |
|
|
Go to AK1 |
|
|
→ No |
|
|
Go to AL1 |
|
PINPOINT TEST AN: INDIVIDUAL FOG LAMP/ LIGHT (AND) DOES NOT WORK
|
STATES |
DETAILS/RESULTS/ACTIONS |
|
AN1: IDENTIFY FAULTY FOGLIGHT/LAMP |
|
|
1 Identify the faulty fog/lamp. |
|
|
• Is one of the front fog lights not working? |
|
|
→ Yes |
|
|
Go to AN2 |
|
|
→ No |
|
|
Rear fog light not working ("station wagon" left hand drive): Go to AN7 |
|
|
Rear fog light not working ("station wagon" right hand drive): Go to AN8 |
|
|
Rear fog light not working (4-door variant): Go to AN9 |
|
|
Rear fog light not working (3-/5-door variant): Go to AN12 |
|
|
AN2: IDENTIFY FAULTY FRONT FOG LAMP |
|
|
1 Identify the faulty front fog light. |
|
|
• Left front fog light not working? |
|
|
→ Yes |
|
|
Go to AN3 |
|
|
→ No |
|
|
Go to AN5 |
|
|
AN3: CHECK ELECTRICAL CIRCUIT 15S-LD11 |
|
|
1 Enter the OFF position. |
|
|
2 Disconnect C302 left front fog lamp. |
|
|
3 Drive the ON position. |
|
|
4Turn on the front fog lights. |
|

|
5 Check voltage between pin 2 of connector C302 left front fog light, circuit 15S-LD11 (green-white), from the wiring side, and "weight". |
|
• Does the meter show battery voltage? |
|
|
→ Yes |
|
|
Go to AN4 |
|
|
→ No |
|
|
REPAIR circuit 15S-LD11. CHECK the system is working properly. |
|
|
AN4: CHECK 31-LD11 GROUND CIRCUIT |
|
|
1 Enter the OFF position. |
|

|
2 Measure the resistance between C302 pin 1 of left front fog lamp circuit 31-LD11, wiring side, and "weight". |
|
• Is the resistance less than 5 ohms? |
|
|
→ Yes |
|
|
After checking the bulb, REPLACE the left front fog lamp. CHECK the system is working properly. |
|
|
→ No |
|
|
REPAIR circuit 31-LD11. CHECK the system is working properly. |
|
|
AN5: INSPECT ELECTRICAL CIRCUIT 15S-LD17 |
|
|
1 Enter the OFF position. |
|
|
2 Disconnect C304 right front fog lamp. |
|
|
3 Drive the ON position. |
|
|
4Turn on the front fog lights. |
|

|
5 Check the voltage between pin 2 of right front fog lamp connector C304, circuit 15S-LD17 (green-white), from the wiring side, and "weight". |
|
• Does the meter show battery voltage? |
|
|
→ Yes |
|
|
Go to AN6 |
|
|
→ No |
|
|
REPAIR circuit 15S-LD17. CHECK the system is working properly. |
|
|
AN6: CHECK 31-LD17 GROUND CIRCUIT |
|
|
1 Enter the OFF position. |
|

|
2 Measure the resistance between pin 1 of right front fog lamp connector C304, circuit 31-LD17, wiring side, and "weight". |
|
• Is the resistance less than 2 ohms? |
|
|
→ Yes |
|
|
After checking the bulb, REPLACE the right front fog lamp. CHECK the system is working properly. |
|
|
→ No |
|
|
REPAIR circuit 31-LD17. CHECK the system is working properly. |
|
|
AN7: INSPECT ELECTRICAL CIRCUIT 15S-LD6 |
|
|
1 Enter the OFF position. |
|
|
2 Disconnect C474 left rear light assembly. |
|
|
3 Drive the ON position. |
|
|
4 Turn on the rear fog light. |
|

|
5 Measure the voltage between pin 4 of connector C474 of the left rear light unit, circuit 15S-LD6, wiring side, and "weight". |
|
• Does the meter show battery voltage? |
|
|
→ Yes |
|
|
After checking the bulb, REPLACE the left rear light assembly. CHECK the system is working properly. |
|
|
→ No |
|
|
REPAIR circuit 15S-LD6. CHECK the system is working properly. |
|
|
AN8: CHECK ELECTRICAL CIRCUIT 15S-LD6 |
|
|
1 Enter the OFF position. |
|
|
2 Disconnect C475 right rear light unit. |
|
|
3 Drive the ON position. |
|
|
4 Turn on the rear fog light. |
|

|
5 Measure the voltage between pin 4 of connector C475 of the right rear light unit, circuit 15S-LD6, wiring side, and "weight". |
|
• Does the meter show battery voltage? |
|
|
→ Yes |
|
|
After checking the bulb, REPLACE the right rear light assembly. CHECK the system is working properly. |
|
|
→ No |
|
|
REPAIR circuit 15S-LD6. CHECK the system is working properly. |
|
|
AN9: IDENTIFY FAULTY REAR FOG LAMP |
|
|
1 Identify the faulty rear fog light. |
|
|
• Left rear fog light not working? |
|
|
→ Yes |
|
|
Go to AN10 |
|
|
→ No |
|
|
Go to AN11 |
|
|
AN10: INSPECT ELECTRICAL CIRCUIT 15S-LD6A |
|
|
1 Enter the OFF position. |
|
|
2 Disconnect C476 left rear light assembly. |
|
|
3 Drive the ON position. |
|
|
4 Turn on the rear fog light. |
|
|
5 Measure the voltage between pin 5 of connector C476 of the left rear light unit, circuit 15S-LD6A, wiring side, and "weight". |
|
• Does the meter show battery voltage? |
|
|
→ Yes |
|
|
After checking the bulb, REPLACE the left rear light assembly. CHECK the system is working properly. |
|
|
→ No |
|
|
REPAIR circuit 15S-LD6A. CHECK the system is working properly. |
|
|
AN11: CHECK ELECTRICAL CIRCUIT 15S-LD12 |
|
|
1 Enter the OFF position. |
|
|
2 Disconnect the C477 of the right rear light assembly. |
|
|
3 Drive the ON position. |
|
|
4 Turn on the rear fog light. |
|

|
5 Measure the voltage between pin 5 of connector C477 of the right rear light unit, circuit 15S-LD12, wiring side, and "weight". |
|
• Does the meter show battery voltage? |
|
|
→ Yes |
|
|
After checking the bulb, REPLACE the right rear light assembly. CHECK the system is working properly. |
|
|
→ No |
|
|
REPAIR circuit 15S-LD12. CHECK the system is working properly. |
|
|
AN12: CHECK ELECTRICAL CIRCUIT 15S-LD6 |
|
|
1 Enter the OFF position. |
|
|
2 Disconnect the C434 rear fog light. |
|
|
3 Drive the ON position. |
|
|
4 Turn on the rear fog light. |
|
|
5 Measure the voltage between C434 rear fog light connector pin 2, circuit 15S-LD6, wiring side, and "weight". |
|
• Does the meter show battery voltage? |
|
|
→ Yes |
|
|
Go to AN13 |
|
|
→ No |
|
|
REPAIR circuit 15S-LD6. CHECK the system is working properly. |
|
|
AN13: CHECK 31-LD6 GROUND CIRCUIT |
|
|
1 Enter the OFF position. |
|

|
2 Measure the resistance between C434 rear fog light connector pin 1, circuit 31-LD6, wiring side, and "weight". |
|
• Is the resistance less than 2 ohms? |
|
|
→ Yes |
|
|
After checking the bulb, REPLACE the rear fog light. CHECK the system is working properly. |
|
|
→ No |
|
|
REPAIR circuit 31-LD6. CHECK the system is working properly. |
|
PINPOINT TEST AO: FRONT FOG LIGHTS ALWAYS ON
|
STATES |
DETAILS/RESULTS/ACTIONS |
|
AO1: CHECK LIGHT SWITCH |
|
|
1 Enter the OFF position. |
|
|
2 Disconnect the C320 light switch. |
|
|
3 Drive the ON position. |
|
|
4 Check if the front fog lights come on all the time. |
|
|
• Do the front fog lights come on all the time? |
|
|
→ Yes |
|
|
REPAIR circuit 15S-LD1, 15S-LD11, or 15S-LD17. CHECK the system is working properly. |
|
|
→ No |
|
|
Replace light switch. CHECK the system is working properly. |
|
PINPOINT TEST AP: REAR FOG LIGHTS ON PERMANENTLY
|
STATES |
DETAILS/RESULTS/ACTIONS |
|
AP1: CHECK LIGHT SWITCH |
|
|
1 Enter the OFF position. |
|
|
2 Disconnect the C320 light switch. |
|
|
3 Drive the ON position. |
|
|
4 Check if the rear fog light comes on all the time (And). |
|
|
• Rear fog lamp (And) turn on all the time? |
|
|
→ Yes |
|
|
REPAIR circuit 15S-LD6 and/or 15S-LD6, 15S-LD6A, or 15S-LD12. CHECK the system is working properly. |
|
|
→ No |
|
|
REPLACE light switch. CHECK the system is working properly. |
|
Visitor comments