Contents: Replacing headlight bulbs ↳ Replacing the sidelight bulbs (Fig.… ↳ Replacing front turn signal bulbs ↳ Replacing the rear light bulbs ↳ Replacing the license plate light… ↳ Replacing interior lighting bulbs ↳
Replacing headlight bulbs
Replacing headlight bulbs (Fig. 13) is done from the engine compartment in the following order:
- open the hood and secure it in the open position with the stop;
- disconnect the negative wire from the battery terminal;
- carefully remove the connector and remove the headlight cover;
- turn and remove the lamp holder retaining spring ring;
- remove the faulty lamp;
- install a working lamp and perform the above operations in reverse order;
- check and, if necessary, adjust the headlights.
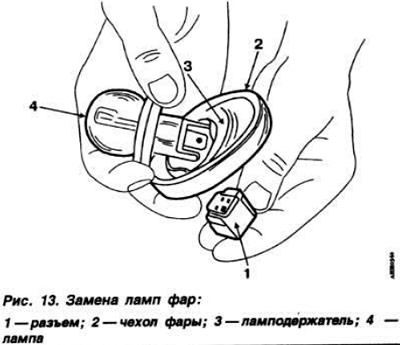
ATTENTION: When installing iodine lamps, do not allow the bulb glass to come into contact with the skin of your hands or body. If this cannot be avoided, then carefully wipe the bulb glass with a lint-free cloth soaked in alcohol.
Replacing the sidelight bulbs (Fig. 14)
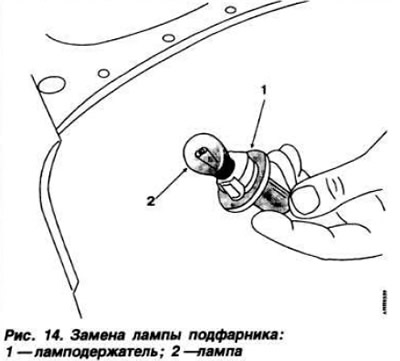
The sidelight bulbs (front parking lights) are built into the headlight reflectors and are replaced in the following order:
- open the hood and secure it in the open position with the stop;
- disconnect the negative wire from the battery terminal;
- turn counterclockwise and remove the socket from the headlight reflector together with the faulty bulb;
- replace a faulty pump;
- perform the above operations in reverse order.
Replacing front turn signal bulbs
- open the hood and secure it in the open position with the stop;
- turn counterclockwise and remove the cartridge from the socket together with the faulty lamp;
- press on the lamp, turn it counterclockwise and remove it;
- insert a working lamp into the socket and perform the above operations in reverse order.
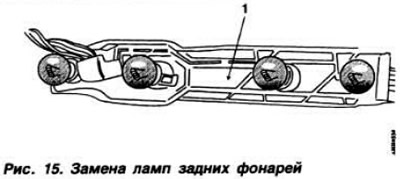
Replacing the rear light bulbs
- open the trunk lid;
- press the locking latch and remove the lamp holder 1 as an assembly;
- press on the faulty lamp, turn it counterclockwise and remove it from the socket;
- insert a working lamp into the socket and perform the above operations in reverse order (Fig. 15).
Replacing the license plate light bulb
The pear-shaped lamp, pin-type, is seated in the holder socket with some force (Fig. 16):
- compress the spring clips 1 and remove the lamp holder assembly from the bumper;
- turn the lamp counterclockwise (heating pads and remove from the holder;
- insert a working lamp into the holder and install the holder together with the lamp into the bumper.

Replacing interior lighting bulbs
- disconnect the negative wire from the battery terminal;
- remove the lamp holder from the socket, disconnect the power cord and remove the faulty lamp from the socket. Insert the working lamp into the socket and perform the above operations in reverse order.