1. Remove the negative cable from the battery.
Attention! On vehicles with air conditioning, air conditioning system components can make it difficult to work on the engine, and it is not always possible to unscrew the bolts and move the system components to the side due to the insufficient length of their hoses. In such a case, the air conditioning system must be discharged by a Ford dealer or air conditioning specialist.
2. Remove the crankcase protection and mudguard.
3. Remove grille.
4. Disconnect the hood release cable from the hood closing mechanism and remove from the clips.
5. Remove the hood, having previously marked the position of the hinges, to facilitate reinstallation and disconnecting the windshield washer tube.
6. Drain the coolant from the cooling system by placing an appropriate container under the radiator drain plug and opening the drain plug located at the bottom of the radiator. To speed up the draining of the coolant, open the cap of the expansion tank. To drain the coolant from the cylinder block, unscrew the drain bolt located in the cylinder block.
7. To provide additional work space, remove the radiator.
8. Disconnect the coolant hoses from the water pump housing on the left side of the engine and cylinder head.
9. Loosen the clamps and remove the pipes and hoses of the cooling system:
- upper and lower radiator pipes;
- expansion tank hoses;
- hoses of the interior heating system from the cylinder head and the cooling system pump;
- body of the automatic carburetor starter.
10. Drain engine oil and remove filter.
11. Unscrew the four bolts securing the upper front cross member, two bolts from both sides at the top and the two lower bolts securing the cross member support and remove it together with the radiator.
12. Remove air filter.
13. Remove the breather hose from the cylinder head cover and unscrew the bolt securing the hose support hanger to the left front side of the cylinder head.
14. Remove the fuel supply hose from the fuel pump and plug it with a plug.
15. Disconnect the brake booster vacuum pipe from the intake manifold.
16. Disconnect electrical wires and remove connectors from the following units and sensors:
- generator;
- starter;
- radiator fan;
- speed sensor and crankshaft position;
- temperature sensor;
- temperature sensor of the engine management system;
- oil pressure sensor;
- ignition distributor;
- ignition coils;
- units of the fuel injection system and fuel injectors;
- throttle position sensor;
- fuel temperature sensor;
- automatic air damper heater;
- radiator temperature sensor.
17. Remove the high voltage distributor with wires from the ignition distributor.
18. Disconnect the accelerator cable.
19. Disconnect the fuel and vacuum hoses, as well as electrical wires from the carburetor.
20. Remove V-belt and auxiliary steering pump (if present in this version). Suspend the auxiliary pump to the car body with a soft wire, while not disconnecting the hoses from the pump.
21. In the passenger compartment, install a bar under the clutch pedal so as to fix it in the upper position to prevent the automatic clutch cable tension regulator from operating.
22. Remove clutch cable.

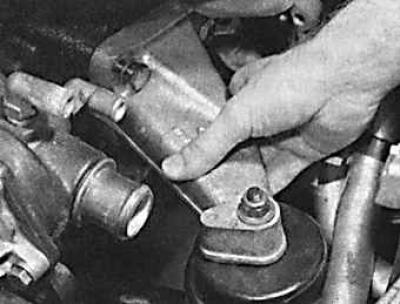
23. On models with air conditioning, unscrew the 4 bolts securing the air conditioning compressor (indicated by arrows in the figure (bottom view)) from the installation suspension and move the compressor away from the engine.
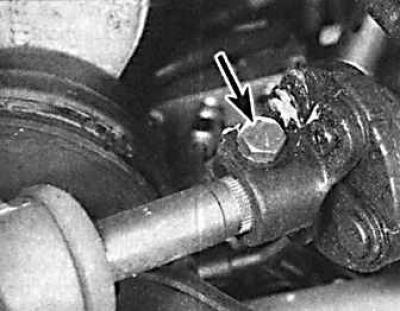
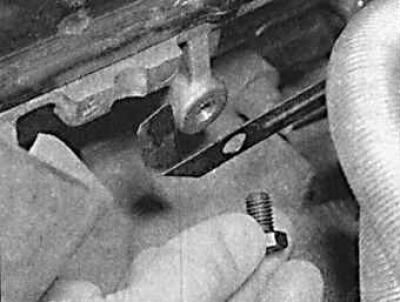
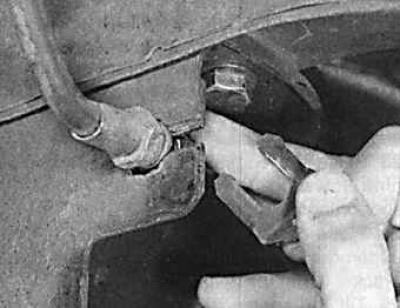
24. Check that the steering wheel is installed in the straight ahead position and mark the position of the intermediate shaft lower clamp and steering gear with paint or marker, then disconnect the intermediate shaft from the steering gear (fastening bolt is indicated by an arrow).
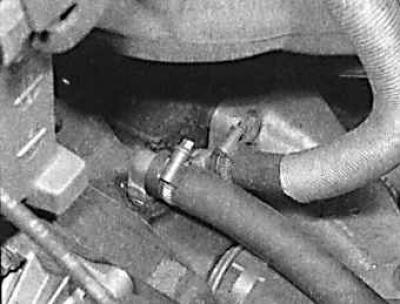
25. Unscrew the front exhaust pipe from the exhaust manifold.
26. Unscrew the stabilizer clamps and remove the stabilizer.
27. On vehicles with automatic transmission, unscrew the torque converter from the drive plate.
28. Install the engine hoist and lift the engine just enough so that the weight of the engine is supported by the hoist, then unscrew the engine holders.
29. Loosen the clutch housing bolts.
30. Disconnect electrical wires and remove starter.
31. Disconnect ground wire from engine.
32. Remove the holder located between the engine and gearbox.
33. Disconnect the brake pipes from the front suspension.
34. Support the gearbox with a suitable hoist and wide board and raise the gearbox slightly.
35. Using a hoist, carefully lift the engine and separate the gearbox from it.
36. While lifting the engine, at the same time move it forward and, turning it in a horizontal plane, remove it upwards.
Visitor comments