Location of float and needle valve in carburetor cover
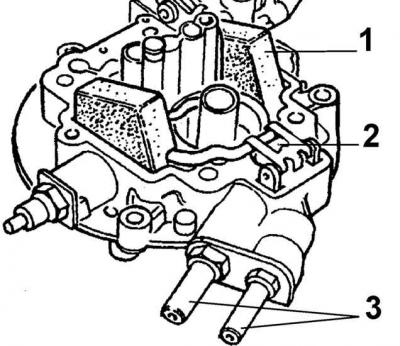
1 – float, 2 – needle valve, 3 – fuel hose fittings
Adjusting the float
The operation of the needle valve determines the fuel level in the float chamber.
1. Remove the ground wire from the battery and the air filter housing.
2. Remove the wires from the automatic starting device.
3. Remove the fuel supply and return hoses from the carburetor.
4. Disconnect the wires from the starter housing.
5. Disconnect the wires from the fuel shut-off valve.
6. Unscrew the four screws securing the carburetor to the intake manifold.
7. Unscrew the two mounting screws and remove the carburetor cover, leaving the main part of the carburetor in place on the intake manifold.
8. Remove the float axle and remove the float.
9. Remove the needle valve.
10. Unscrew the needle valve body.
11. Before installation, check the condition of the conical surface of the needle tip.
12. Screw in the needle valve body with a new copper gasket.
13. Insert the needle valve, float and float shaft.
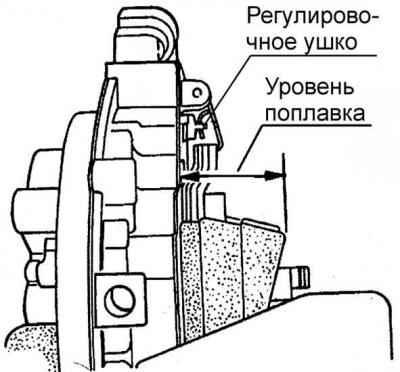
14. Check the float adjustment by installing the upper part of the carburetor so that the needle valve is closed, but the valve ball should not be recessed. Measure the distance from the gasket of the upper part of the carburetor to the bottom of the float. If the obtained size does not correspond to the required one, bend the stop tab on the float.
15. Install the upper part of the carburetor and the other previously removed elements. Check and, if necessary, adjust the speed and idle mixture quality.
The original can be found on this resource: FORDBOOK