Remove the spare wheel and its mount.
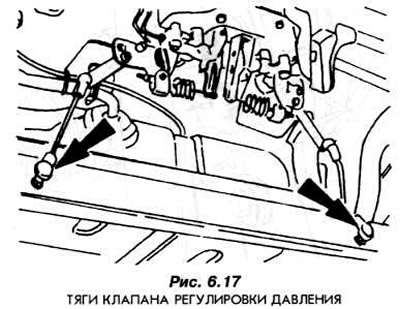
Disconnect the pressure control valve rod from the rear axle (Fig. 6.17).
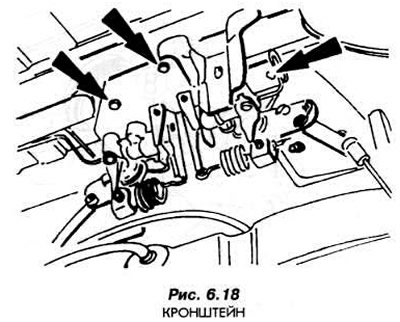
Unscrew the valve bracket from the body crossmember (Fig. 6.18).
Carefully lower the adjustment valve.
Unscrew the hard brake pipes and close their openings immediately.
Unscrew the bracket from the adjustment valve.
The pressure regulating valve is installed in the following order:
Screw the adjustment valve to the bracket.
Screw on the tubes, making sure the connection is tight.
Attach the bracket with the valve to the chassis.
Connect the rods to the rear axle beam.
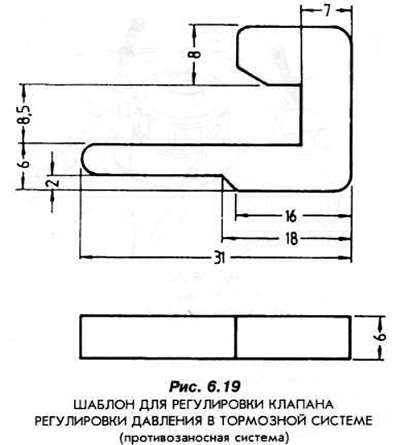
Adjust the valve. The template shown in Fig. 6.19 serves for adjustment. If necessary, such a template can be made according to this drawing.
The fuel tank should be filled to half capacity.
All vehicle equipment, including the spare tire and tools, must be kept in their designated places.
There must be no other load on the vehicle.
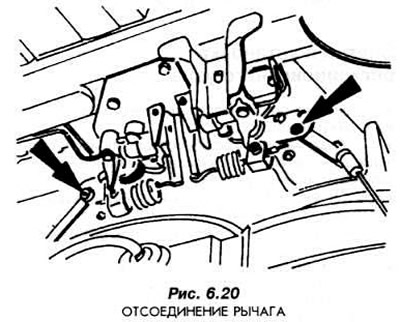
Loosen the actuating lever as shown in Fig. 6.20.
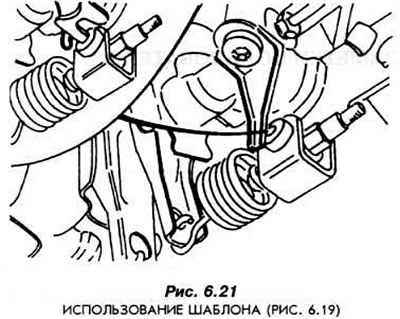
Insert the template into the bracket (Fig. 6.21). Make sure that the actuating lever and rod are in the extreme position.
Tighten the lever mounting bolt.
Remove the template.
Adjust the valve on the other side of the car in the same way.
[The text was obtained in its entirety from the specified website: fordbook.ru]