- increased (compared to usual) noise;
- difficult gear shifting;
- spontaneous disengagement or unclear engagement of gears;
- oil leakage through seals and gaskets.
In addition, the gearbox is removed to replace the clutch, flywheel and rear crankshaft oil seal of the engine.
An automatic transmission is removed for almost the same reasons as a manual transmission, except for the need to replace the clutch and flywheel, which are absent in this case. The methods for removing and installing manual and automatic transmissions are almost the same and are described using a manual transmission as an example. The difference lies in the size and number of transmission control cables, as well as the presence of hydraulic system hoses in the automatic transmission, connecting the transmission to the cooling radiator.
Note: The work of removing and installing the gearbox is very labor-intensive, so first make sure that its malfunctions are not caused by other reasons (insufficient oil level, clutch drive defects, loose gearbox mounts, etc.).
Note: The gearbox is quite heavy and its shape is awkward to hold, so we recommend removing it with an assistant.
You will need: open-end and socket wrenches "8", "10", "13".
1. Remove the air filter intake (see "Removal and installation the air filter").
2. Remove the battery tray (see "Removal and installation the battery").

3. Remove the three battery tray bracket mounting bolts…
4. …and remove the bracket.
5. Disconnect the gearbox control cables from the gearbox (see "Replacing gearbox control cables").
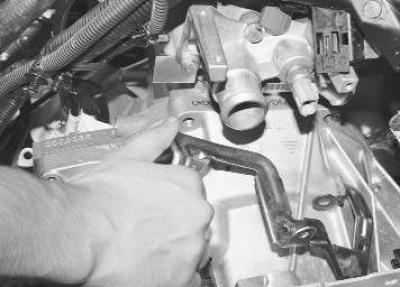
6. Remove the gearshift mechanism cover by unscrewing the three bolts that secure it.
7. Drain the oil from the gearbox (see "Gearbox oil change").
8. Remove the front wheel drives (see "Removal and installation front wheel drives").
9. Disconnect the wiring harness connector from the reverse light switch (see "Checking and replacing the reverse light switch").

10. Disconnect the lines from the clutch master cylinder (see "Replacing the clutch release hydraulic lines").

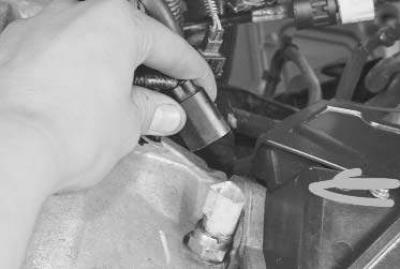
11. Disconnect the plastic pipe holder from the bracket on the gearbox.

12. Unscrew the two bolts securing the ground wires to the body and move the wires to the side.
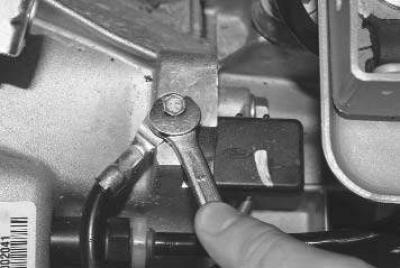
13. Unscrew the bolt securing the ground wire terminal to the gearbox housing…

14. …and move the wire to the side.
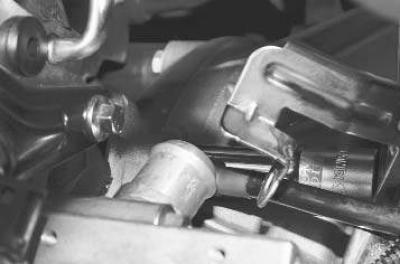
15. Remove the bolt securing the gearbox housing to the engine at the top left.
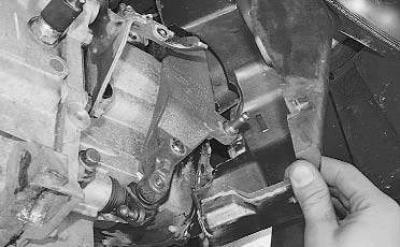
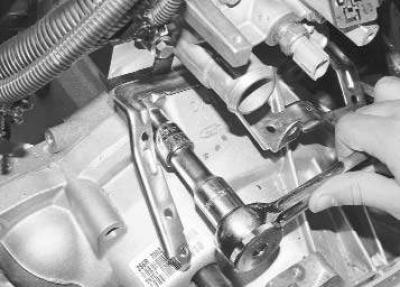
16. Loosen the nut of the stud securing the mounting bracket to the gearbox housing…
17. …and remove the mounting bracket for securing the pipelines (for clarity, the coolant supply hose has been removed).
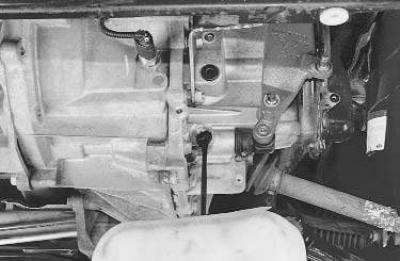
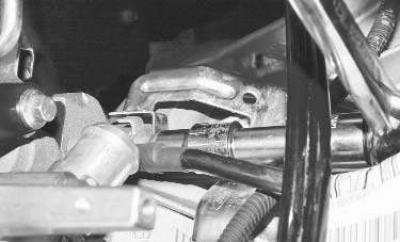
18. Unscrew the stud securing the gearbox housing to the engine at the top right (for clarity, the coolant supply hose has been removed) and move the ground wire to the side.
19. Remove the starter (see "Removal and installation the starter").

20. Install a reliable support under the engine or hang it up using a lifting mechanism. Install a similar support under the gearbox.
21. Remove the left support of the power unit (see "Replacing the left support of the powertrain suspension").
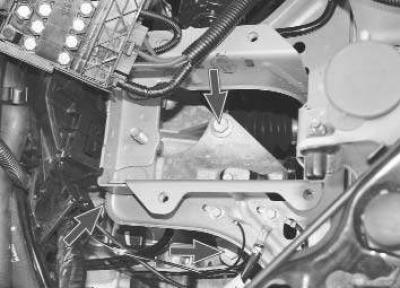
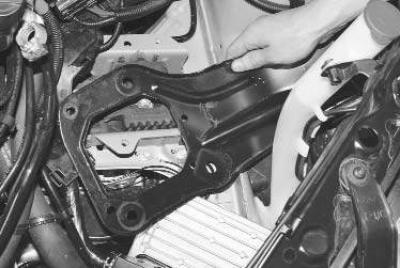
22. Remove the three bolts securing the left powertrain support bracket…
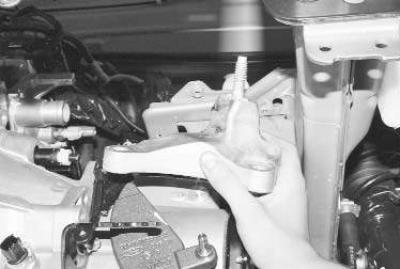
23. …and remove the bracket.
24. Remove the rear support of the power unit (see "Replacing the rear support of the powertrain suspension").
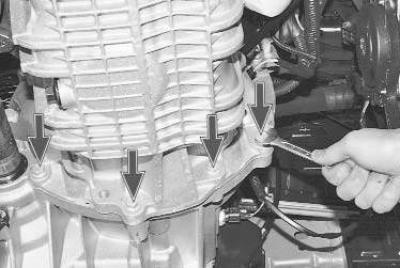
25. Remove the four bolts securing the gearbox to the oil pan.
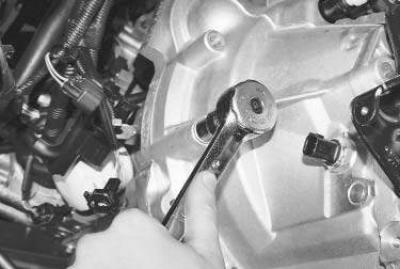
26. Remove the front bolt…
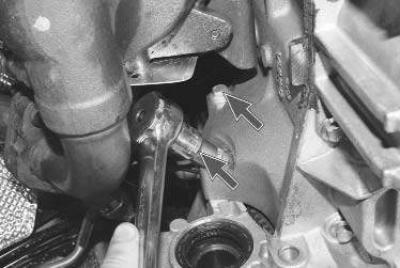
27. …and two bolts for the rear mounting of the gearbox to the engine.
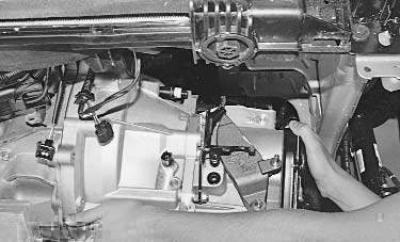
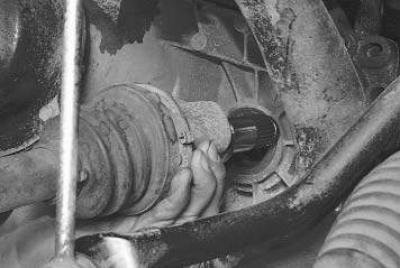
28. Move the gearbox back until the input shaft of the gearbox comes out of the hub of the driven clutch disk. Then move the gearbox back as far as possible, remove the support from under it and, tilting the rear part of the gearbox down, remove it from the car.
Caution! When removing the gearbox, do not rest the end of the input shaft against the diaphragm spring petals to avoid deforming them.
29. Install the gearbox, all removed parts and assemblies in the reverse order of removal.
Note: Before installing the gearbox, we recommend lubricating the splines of the input shaft with a thin layer of high-melting grease.
Note: Check the alignment of the clutch driven disc using a special drift (see "Removal and installation the clutch").
30. Fill the gearbox with oil (see "Gearbox oil change").
31. Remove air from the clutch release hydraulic drive (see "Bleeding the clutch release hydraulic drive").
32. If necessary, adjust the gearbox control drive (see "Adjusting the gearbox control drive").