Note: In order to remove the rear suspension strut, the coil spring must be temporarily compressed. This is to retract the piston rod into the strut and provide room to remove the strut from the bumper located on top of the rear suspension beam.
Withdrawal
1. Support the front wheels with wedges, then lift the rear and place it on stands. Remove the corresponding wheel.
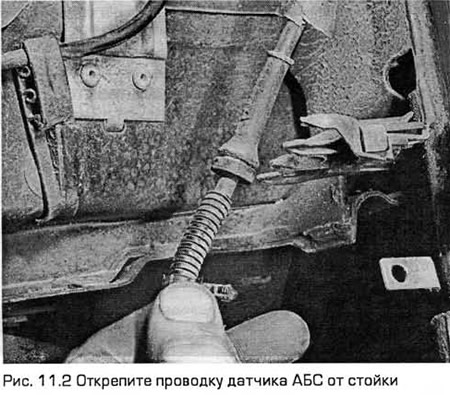
2. Unfasten the ABS sensor wiring (in the presence of) and remove the sensor from the axle support (chapter 9) (see fig. 11.2).
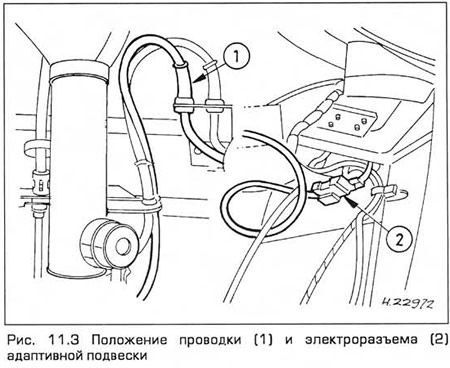
3. On models with adaptive suspension, remove the wiring from the rack and disconnect the electrical connector (see fig. 11.3).
4. On models with drum brakes, install the clamp on the rear brake hose. Then unscrew the nut securing the brake pipe to the flexible hose on the suspension strut. Release the retainer and disconnect the flexible hose from the rack.
5. On models with rear disc brakes, remove the brake caliper mounting bolts from the axle support (chapter 9). The hydraulic hose does not need to be disconnected. Support the caliper on a stand so that the hose is not stretched.
6. Remove the nut securing the rear anti-roll bar link to the front lower control arm on the appropriate side of the vehicle. Hold the connecting link while loosening the nut.
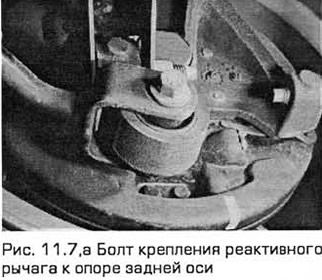
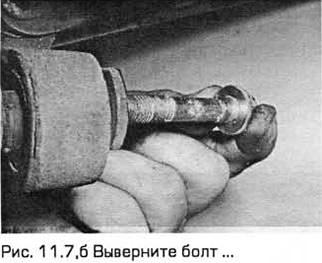
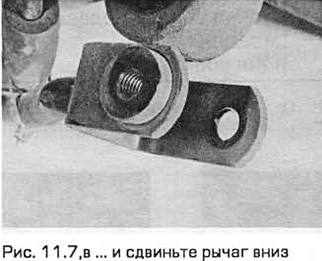
7. Turn out a bolt of fastening of the jet lever to the bottom part of an axis support. Slide the lever down (see fig. 11.7,a-c).
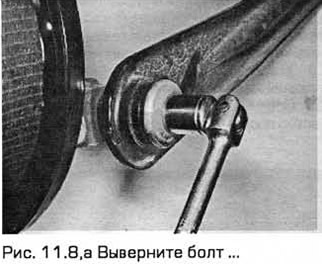
8. Turn out bolts of fastening of forward and back lower levers to an axis support. Move the levers to the side (see fig. 11.8, a, b).

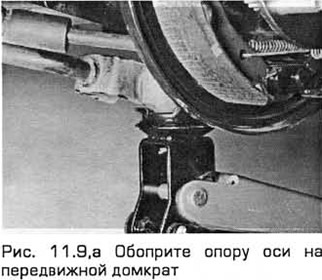
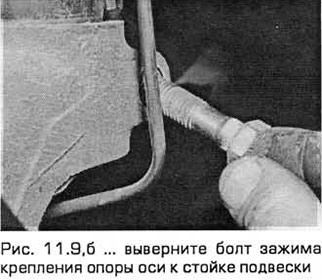
9. Support the axle support on a mobile jack. Then unscrew the clamp bolt securing the axle support to the suspension strut (see fig. 11.9, a, b).
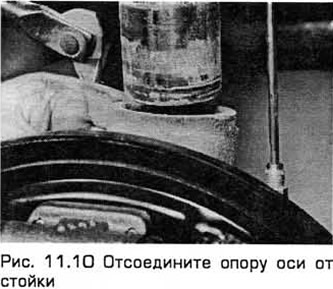
10. Open the clamp on the axle support using a pry bar. Disconnect the axle support from the rack. Lower the jackstand as low as possible without damaging the handbrake cable (see fig. 11.10).
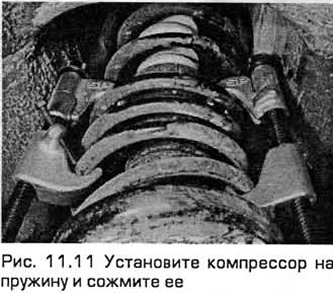
11. Install the compressor on the spring and compress it so that the upper and lower supports are released from its force (see fig. 11.11). This will also release the strut-mounted bracket that is pressed against the rubber bumper located on top of the rear suspension beam.
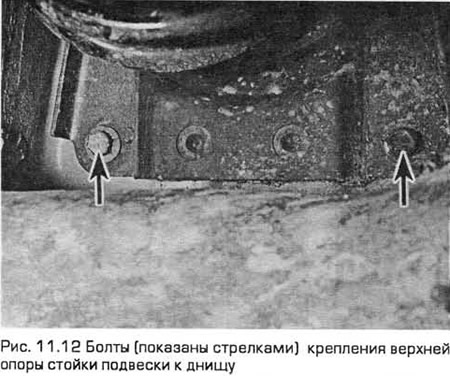
12. Support the stand. Then, inside the wheel arch, unscrew the two bolts securing the upper support to the bottom (see fig. 11.12).
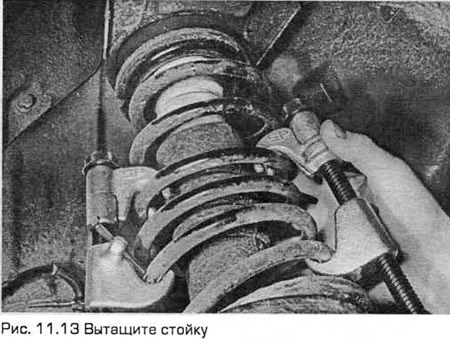
13. Slightly raise the strut to press the rod into the shock absorber and release the strut bracket from the bump stop on the beam. Lower the strut and pull it out from under the car (see fig. 11.13).
Installation
14. Install the rack assembly (together with the spring compressor), by inserting the rack through the wheel arch. Install the bracket on the bump stop located on the rear suspension beam. Insert two bolts securing the upper support to the recess of the bottom and tighten them to the required torque. Carefully release the compressor compressing the spring so. so that it fits into the upper and lower saddle, and the rack bracket stands on the beam fender. The fender has a conical undercut and the strut bracket must fully enter it before the spring is released.
15. Establish a support of a back axis and connect it to a rack. Then insert the clamp bolt and tighten it to the required torque.
16. Install the front and rear lower arms on the rear axle support. Fasten the bolts.
17. Connect the reaction arm to the bottom of the rear axle support and install the bolt.
18. Install the anti-roll bar link to the lower arm. Tighten the nut to the required torque.
19. On models with rear disc brakes, install the caliper bracket on the axle support and tighten the bolts to the required torque (chapter 9). Check: the brake hose must not be twisted.
20. On models with rear drum brakes, connect the hose to the strut, install the clamp, then install the brake line and tighten its fastening nut. Remove the clamp from the brake hose and bleed the hydraulic system (chapter 9).
21. Connect the electrical connector of the adaptive suspension (in the presence of) and secure the wiring to the rack.
22. Install the ABS sensor (in the presence of - see chapter 9) and secure the wiring to the rack.
23. Install the wheel and lower the car to the ground.
25. With the vehicle now resting on the suspension, fully tighten the reaction arm and lower arm mounting bolts.
Visitor comments