Replacement
1. Chock the front wheels. Engage first gear (or position"R"). Loosen the nuts securing the rear wheels, lift the rear of the vehicle and place it on supports. Remove the corresponding rear wheel.
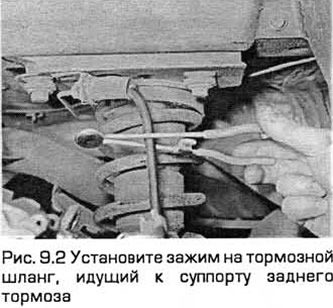
2. Install the clamp on the brake hose going to the rear brake caliper. This is necessary to reduce fluid leakage during subsequent operations (see fig.9.2).
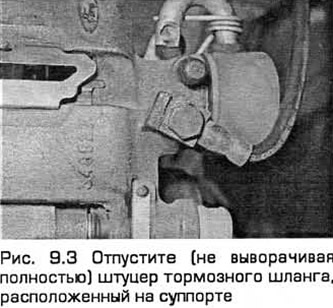
3. Let go (without turning completely) brake hose fitting located on the caliper (see fig.9.3).
4. Remove the rear brake pads and free the caliper (paragraph 8).
5. Disconnect the handbrake cable from the caliper. On Sedan and Hatchback models, the handbrake cable lever is directed away from the caliper, and on Station wagon models, towards the caliper (see fig. 9.5, a, b).
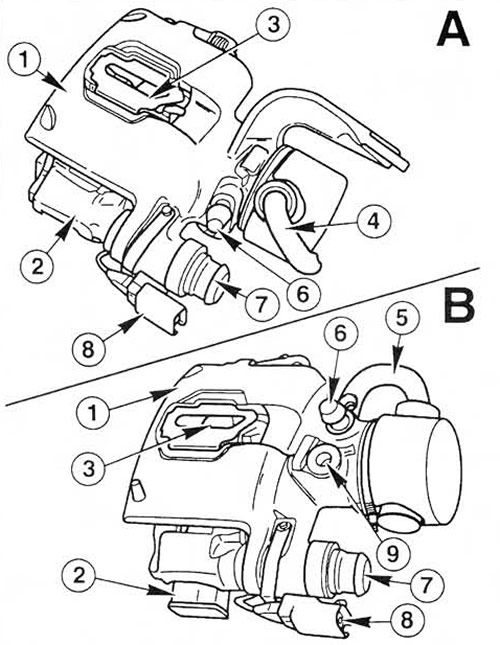 Pic. 9.5, a. Rear brake caliper - (A) sedan and hatchback models. (IN) Universal models.
1. Caliper
3. Caliper frame
3. elastic retainer brake pads
4. The lever of the handbrake cable is directed away from the caliper
5. The lever of the handbrake cable is directed towards the caliper
6. Bleeding nipple
7. Protective cap for the guide pin
8. Electrical connector for pad wear indicator
9. Brake hose connection
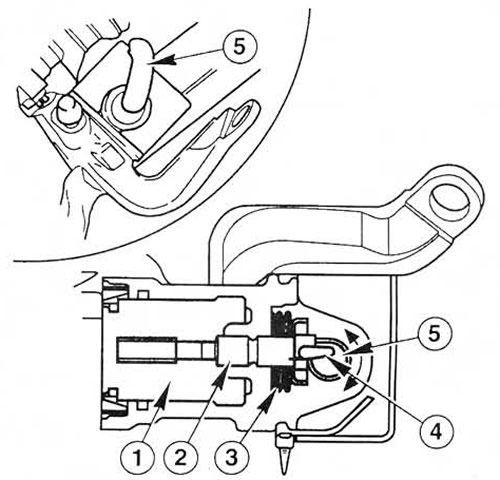 Pic. 9.5.6. Hand brake drive to rear brake caliper.
1. Piston
2. Automatic adjuster screw
3. Elastic washers
4. Cam
5. Handbrake cable lever
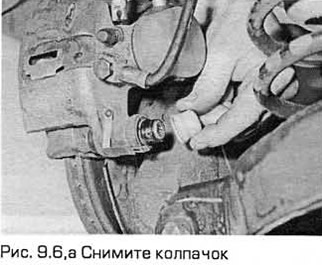
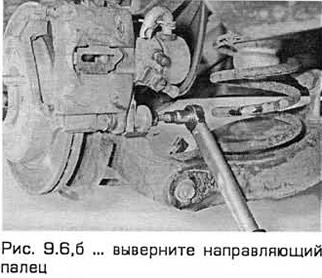
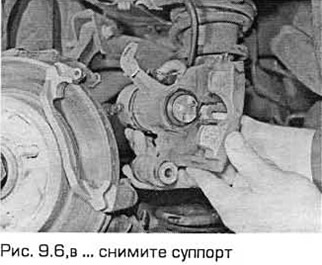
6. Remove the cap. Unscrew the guide pin. Remove the caliper and place a support under it or tie it so as not to strain the hose (see Fig.9.6,a-c).
7. While holding the caliper with your hand, hold the hose with your other hand so that it does not turn. Turning the caliper relative to the hose, unscrew it from the fitting, being careful not to twist or pull the hose. Immediately after disconnecting the caliper, plug the holes in the caliper and hose so that dust or dirt does not get into them.
8. If necessary, the caliper support bracket can be removed by unscrewing its bolts from the rear axle support.
Repair
9. At the time of writing the manual, repair procedures were not provided. Therefore, before disassembling the caliper, ask about the availability of spare parts. Basically, you can use the information regarding the repair of the front brake caliper. At the same time, please note that before pulling the piston out of the caliper, you will need to unscrew the piston from the hand brake mechanism (paragraph 8, item 10). When assembling, fully press the piston into the caliper and screw it onto the hand brake mechanism. Do not attempt to disassemble this mechanism if it is defective. In this case, the caliper assembly must be replaced.
Installation
10. Install the caliper and support bracket (where needed) in reverse order of removal. Make sure the brake hose is not twisted. Tighten the mounting bolts and wheel nuts to the required torque.
11. Eliminate air from the brake system (paragraph 15). Make sure there are no leaks at the hose connection. Check your brakes carefully before you start driving.
Visitor comments