Note: See. paragraph 4.
Removal
1. Chock the front wheels, release the parking brake and engage first gear (or select the "P" position). Loosen the nuts of the corresponding wheel, lift the rear of the car and place it on supports. Remove the wheel.
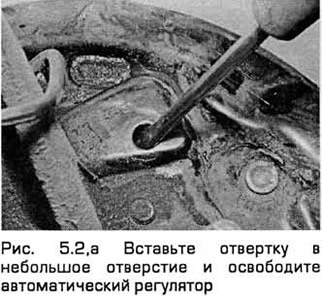
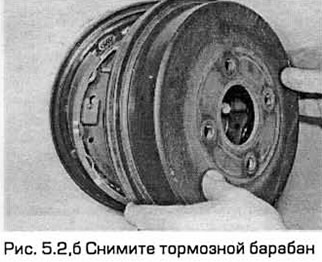
2. Remove the two special clamps (if any) and remove the brake drum from the wheel studs. If the shoes interfere with removing the drum, release the automatic adjuster. To do this, pull out the small rubber bushing located near the center of the brake shield and insert a screwdriver into the small hole. After this, you can turn the ratchet adjuster so that the shoes go to the lowest position (see Fig. 5.2, a, b). Install the rubber bushing.
3. After removing the brake drum, remove dust from the drum, brake shoes, wheel cylinder and backplate with methyl alcohol or brake cleaner. Do not inhale the dust, it may contain asbestos.
Examination
4. Clean the inner surfaces of the brake drum. Then inspect the friction surface for scratches or cracks. If cracks, deep scratches or wear (when the surface diameter exceeds the maximum specified in Technical requirements) the drum must be replaced together with the drum on the opposite side of the car.
5. Brake drum treatment is not recommended.
Installation
6. Position the brake drum on the wheel studs and (if available) install special clamps. Make sure that the drum contacts the hub flange.
7. Install the wheel and then check the other drum.
8. Lower the vehicle to the ground and tighten the wheel nuts to the specified torque.
Finally, press the brake pedal sharply several times to engage the pads.
9. Before resuming driving, carefully check the brakes.
(The text was obtained in its entirety from the specified website: FordBook.ru)