Warning: Always change the pads on both front brakes at the same time. Replacing pads on only one of the wheels can lead to uneven braking. While Ford pads do not contain asbestos, the dust generated by wear from other pads may contain asbestos, which is very hazardous to health. DO NOT blow off dust with compressed air or inhale air containing asbestos. Use a respirator when working on the brakes. DO NOT use gasoline (or gasoline-based solvents) for dust cleaning. Use brake fluid or methyl alcohol. Avoid contaminating the pads or brake disc with brake fluid or oil. See warning paragraph 15 about the dangers of brake fluid.
1. Apply the parking brake. Loosen the nuts on the front wheels, raise the front end and place it on stands, remove the front wheels. Work on each brake in turn.
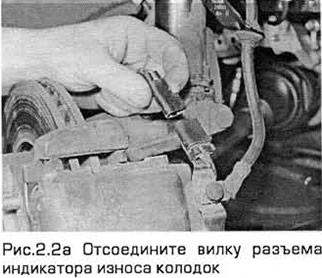
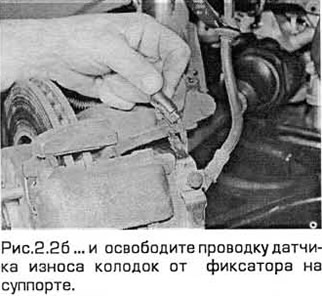
2. Disconnect the pad wear indicator connector plug and release the wiring from the retainer on the caliper, (see Fig. 2.2, a, b). The indicator wiring only fits the inner shoe.
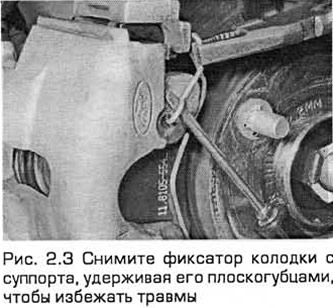
3. Use a screwdriver to pry off the pad fixing clip on the caliper. Hold the clamp with pliers (see fig. 2.3).
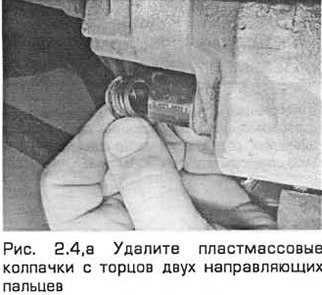
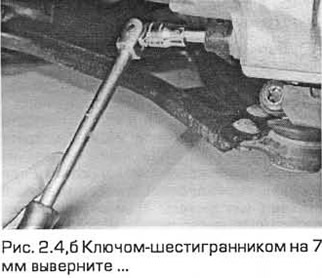
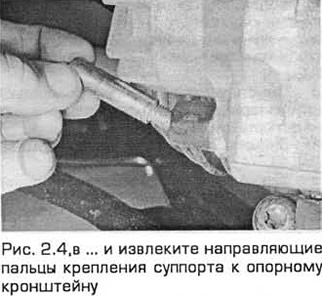
4. Remove the plastic caps from the two guide pins. Then with a hex wrench (on 7) unscrew the bolts securing the caliper to the bracket (see Fig. 2.4, a, b).
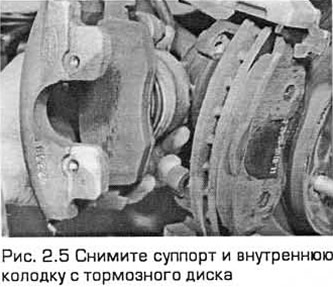
5. Remove the caliper and place a support under it so as not to pull on the hose. The outer pad will touch the disc and the inner pad will touch the caliper piston (see fig.2.5).
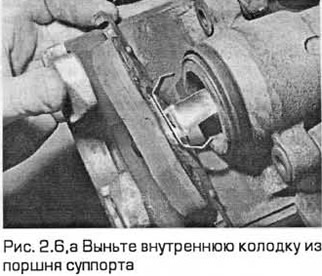
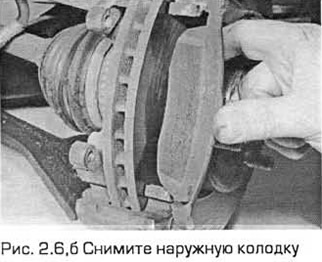
6. Pull the inner shoe away from the piston and remove the outer shoe from the bracket, taking into account how they are installed (see Fig. 2.6, a, b).
7. Use a brush to remove dirt and dust from the caliper, pads and disc, being careful not to inhale the dust. She is very dangerous. Scrape the rust off the disc.
8. Inspect the front brake disc for nicks and cracks. If you need to check it more carefully. cm. paragraph 4.
9. The piston must be pushed into the caliper hole to free up space for removing the pads. For this you can use a clamp. As the piston enters the cylinder bore, the fluid level in the master cylinder reservoir will rise slightly. Make sure that there is enough space in the reserve tank to compensate for the influx of fluid, and if necessary, pump out some of the fluid from it with a syringe.
10. Install new pads in the reverse order of removal. Tighten the guide bolts to the required torque.
11. Finally, sharply press the brake pedal several times so that the pads take their place. Check the level in the reservoir tank and top up if necessary.
12. Perform a test drive to check the operation of the brakes and break in the linings. New pads do not provide maximum braking performance until they are worn in. Therefore, avoid sudden braking until the vehicle has traveled several hundred kilometers.
Visitor comments