Warning: Always replace the pads on both rear brakes at the same time. Replacing the pads on only one wheel may cause uneven braking. Dust from worn pads may contain asbestos, which is very dangerous to your health. DO NOT blow off dust with compressed air or inhale air containing asbestos. Wear a respirator when working on the brakes. DO NOT use gasoline (or gasoline-based solvents) to clean dust. Use brake fluid or methylated spirits. Do not allow brake fluid or oil to contaminate the pads or brake disc.
1. Remove the rear brake drums as shown in paragraph 5. When servicing each brake in turn, follow these instructions.
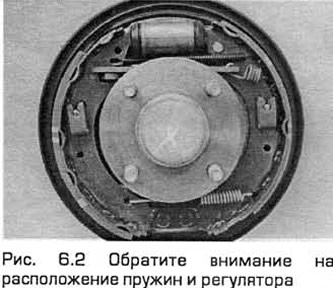
2. Pay attention to the location of the springs and the regulator. Clean the components with brake system flush and dry. Place a container under the rear shield to catch any leaks (see Fig. 6.2).
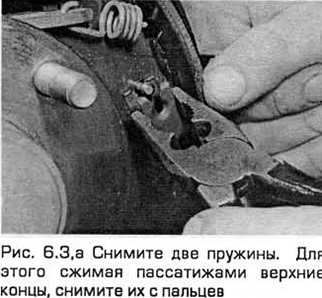
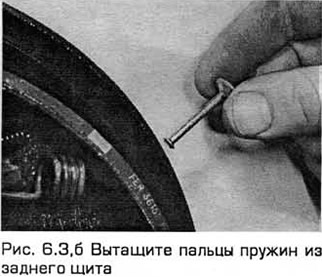
3. Remove the two springs. To do this, squeeze the upper ends with pliers and remove them from your fingers. Pull the spring fingers out of the rear shield (see Fig. 6.3, a, b).
4. Pull the lower end of the leading (front) shoe away from the lower support rod (using pliers or an adjustable wrench) (see Fig. 6.4).

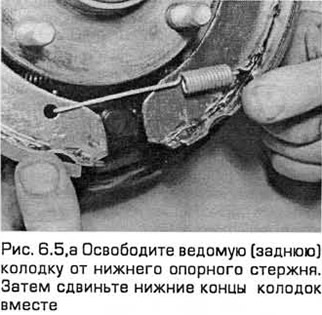
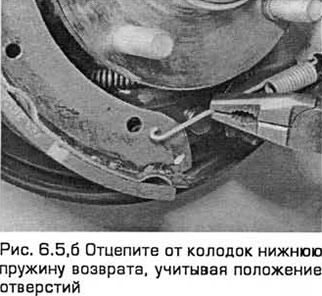
5. Release the driven (rear) shoe from the lower support rod. Then push the lower ends of the shoes together. Unhook the lower return spring from the shoes, taking into account the position of the holes (see Fig. 6.5, a, b).
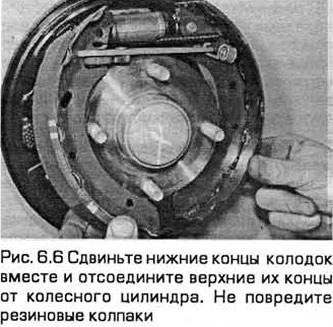
6. Push the lower ends of the pads together and detach their upper ends from the wheel cylinder. Do not damage the rubber caps (see Fig. 6.6).
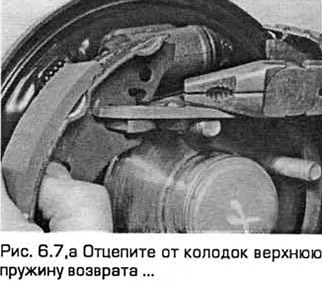
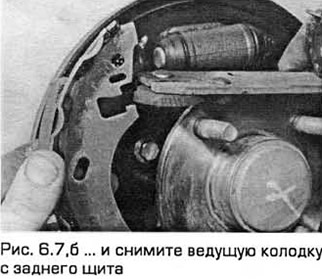
7. Unhook the upper return spring from the pads and remove the leading pad from the rear shield (see Fig. 6.7.a, b).
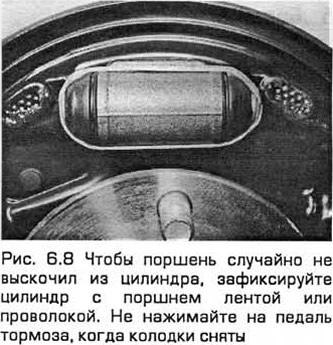
8. To prevent the piston from accidentally jumping out of the cylinder, secure the cylinder with the piston with tape or wire. Do not press the brake pedal when the pads are removed (see Fig. 6.8).
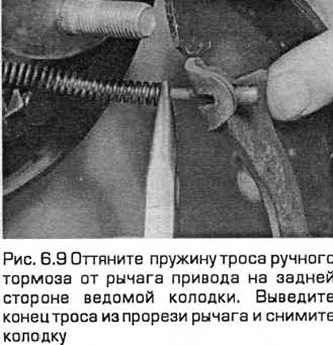
9. Pull the handbrake cable spring away from the drive lever on the rear side of the driven shoe. Remove the end of the cable from the slot in the lever and remove the shoe (see Fig. 6.9).
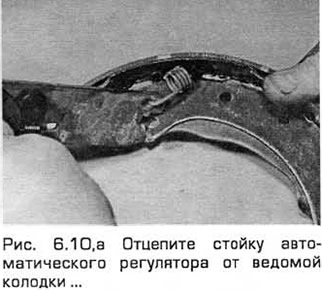
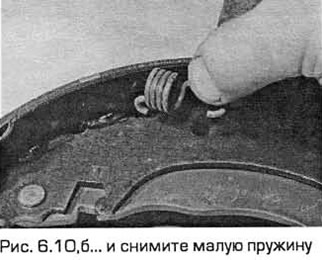
10. Unhook the automatic regulator stand from the driven shoe and remove the small spring (see Fig. 6.10,a,6).
11. If the wheel cylinder is leaking or otherwise faulty, check it as described in the next section.
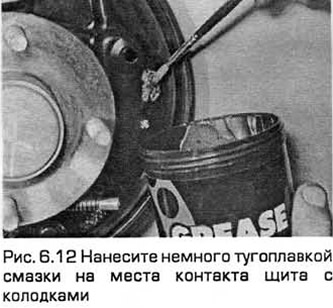
12. Wash the rear shield. Apply a little high-melting grease to the contact points of the shield with the pads. Be careful - the grease should not get on the working friction surfaces of the brake (see Fig. 6.12).
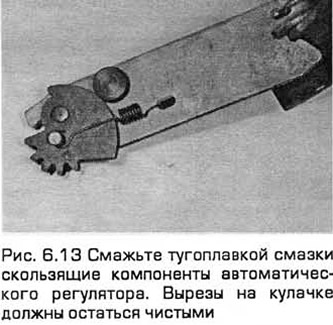
13. Lubricate the sliding components of the automatic regulator with high-melting grease. The cutouts on the cam must remain clean (see Fig. 6.13).
14. Install the new brake shoes in the reverse order of removal. Set the eccentric cam to its lower position before connecting it to the driven shoe.
15. Before installing the brake drum, check it (paragraph 5).
16. After installing the drum, install the wheel. Then perform the replacement operation on the other rear brake.
17. Lower the vehicle to the ground and tighten the wheel nuts.
18. Press the brake pedal to ensure that the automatic adjuster and pads are in place.
19. Make several stops, moving forward and backward, and fully apply the parking brake two or three times. Perform a test drive to check the brake operation and to allow the new pads to become accustomed to the disc. Remember that braking with maximum efficiency is not possible until the pads are accustomed.
(The original article is posted at FordBook.ru)