Warning: Brake fluid is dangerous. If it comes into contact with your skin, rinse it off immediately and thoroughly. If it gets into your eyes, seek medical attention. Brake fluid will damage paint and plastic. If it comes into contact with such surfaces, rinse it off immediately and thoroughly with clean water.
1. If the master cylinder has been removed and then reinstalled and connected to the pipeline, then the entire system (both circuits) must be bled. If a component of one of the circuits has been removed, then only the corresponding circuit must be bled.
2. Bleeding should start with the front brake. Then you need to bleed the rear brake, located diagonally relative to the bled front one. Then you need to bleed the other front brake and then the other rear.
3. Auto parts stores sell bleeding kits that allow you to bleed the air yourself, without assistance. Follow the manufacturer's instructions for the kit. If you use such a kit, you do not need to hold the brake pedal down while bleeding.
4. When bleeding, the brake fluid level in the reservoir should not fall below the "minimum" mark. If the level has dropped so much that air has entered the system, the entire bleeding procedure must be repeated. Always add only fresh brake fluid to the system.
5. Before starting work, check the condition of the pipes and hoses, as well as the tightening of the connections. Do not allow brake fluid to get on the paintwork, otherwise it may be damaged. Immediately wash off any drips with cold water.
6. If you are not using a bleeding kit, then prepare a clean jar, a piece of plastic or rubber tubing that needs to be pulled over the bleeding valve, and a canister of brake fluid of the appropriate brand and capacity. You will also need an assistant.
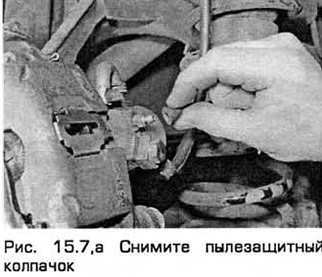
7. Clean the surfaces around the bleeder valve on the front brake. Remove the dust cap. Attach one end of the tube to the valve and lower the other end into a jar filled with brake fluid (see Fig. 15.7, a, b).
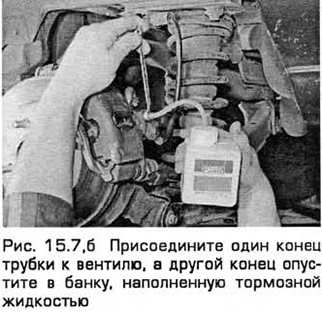
8. Loosen the valve one or two turns and have an assistant depress the brake pedal all the way. Tighten the bleeder valve while the pedal is fully depressed, then have an assistant release the pedal. Continue this procedure until clean, bubble-free brake fluid flows from the tube into the can. Finally, tighten the bleeder valve while the pedal is fully depressed.
9. Remove the tube and install the dust cap. If necessary, add brake fluid to the reserve tank.
10. Repeat the procedure in the sequence indicated in point 2.
11. Check: the pedal should become tight. If it is "soft", then there is air left in the system and it needs to be bled again.
12. After bleeding is complete, add fluid to the reserve tank and install the cap.
13. On models with a hydraulic clutch drive, check the operation of the hydraulic system and, if necessary, remove air from it (paragraph 6).
[This article was borrowed from the website: FORDBOOK.ru]