Contents: Removal ↳ Installation and adjustment ↳
Removal
1. Disconnect the negative battery cable.
2. Remove the lower part of the trim from the front panel (Chapter 11).
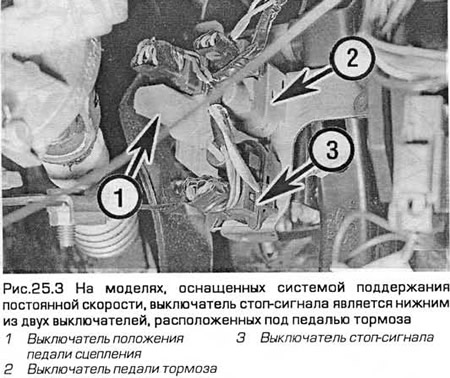
3. Disconnect the switch electrical connector. On models equipped with cruise control, the brake light switch is the lower of the two switches located under the brake pedal (see Fig. 25.3).
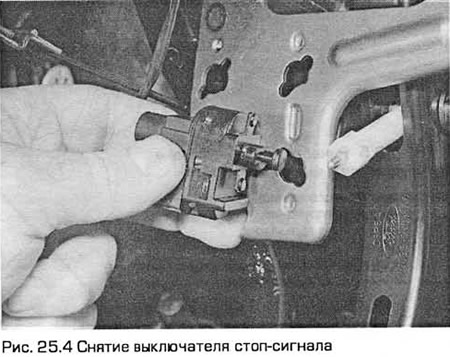
4. On models without cruise control, turn the switch counterclockwise a quarter turn and pull it out of the pedal bracket (see Fig. 25.4). On models with cruise control, turn the switch clockwise to remove it.
Installation and adjustment
5. After removing the switch, reinstall it by pulling out the plunger completely.
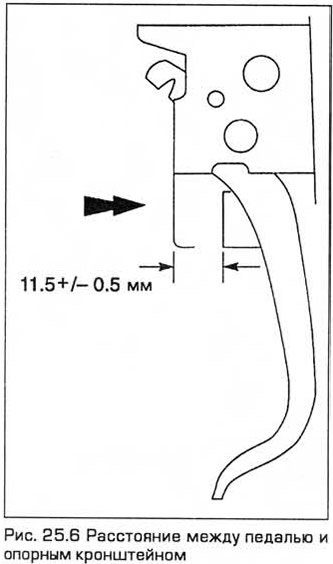
6. Press the brake pedal until the distance between the pedal and the support bracket is as shown in Fig. 25.6.
7. While holding the pedal in this position, install the sensor onto the support bracket.
8. After securing the sensor in place, release the brake pedal and gently pull the plunger. This will automatically adjust the brake light switch.
9. Connect the electrical connector of the wiring and attach the battery. Check the operation of the sensor and install the lower part of the trim on the front panel (Chapter 11).