Warning: Always change pads on both rear brakes at the same time. Replacing pads on only one of the wheels can lead to uneven braking. While Ford pads do not contain asbestos, the dust generated by wear from other pads may contain asbestos, which is very hazardous to health. DO NOT blow off dust with compressed air or inhale air containing asbestos. Use a respirator when working on the brakes. DO NOT use gasoline (or gasoline-based solvents) for dust cleaning. Use brake fluid or methyl alcohol. Avoid contaminating the pads or brake disc with brake fluid or oil.
1. Chock the front wheels. Engage first gear (or position "R"). Loosen the nuts securing the rear wheels, lift the rear of the vehicle and place it on supports.
2. Remove rear wheels. Work on each brake in turn.
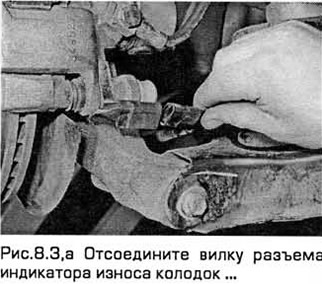
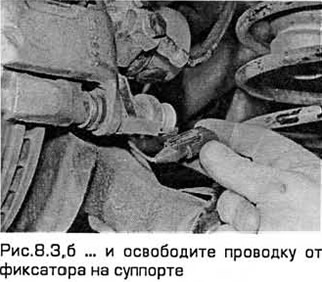
3. Disconnect the pad wear indicator plug and release the wiring from the retainer on the caliper. Indicator wiring only fits inner shoe (see Fig.8.3, a, b).
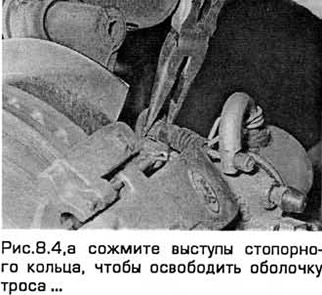
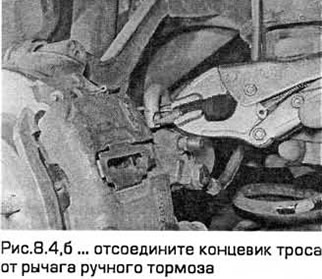
4. Only on Wagon models, to rotate the caliper back (to remove the pad) the parking brake cable must be disconnected from the caliper (see Fig. 8.4, a, b).
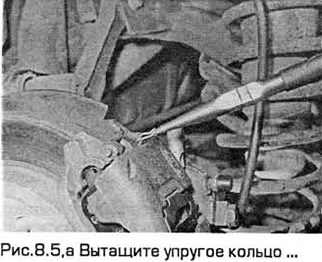
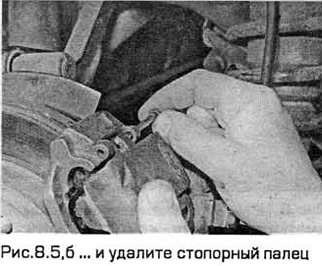
5. Pull out the elastic ring and remove the locking pin that secures the caliper to the support bracket. Please note that on Sedan and Hatchback models, the pin is located at the bottom of the caliper, and on Station wagon models, at the top of it (see Fig.8.5, a, b).
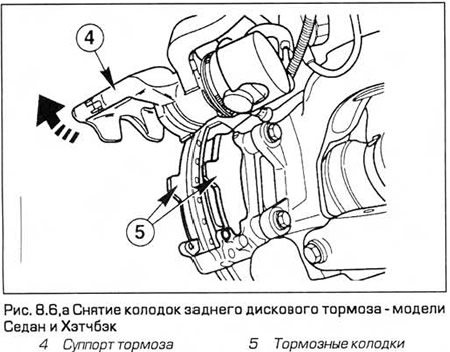
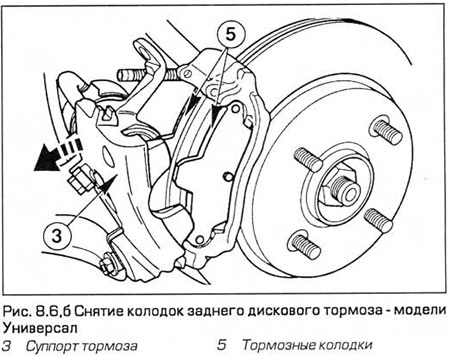
6. Rotate the caliper away from the support bracket to access the brake pads (see fig. 8.6, a, b).
7. On Sedan and Hatchback models, remove the brake hose bracket bolts from the rear suspension strut so as not to strain the hose.
8. On Station wagon models, place a jack under the rear suspension strut and squeeze it slightly so as not to pull on the hose.
9. To do this, remove the cover and unscrew the pivot pin. Support the caliper on a stand or tie it away from the installation site with wire.
10. Remove pads from support bracket. Sweep dirt and dust from the pad caliper and disc. Remove any corrosion from the disc.
11. Inspect the rear brake disc.
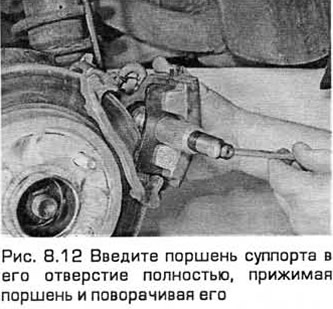
12. Before installing new pads, insert the caliper piston into its hole completely, pressing the piston and turning it. The level of brake fluid in the reserve reservoir will rise, so if necessary, first pump out some of the fluid from it with a syringe (see fig.8.12).
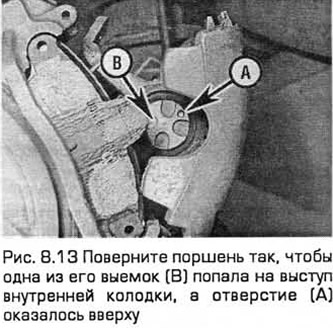
13. Turn the piston so that one of its recesses falls on the protrusion of the inner shoe, and the hole (A) turned up at the top (see fig.8.13).
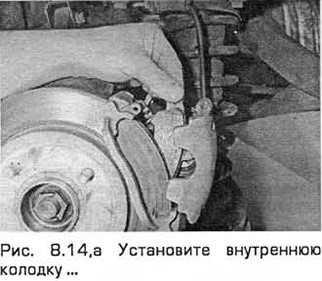
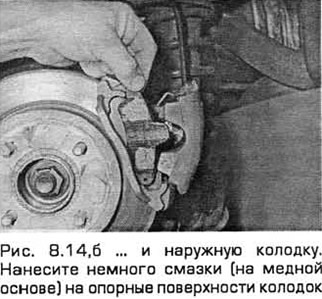
14. Install new pads, taking into account that the inner pad has a wear indicator wiring. Apply some lubricant (copper-based) on the bearing surfaces of the pads, but so that the lubricant does not get on the friction linings (see Fig.8.14, a, b).
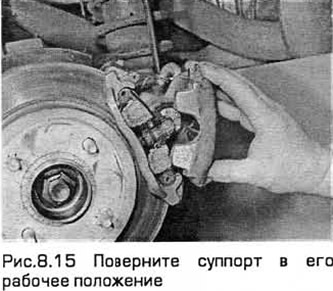
15. Rotate the caliper to its working position (see fig.8.15) so that the notch of the piston hits the protrusion of the inner pad and secure the caliper with the lock pin and elastic ring.
16. Install the hose bracket.
17. Connect the plug of the wear indicator connector.
18. Finally, depress the brake pedal so that the pads are in their normal position. Check the brake fluid level in the reservoir and top up if necessary.
19. Perform a test drive to check the operation of the brakes, as well as to ensure that the new pads run in to the disc. Do not forget that until the pads are worn in, braking with maximum efficiency is impossible.
Visitor comments