Note: See warning paragraph 2.
Removal
1. Apply the parking brake. Loosen the front wheel nuts, lift the front end and place it on supports. Remove the corresponding front wheel.
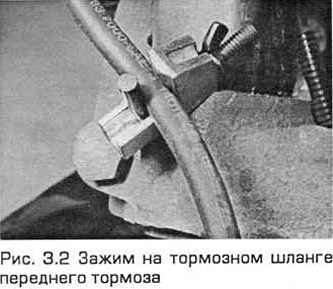
2. Install a clamp on the brake hose going to the front brake caliper. This is necessary to reduce fluid leaks during subsequent operations (see Fig. 3.2).
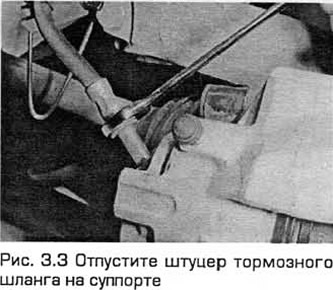
3. Loosen (without completely unscrewing) the brake hose nipple located on the caliper (see Fig. 3.3).
4. Remove the front brake pads (paragraph 2).
5. Hold the caliper with one hand and hold the hose with the other hand to prevent it from turning. Turn the caliper relative to the hose and unscrew it from the fitting, being careful not to twist or pull the hose. Immediately after disconnecting the caliper, plug the holes in the caliper and hose to prevent dust or dirt from getting in.
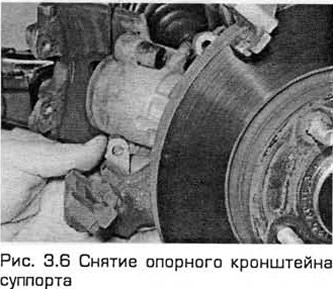
6. If necessary, the caliper support bracket can be removed by unscrewing its bolts from the steering knuckle (see Fig. 3.6).
Repair
7. Place the support on the workbench. Brush off any dirt or dust. Do not inhale the dust, it can be dangerous.
8. Remove the rubber dust seal from the end of the piston.
9. Using compressed air (low pressure, such as from a foot-operated tire pump), push the piston out of the hole by connecting an air hose to the nozzle of the pressure line.
Caution: The piston may suddenly jump out of the hole. Insert a thin wooden shim between the piston and the caliper body so that if the piston suddenly comes out, its end is not damaged.
10. Pull the piston seal out of the cylinder groove. Use a hook-end tool to do this. Be careful not to scratch the cylinder surface.
11. Wash the piston and caliper body with methyl alcohol and dry them. Inspect the piston and cylinder surfaces for wear, damage, and corrosion. If the piston is defective, purchase a new one along with the seal. If the cylinder is defective, the entire caliper must be replaced. Seals must be replaced regardless of the condition of other components.
12. Lubricate the piston and seal with clean brake fluid. Insert the piston seal into the cylinder groove.
13. Press the piston into the cylinder without distorting it.
14. Install the dust seal rubber onto the piston and caliper, then fully press the piston into the cylinder.
Installation
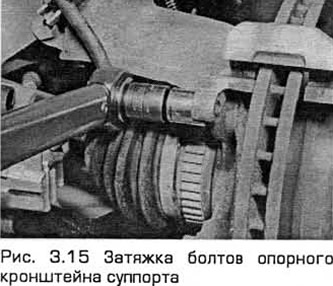
15. Install the caliper and support bracket (where necessary) in the reverse order of removal. Make sure that the brake hose is not twisted. Tighten the mounting bolts and wheel nuts to the specified torque (see Fig. 3.15).
16. Remove air from the brake system (paragraph 15). Do not forget to remove the clamp from the hose. Make sure that there are no leaks in the hose connection. Before driving the car, carefully check the brakes.
(The full article is on the online resource: fordbook)