Caution: brake dust contains asbestos, which is extremely harmful to health. Do not blow with compressed air or inhale.
Warning: Clean the outside of the parts with bleach or denatured alcohol. Never use gasoline, kerosene or gasoline-based cleaners for this purpose.
Note: if bulkhead is necessary (usually due to fluid leaks, a stuck piston, or a broken bleeder valve, a repair kit is needed. Always repair and replace calipers in pairs.
Withdrawal
1. Raise the car, place it securely on stands.
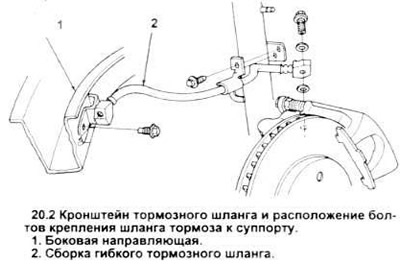
2. Disconnect the brake hose from the caliper block (see picture).
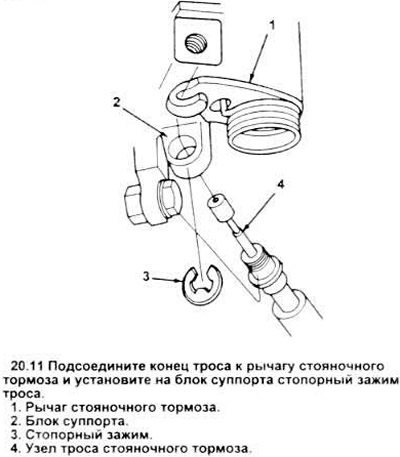
3. Remove the retaining clip from the parking brake on the caliper. Disconnect the parking brake cable from the lever bar (see figure 19.4).
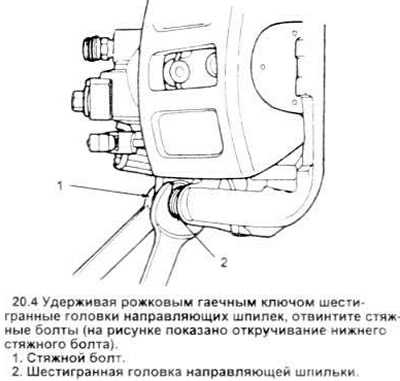
4. Hold the hex drive studs with an open end wrench and unscrew the tie bolts (see picture).
5. Disconnect the cylinder from a support.
6. Remove the guide pins and pads from the caliper.
Installation
7. Apply silicone dielectric compound (D7AZ-19А331-A) or similar inside the casings of the guide studs and on the studs themselves.
8. Place the guide pins and shrouds in the caliper.
9. Position the cylinder. Check that the brake pads are installed correctly.
10. Clean the dirt from the threads of the tie bolt and lubricate the threads with a drop of Treadlock and Sealer (EOA2 - 19554 - A), or similar. Install the tie bolts and tighten them. while holding the guide pins with an open end wrench.
11. Connect the end of the cable to the parking brake lever. Install the cable retainer clip to the caliper block (see picture).
12. Using new washers. connect the brake hose to the cylinder Tighten the lock bolt to the required torque.
13. Bleed the brake system (see section 11).
14. Install the wheel and fit the wheel nuts.
15. Lower the car.
16. Tighten the nuts to the required torque.
Visitor comments