Withdrawal
1. Support the front wheels, raise the rear of the vehicle and support it on stands. Remove the corresponding rear wheel.
Front lower arm
2. To remove it, you must first remove the fuel tank. See chapter 4.
3. Turn away a nut and disconnect a connecting link of the stabilizer of cross-section stability from the bottom lever. While loosening the nut, hold the connecting link with an adjustable wrench or clamp. Remove the rubber bushing.
4. Turn out a bolt of fastening of the forward lower lever to a support of a back axis.
5. Turn out a bolt of fastening of the forward lower lever to a beam.
6. Pull the lever out from under the car.
Rear lower arm
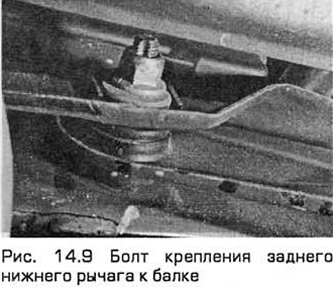
7. Turn out a bolt of fastening of the back lower lever to a support of a back axis
8. The rear lower arm-to-beam bolt has an eccentric head and spacer to adjust rear wheel toe. Before unscrewing the bolt, mark its position with a scriber through the opening in the beam.
9. Turn out a bolt of fastening of the back lower lever to a beam (see fig. 14.9). It can be turned out through an opening in the beam. Remove the eccentric spacer.
10. Remove the lever from under the car.
Installation
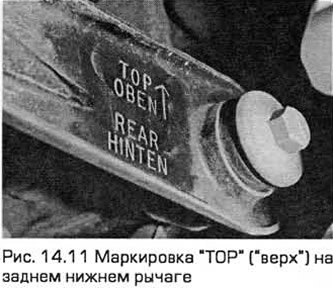
11. Installation - in the reverse order of removal. First, start the fixing bolts and tighten them completely only after the vehicle is on the ground and the suspension is loaded. Please note that there is a marking on the rear lower arm "TOR" ("top"). Check and adjust rear wheel alignment as soon as possible (see fig. 14.11).
Visitor comments