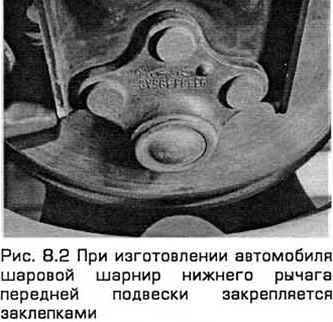
Note: If the ball joint is worn, the entire lower arm assembly or just the ball joint can be replaced. The ball joint is fixed with rivets during the manufacture of the car, it must be bolted when replacing it. This describes the procedure for replacing a riveted hinge.
1. Remove the lower front suspension arm (paragraph 7). It is not recommended to replace the ball joint when the lower arm is installed in the vehicle, as the holes in the arm cannot be accurately drilled.
2. When the lever is installed on the workbench, drill the pilot hole (3 mm diameter) in each of the three rivets, then drill holes in the rivets with a diameter of 9 mm and a depth of 12 mm. After that, knock out the rivets from the lever with a beard with a diameter of 7 or 8 mm (see fig.8.2).
3. Clean any dirt or rust from the rivet holes.
4. The new ball joint comes with a protective plastic cap fitted over the rubber boot and stud. This cap is not recommended to be removed prematurely. Remove it just before connecting the ball joint to the steering knuckle.
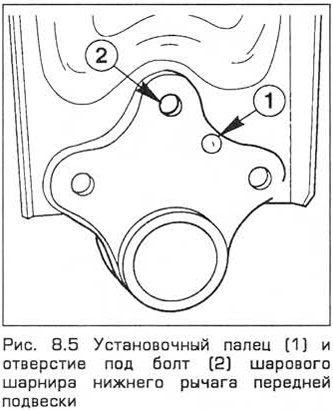
5. Install a new ball joint on the lower arm and secure it with three new bolts. Insert the bolts from the upper side of the arm. Tighten the nuts to the required torque. The locating pin on the ball joint assembly must fit into the lower arm hole.
6. Install the lower front suspension arm (paragraph 7).
Visitor comments