Note: The engine mount rarely requires attention, but if it breaks or wears to the point of failure, it should be replaced immediately; otherwise, additional deformation of the drive elements will inevitably cause failure.
1. Disconnect the negative battery cable
Examination
2. During the inspection, the engine should be slightly raised to relieve the load on the suspension. Raise the car and support it securely on stands, then move the jack under the engine oil pan. Slide a large block of wood between the jack support and the oil pan, then carefully raise the engine just enough to relieve the suspension.
4. Check the suspension - the rubber may be cracked, hardened or separated from the metal base. Sometimes it splits right down the center.
5. Check the relative movement of the suspension plates and the engine, gearbox or frame/body (use a large screwdriver or a rod as a lever to try to move the suspension). If the movement is noticeable, lower the engine and tighten the suspension fasteners. To reduce wear on the suspension, use rubber boots (dust boots).
Engine mount replacement
6. Remove the lower shock absorber bolt on the right side of the engine.
7. Raise the vehicle and support it on stands.
8. Place the jack under the oil pan. To distribute the weight evenly, place a block of wood between the jack and the pan.
9. Remove the nuts that connect the engine mount to the lower frame.
10. Raise the engine with a jack to remove the load from the suspension.
11. On models equipped with air conditioning, disconnect the front suspension from the compressor bracket. Unscrew the two through bolts and remove the suspension from the machine (see illustration).
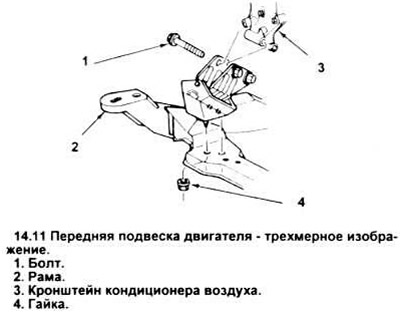
12. Connect the new suspension with two through bolts (see figure).
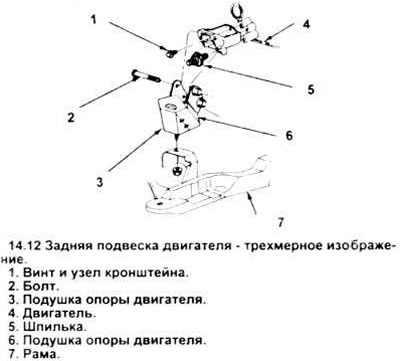
13. Lower the engine into place.
14. Tighten the engine mounting nuts to the frame.
15. Tighten the fasteners to the torque value specified in the specification.
Replacing the shock absorber
Note: After removing the self-locking fastener, replace it with a new self-locking fastener.
16. Shock absorbers are changed if they are leaking, bent or damaged.
17. Unscrew the bolt securing the lower end of the shock absorber to the engine bracket (see figure).
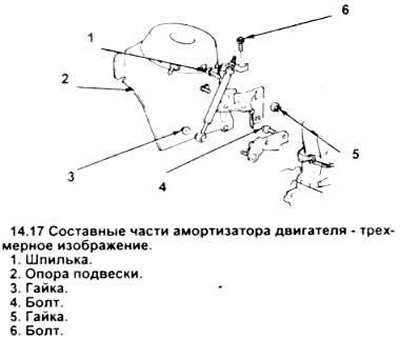
18. Unscrew the bolts securing the upper shock absorber bracket to the suspension support bracket.
19. Remove the engine shock absorber.
20. Separate the shock absorber from the support bracket by removing the cap of the upper nut and the nut itself. Assembly is performed in the reverse order.
21. Align the lower shock absorber cup with the notch on the engine bracket. Secure with a new bolt.
22. Position the upper shock absorber bracket on the suspension mount and secure with new bolts.
23. Tighten the fasteners to the required torque value.